- 1. Windows Reinstallation
- 2. Windows Recovery
1. Windows Reinstallation #
Reinstalling Windows? Here’s a quick checklist to make it smooth and hassle-free! ✅ First, back up your important files to avoid losing anything. Then, create a bootable USB using Rufus and check if your PC has a Windows license. Next, boot from the USB, install Windows, and skip the Microsoft account setup if needed. Once done, update drivers, install essential apps, and set your PC to high performance. That’s it—you’re all set with a fresh Windows install! 💻
Follow these step below #
1.1 Preparation #
- Firstly, we can ask customer to backup their important folders like AOIBin (prjtxt, prjimg, model, configFile) and other personal folder before proceed with the reinstallation.
- As Technical Support Engineer also need to make sure back up the folders when at customer site to avoid conflict of losing data even though they have back it up.
- May use an external storage if needed.

*Skip this step if the machine/PC have corrupted and no data to backup*
1.2 Create Bootable USB #
- Choose either one method and create bootable USB.
- Prepare in advance to save time.
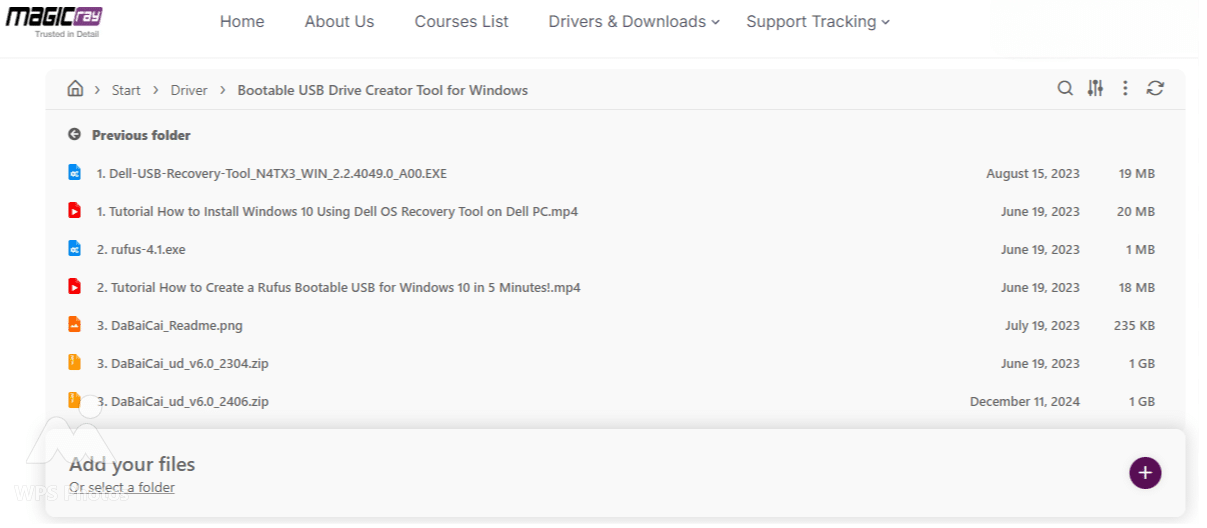
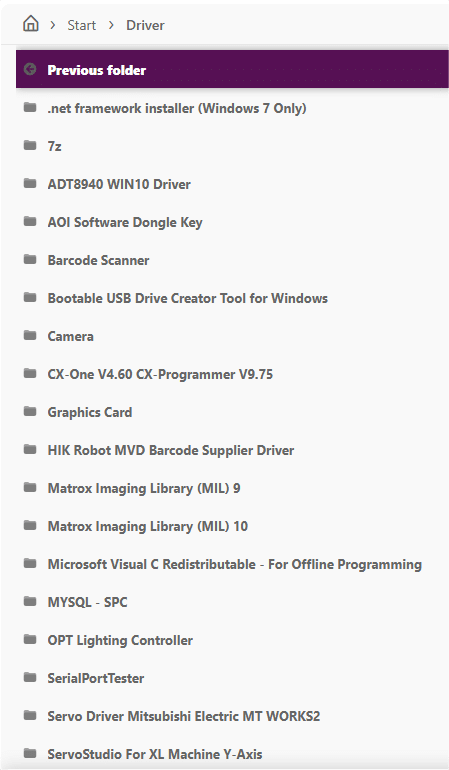
- Can be found in Magicray Support website or search for official website.
- In website, go to Drivers & Downloads tab > Driver > Bootable USB Drive Creator Tool for Windows.
1.2.1 Rufus Method #
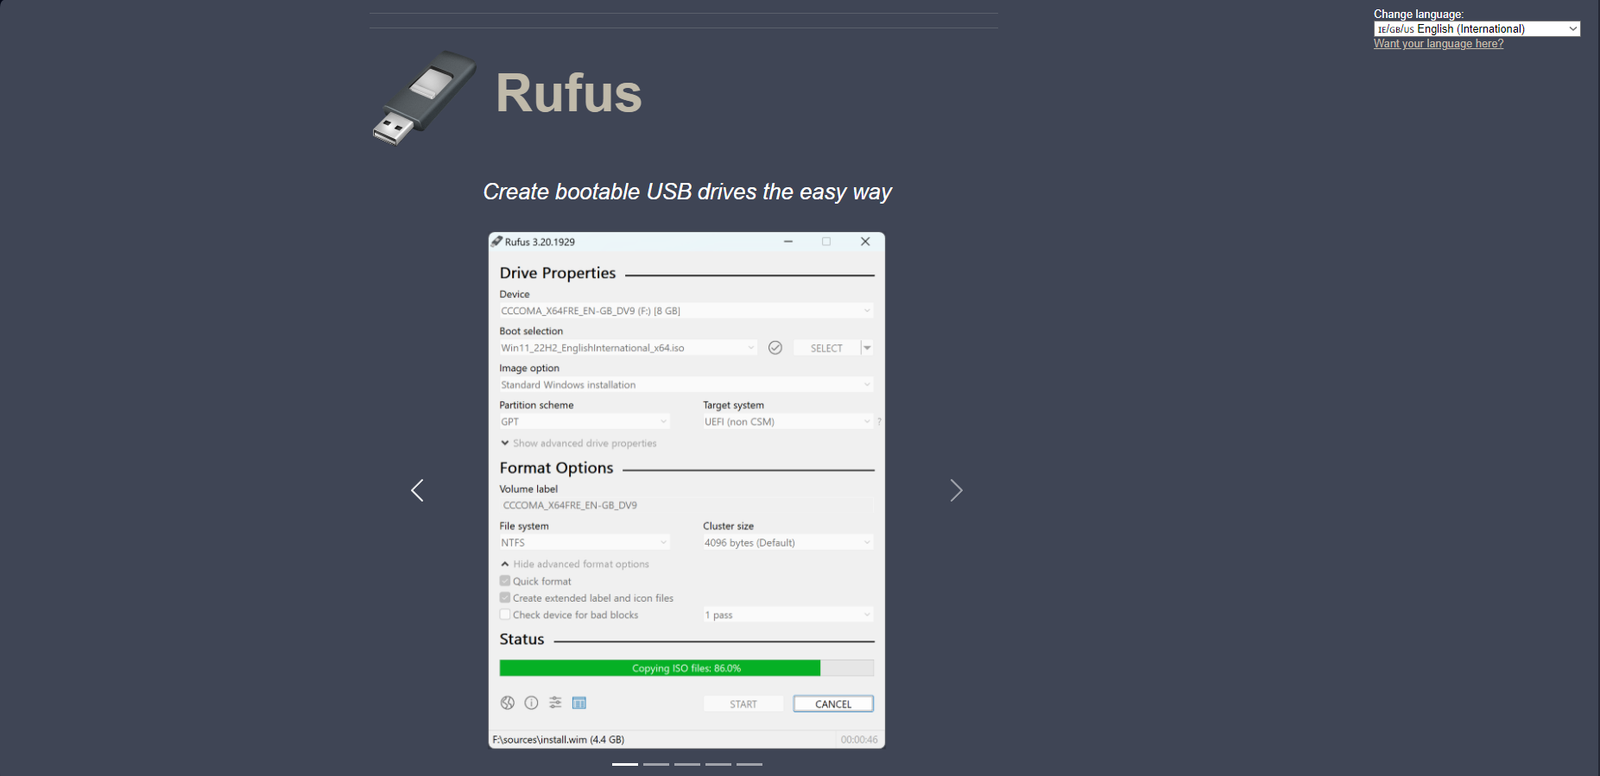
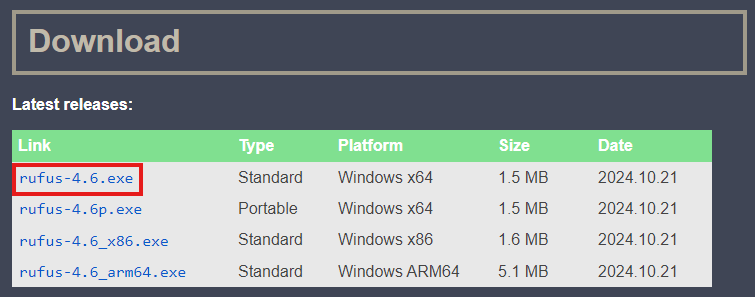
- Download & install RUFUS software on PC / laptop from RUFUS website.
- Youtube
Details (Click to expand)
- Scroll down, download and install the software.
- Insert a pendrive, backup every important data of the pendrive. (Pendrive will be format after create bootable)
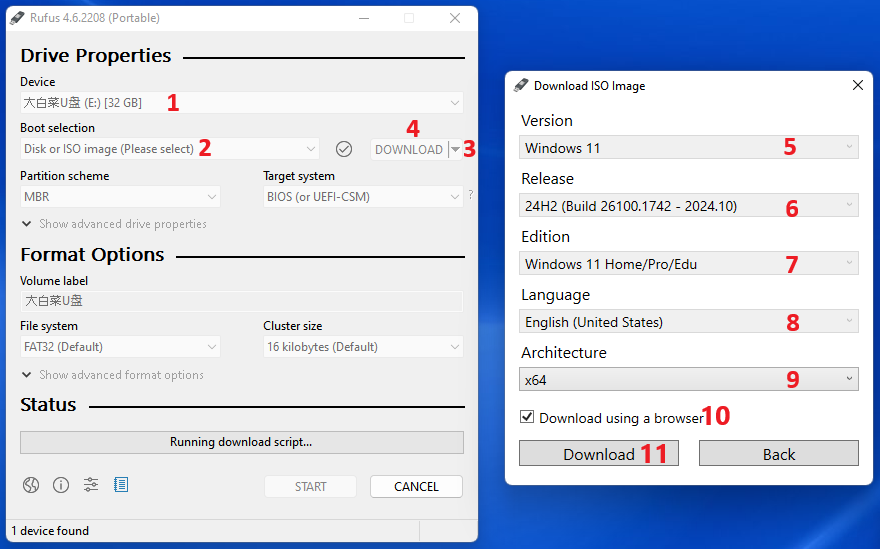
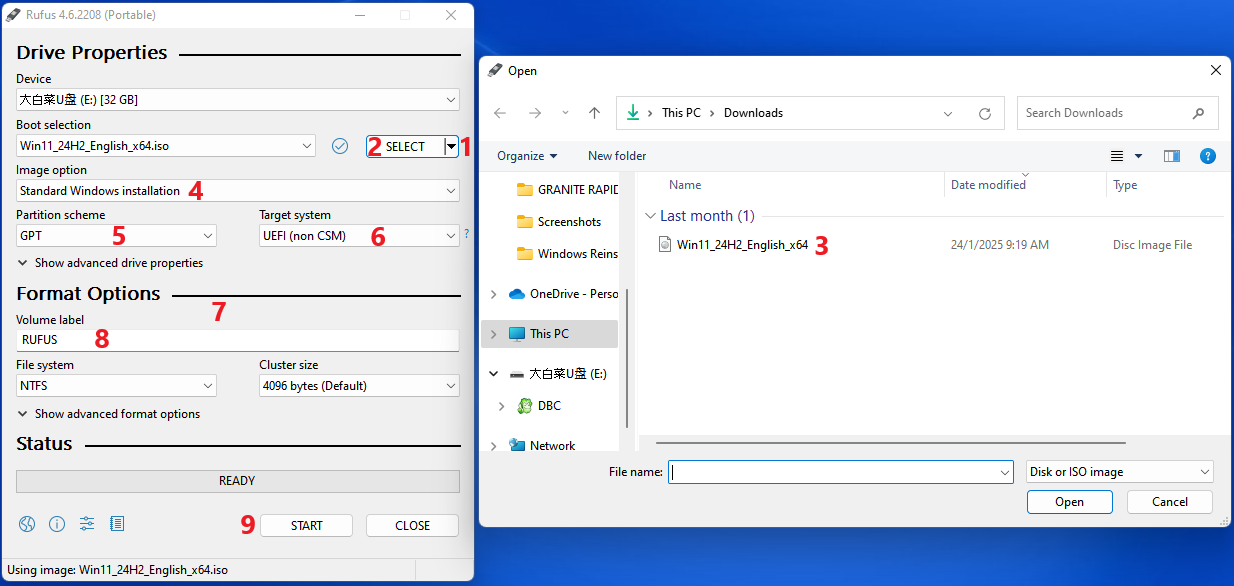
- Open RUFUS

- Device: Select pendrive
- Boot selection: Disk / ISO image
- Select Download in dropdown option
- Click the download button
- Version: Windows 10
- Release : Default
- Edition: Default
- Language: English US
- Architecture: x64
- Tick download using a browser to see download percentage.
- Click Download
- After download:
- Change back the option to select
- Click select
- Choose the downloaded file, make sure a windows 10 ISO is downloaded.
- Image option: Standard Windows Installation
- Partition Scheme: GPT
- Target systems: UEFI
- Format Options: By default
- Volume label: ‘Use to change pendrive to desired name’
- Click START
- Wait for few minutes and a bootable USB will be created.
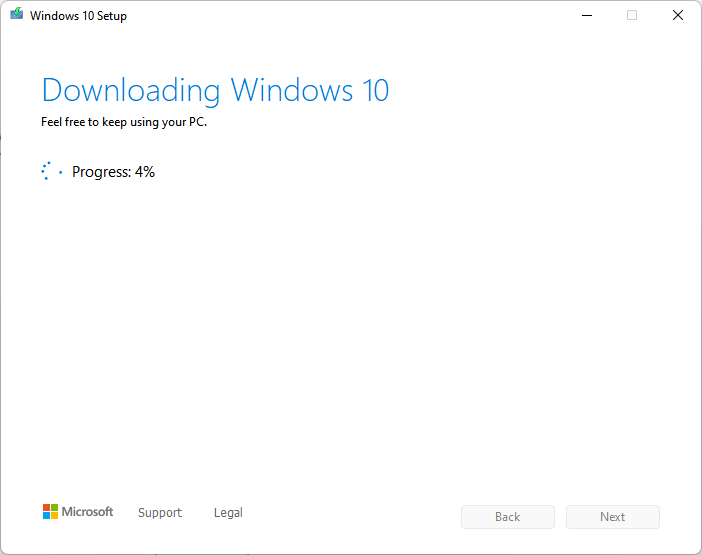
1.2.2 Official Windows Method #
- Download & install windows ISO from windows official website.
- Youtube
Details (Click to expand)
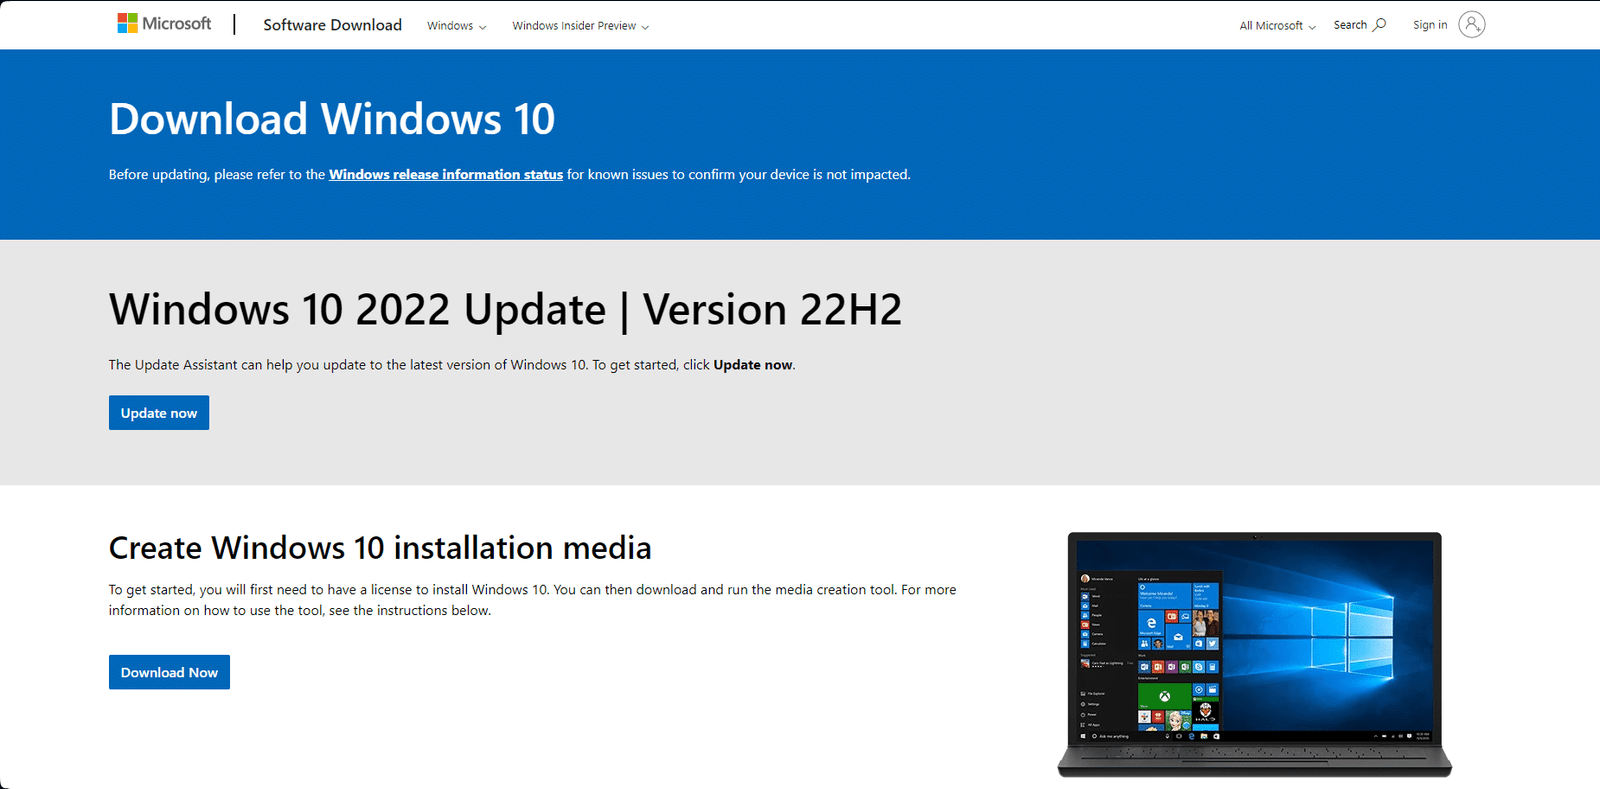
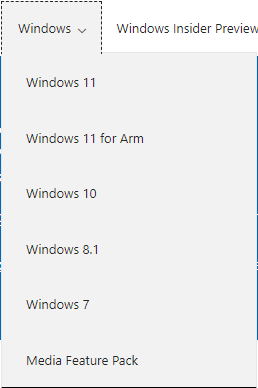
- Choose windows 10 to download.
- Find and download the windows installation media.
- Insert a pendrive, backup every important data of the pendrive. (Pendrive will be format after create bootable)
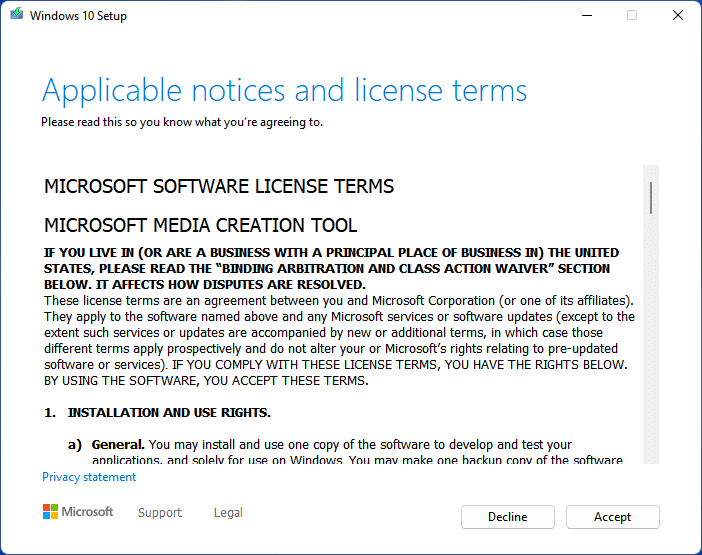
- Run the media creation tool

- Accept the license
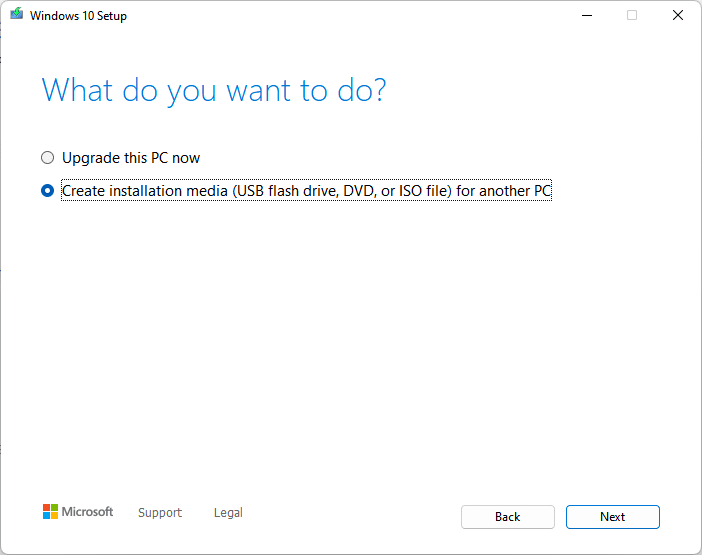
- Choose create installation media
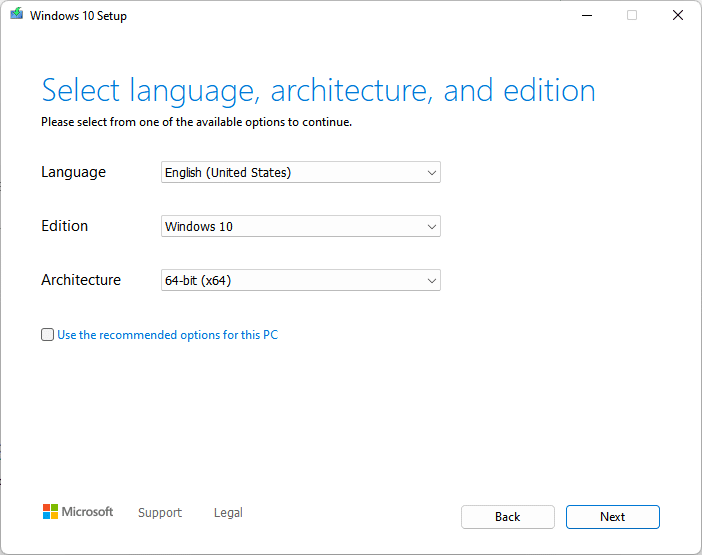
- Choose the language, windows edition and architecture(mostly x64).
- Choose USB flash drive if using a USB pendrive.
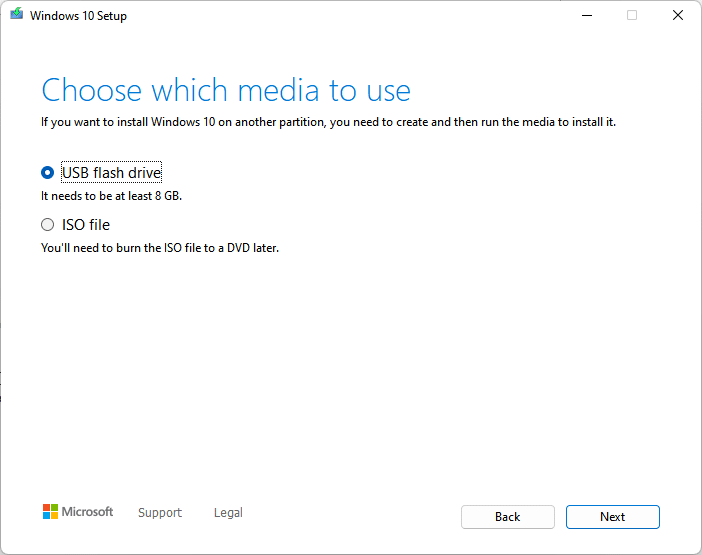
- Select the pendrive that will be use to create a bootable.
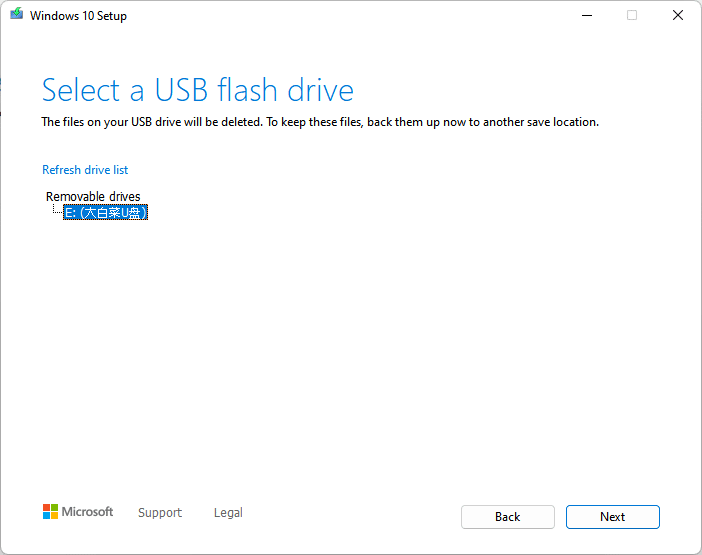
- Wait for few minutes and a bootable USB will be created.
1.2.3 Official Dell OS Recovery Tool #
- Go to Dell website and download and install the Dell OS recovery tool.
- Youtube
Details (Click to expand)
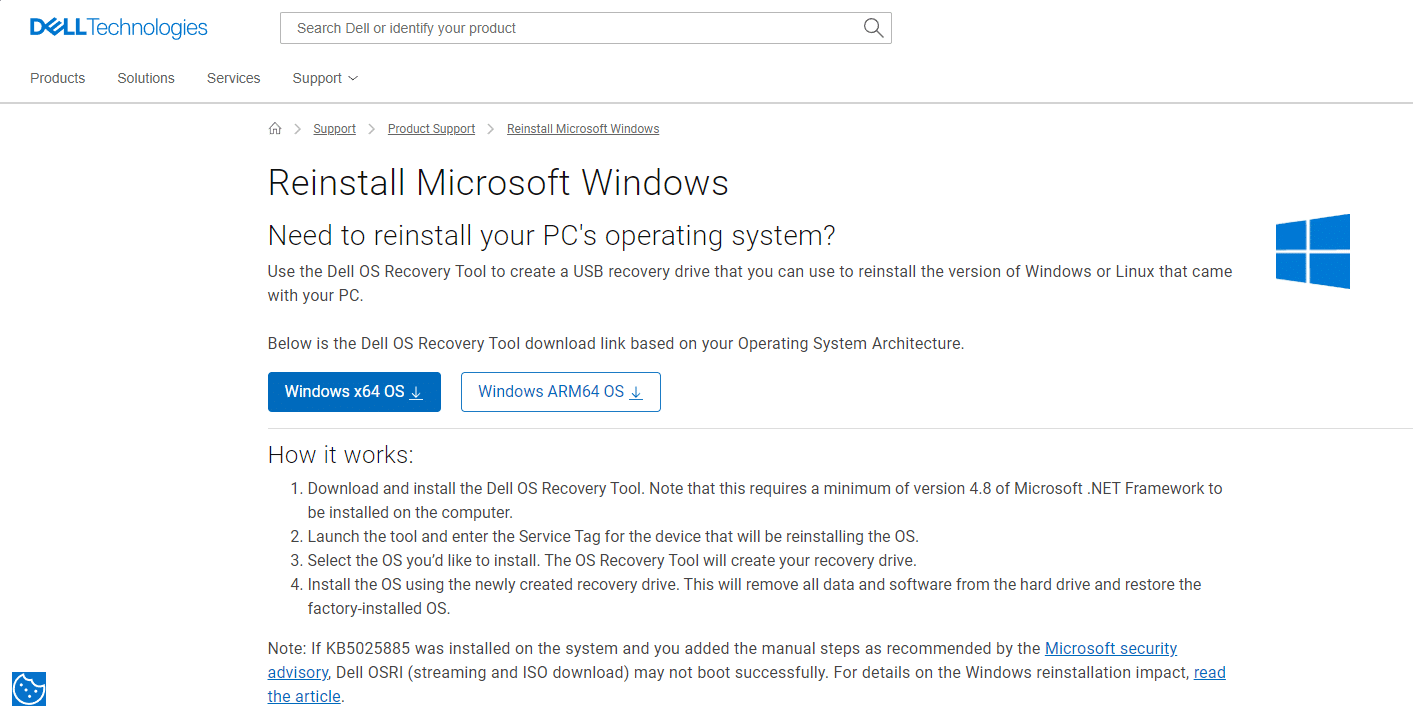
- Launch the downloaded software.

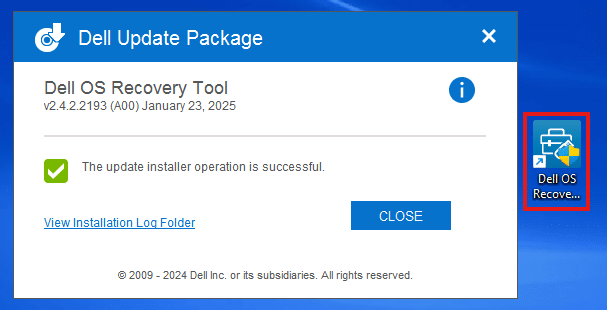
- Click install
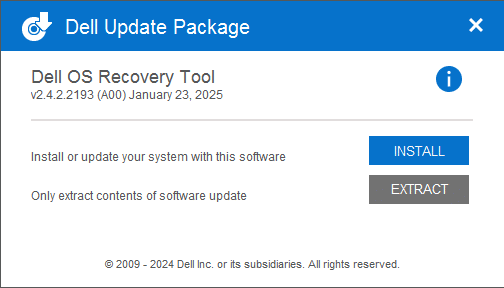
- After install, a Dell OS Recovery Tool shortcut will be created.
- Launch the software
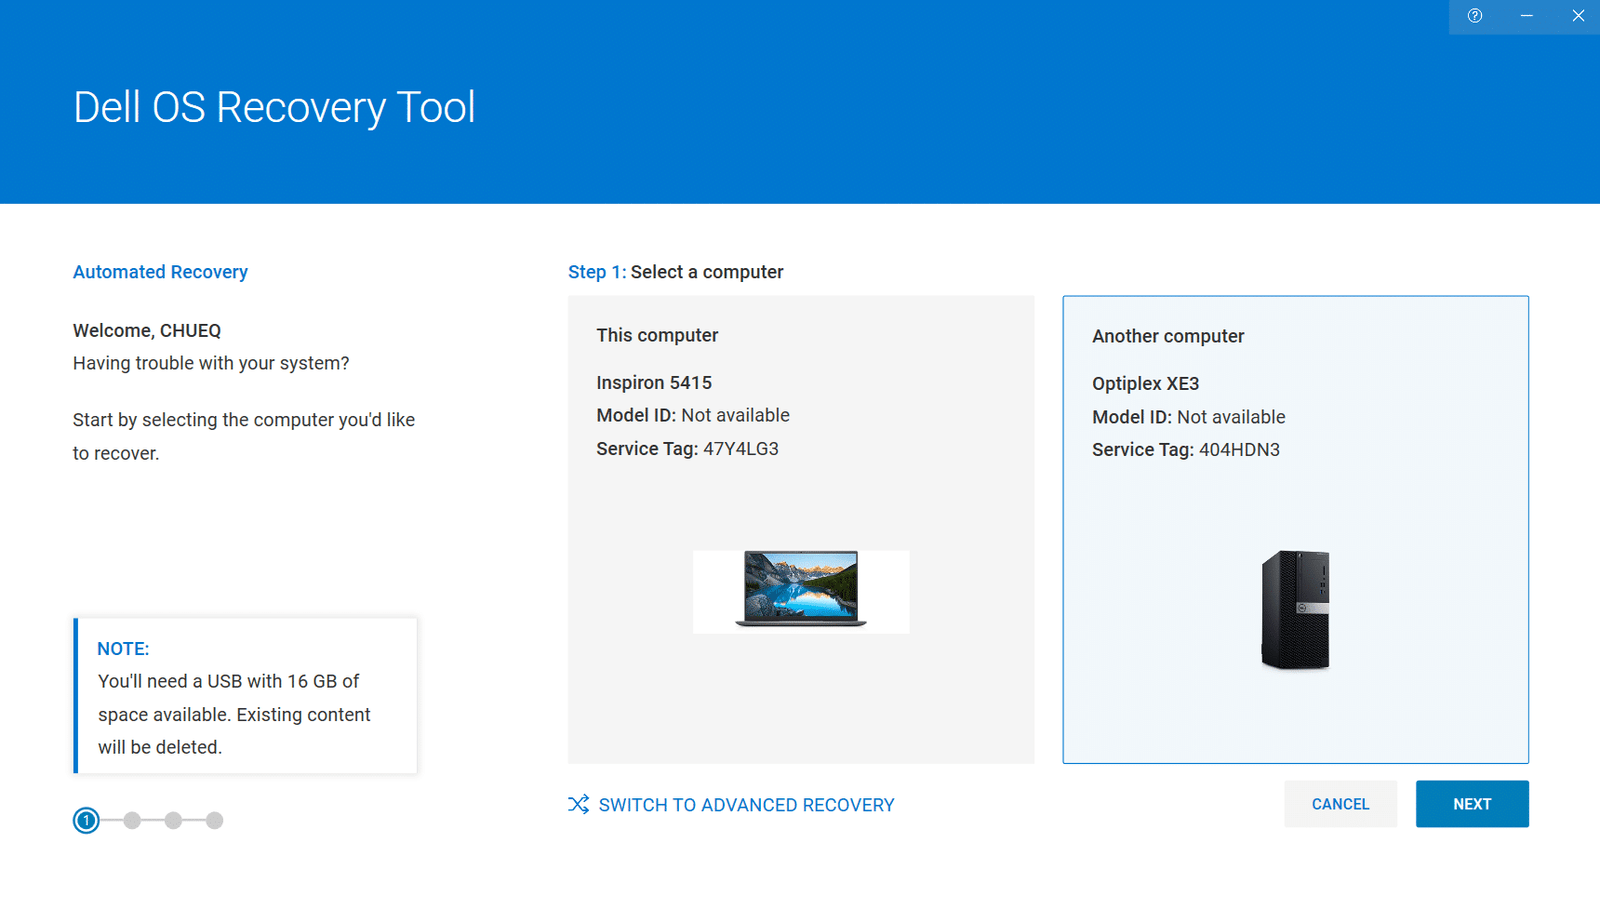
- Identify the computer that requires the recovery media using the Service Tag.
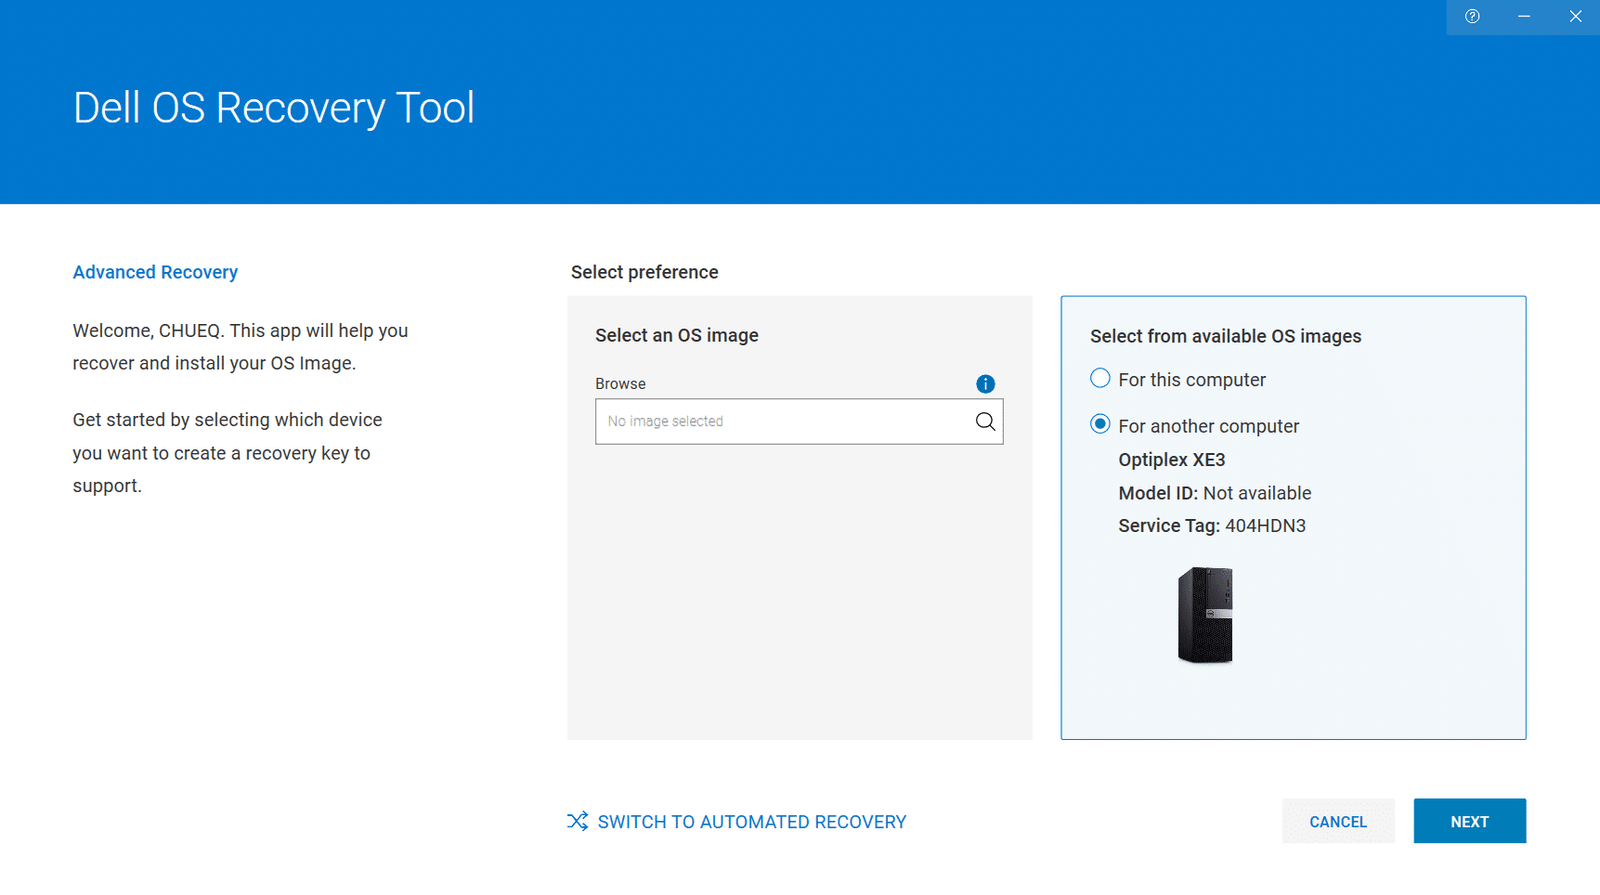
- If you are downloading the recovery image using the same Dell computer, select this computer, and click NEXT.
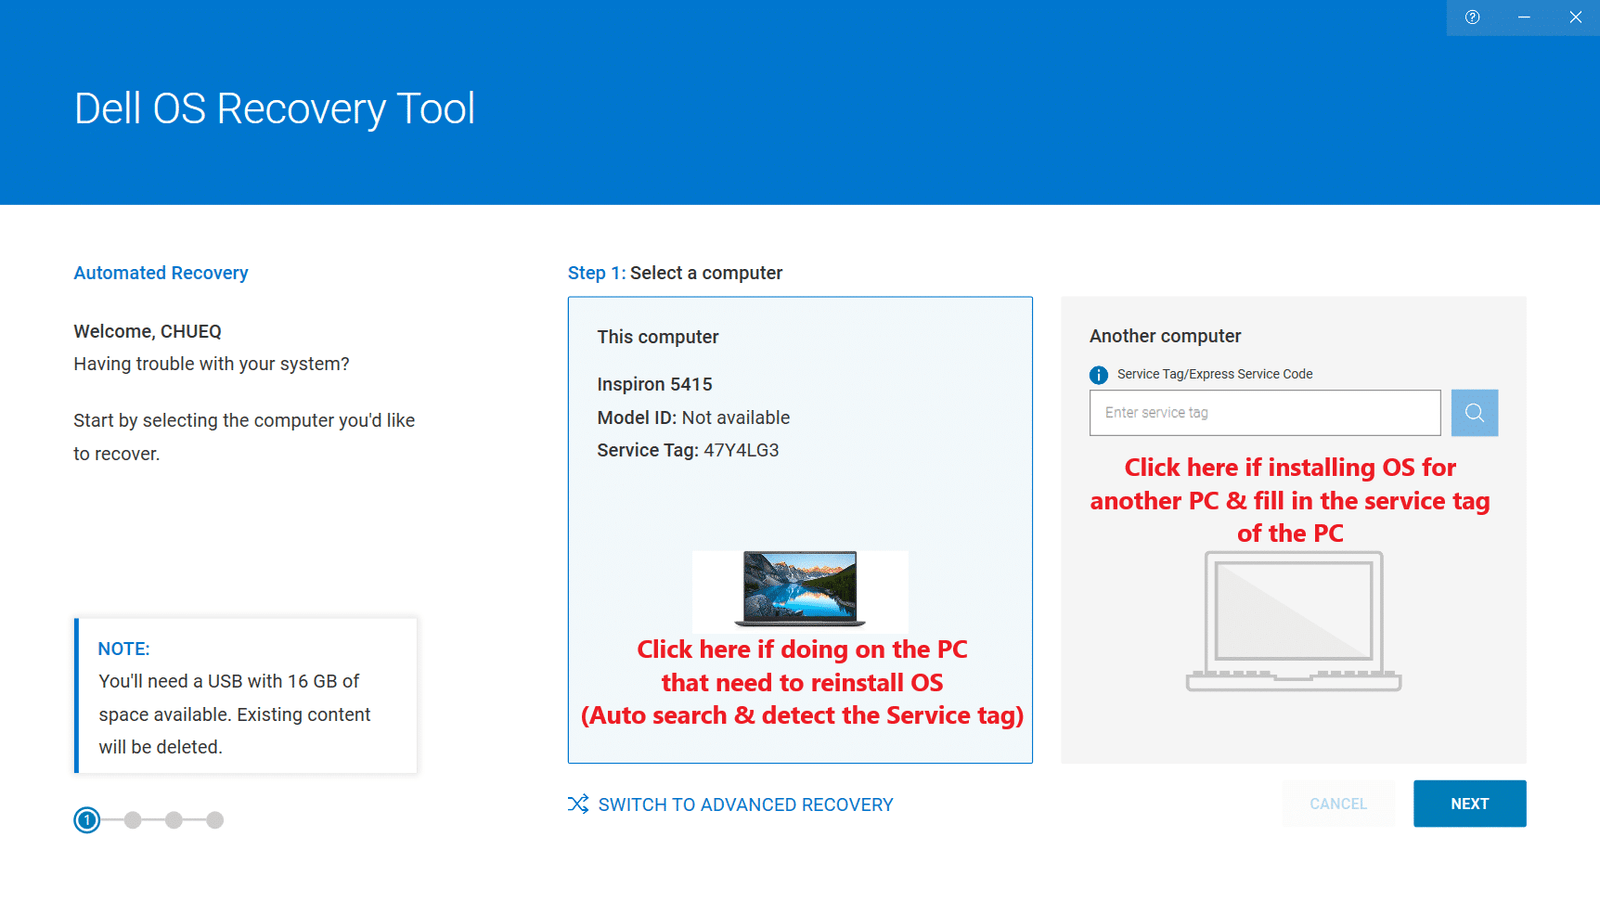
- If you are using another working computer to create the recovery media, choose another computer, enter the Service Tag of the computer you want to create recovery media for, and click the Magnifying Glass icon to search for the computers identity.
- Insert a pendrive, backup every important data of the pendrive. (Pendrive will be format after create bootable)
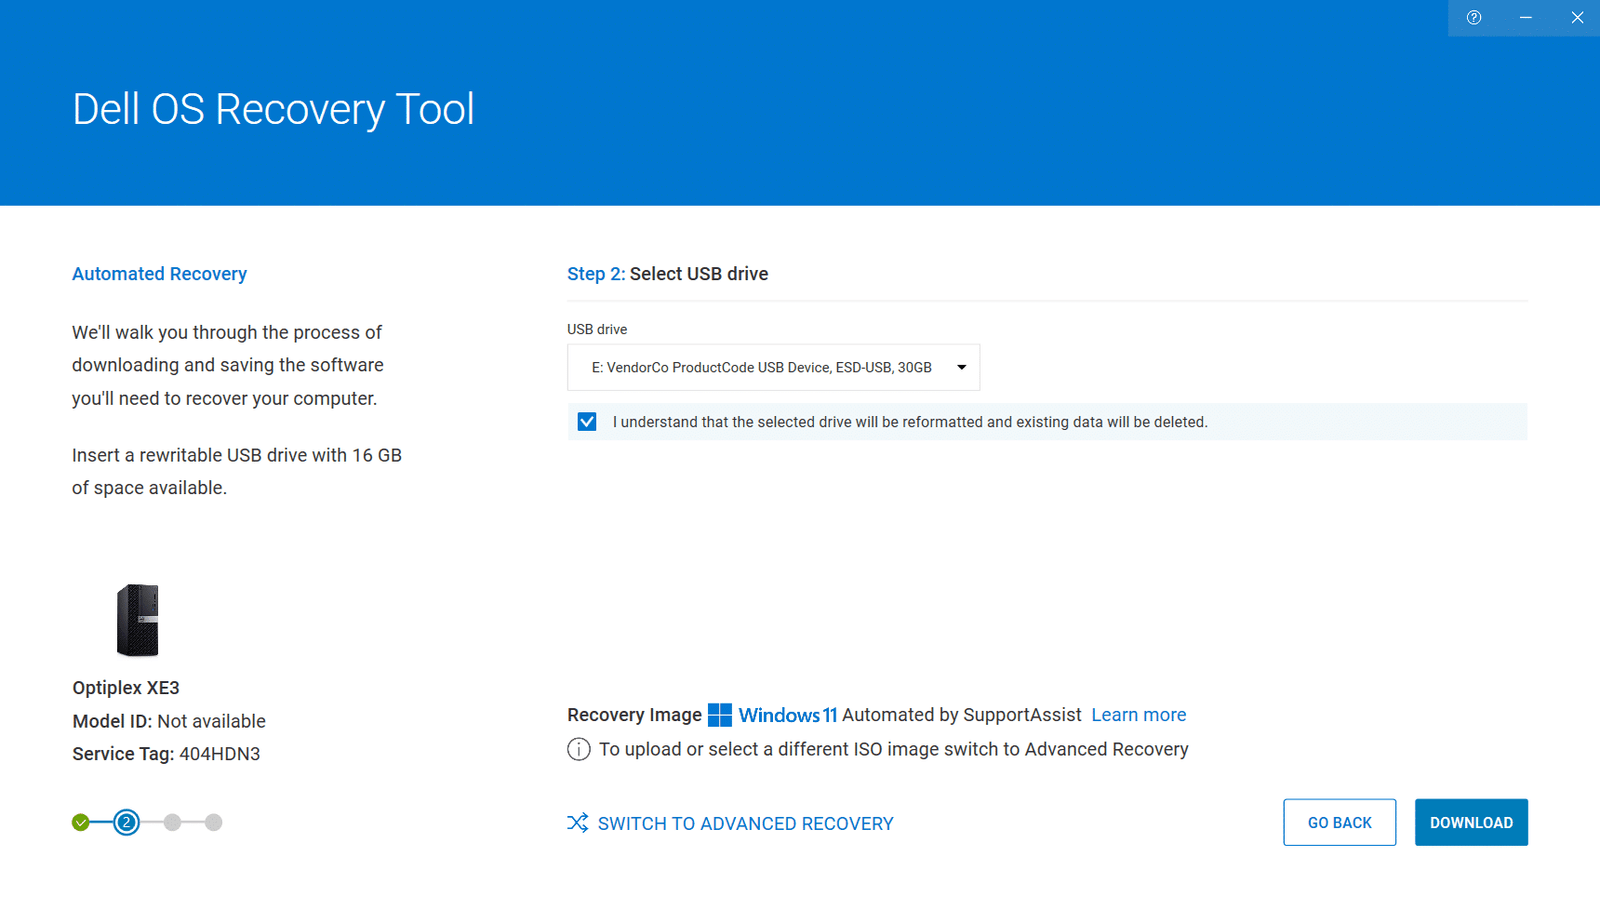
- Select the USB that will be use to create a bootable, check the ‘I understand’ and click download.
- The windows version is automatically selected, if want to change version, click on ‘switch to advanced recovery’.
- Click on ‘switch to advanced recovery’, fill in service tag and NEXT.
- May select the windows version & click on download.
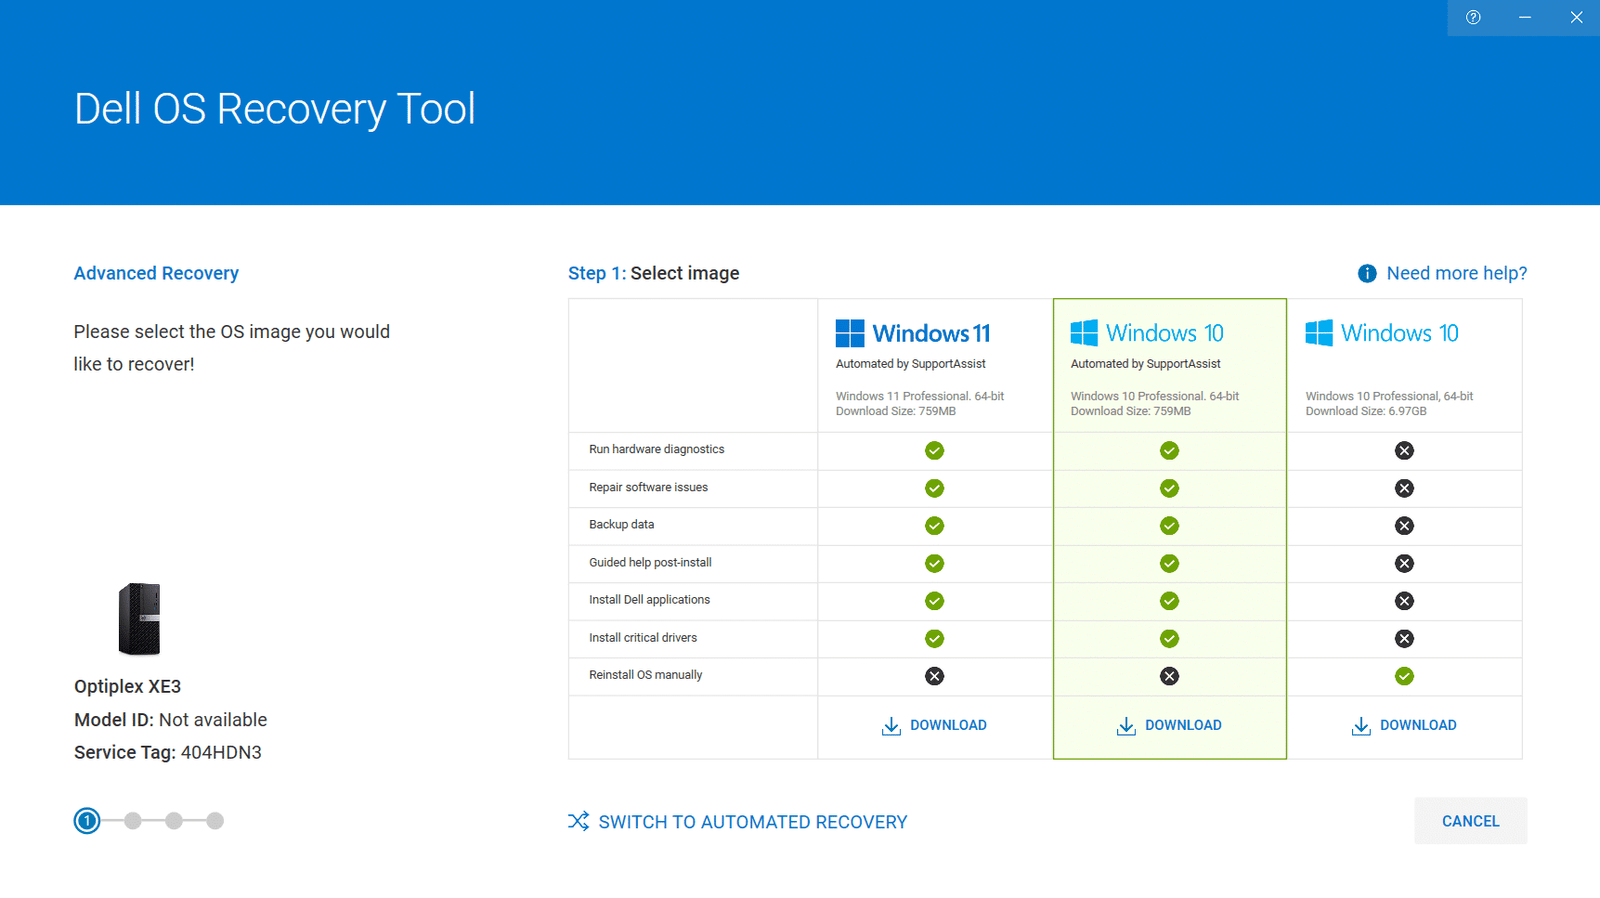
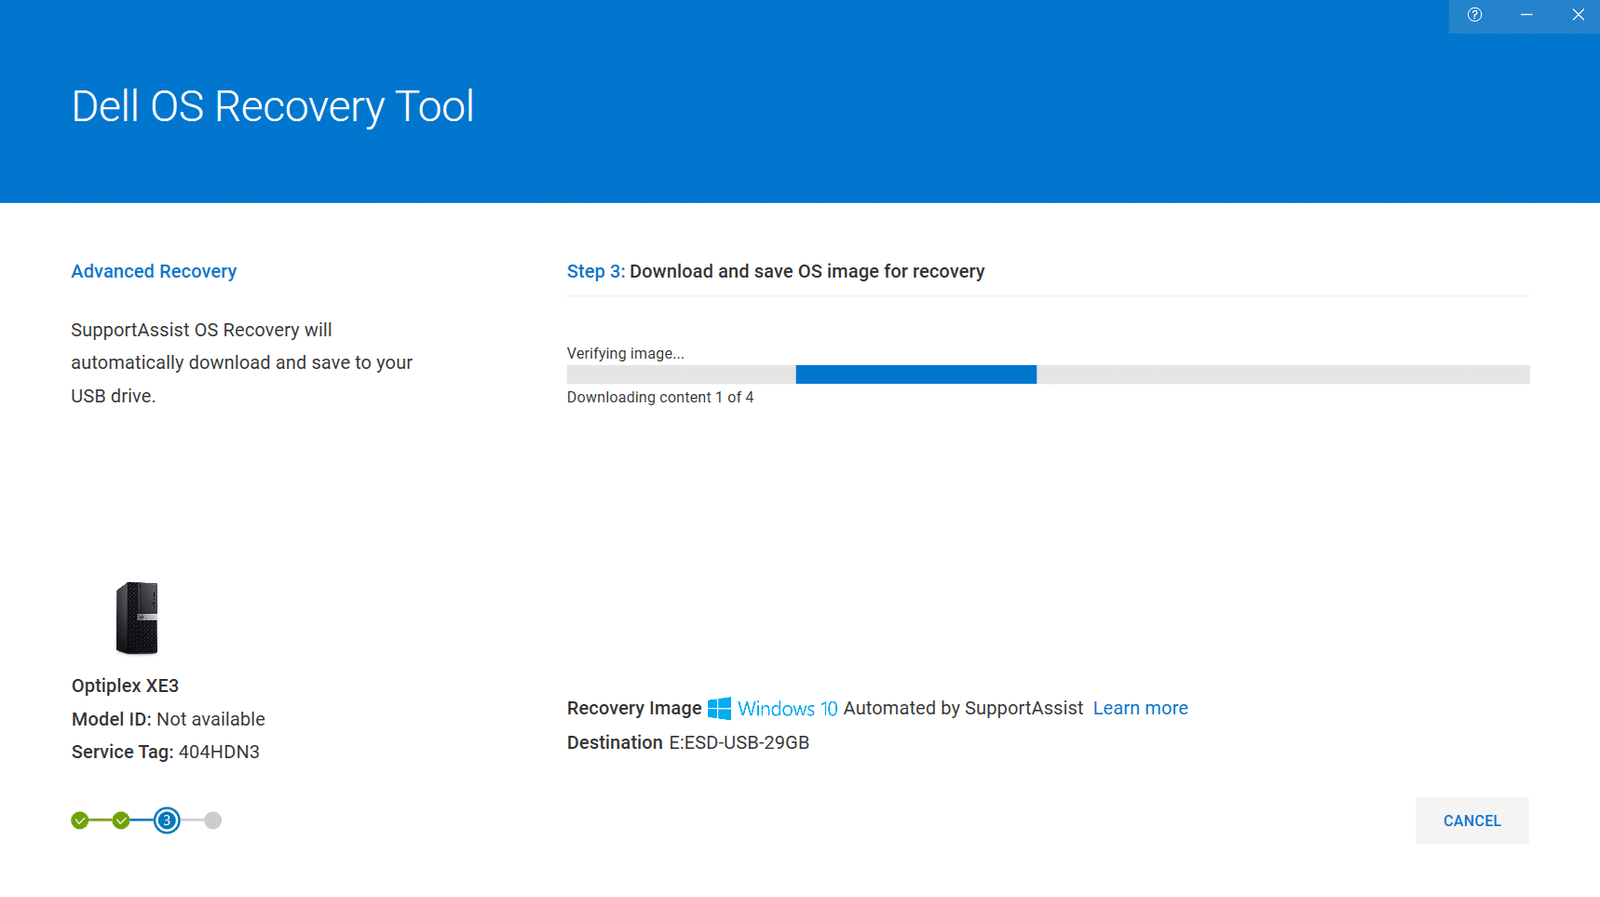
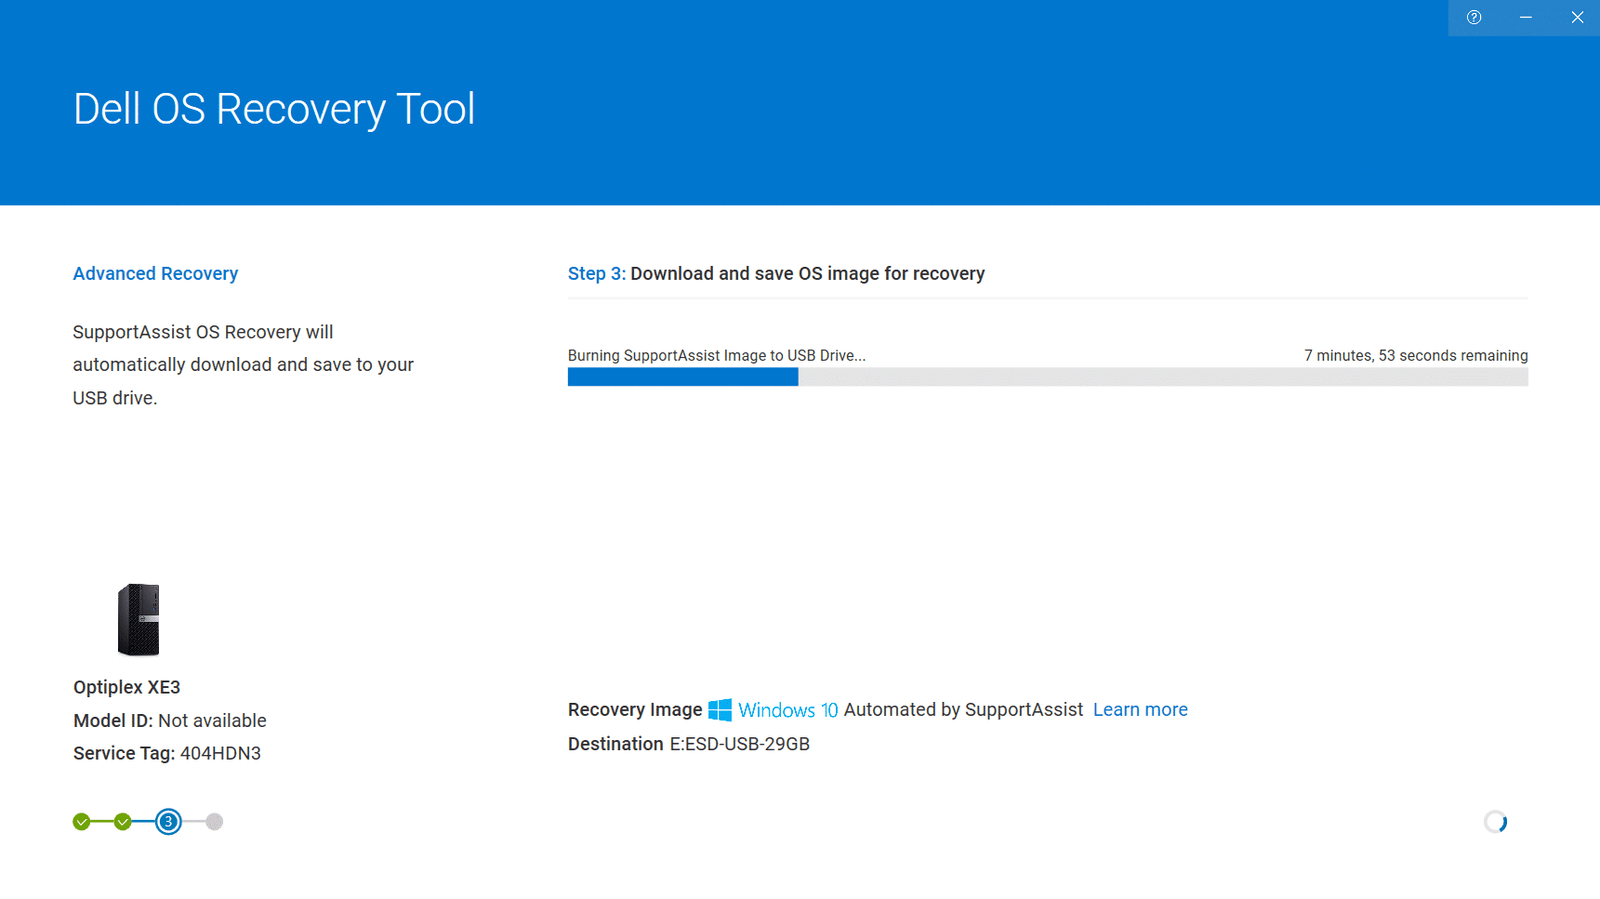
- Continue clicking the download.
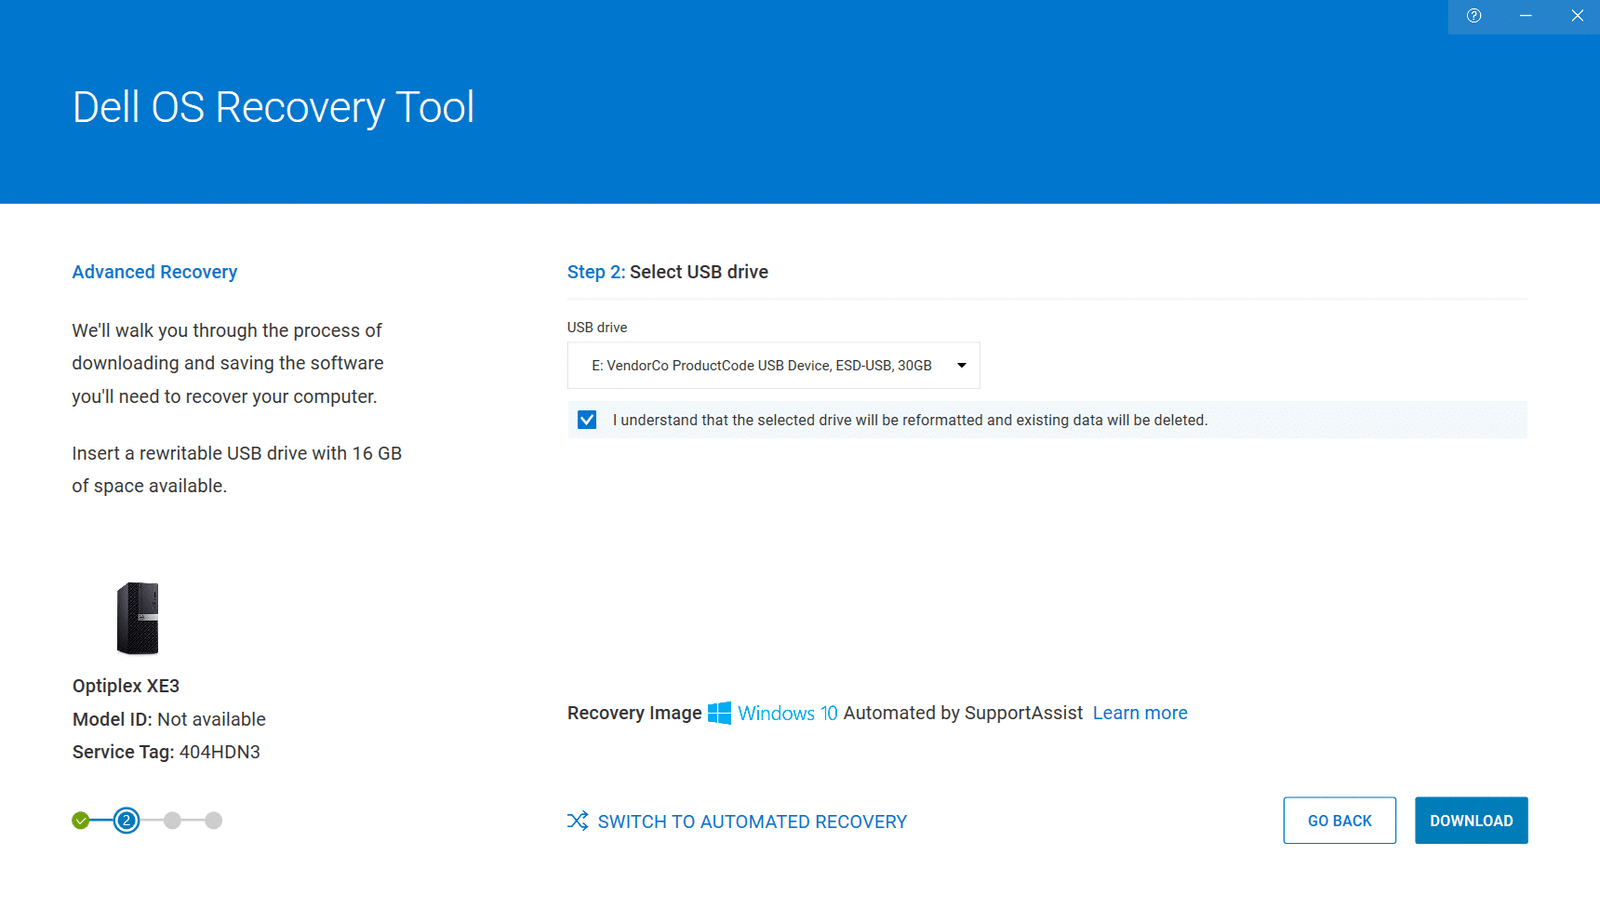
- Wait for the downloading and burning OS to USB for a few minutes.
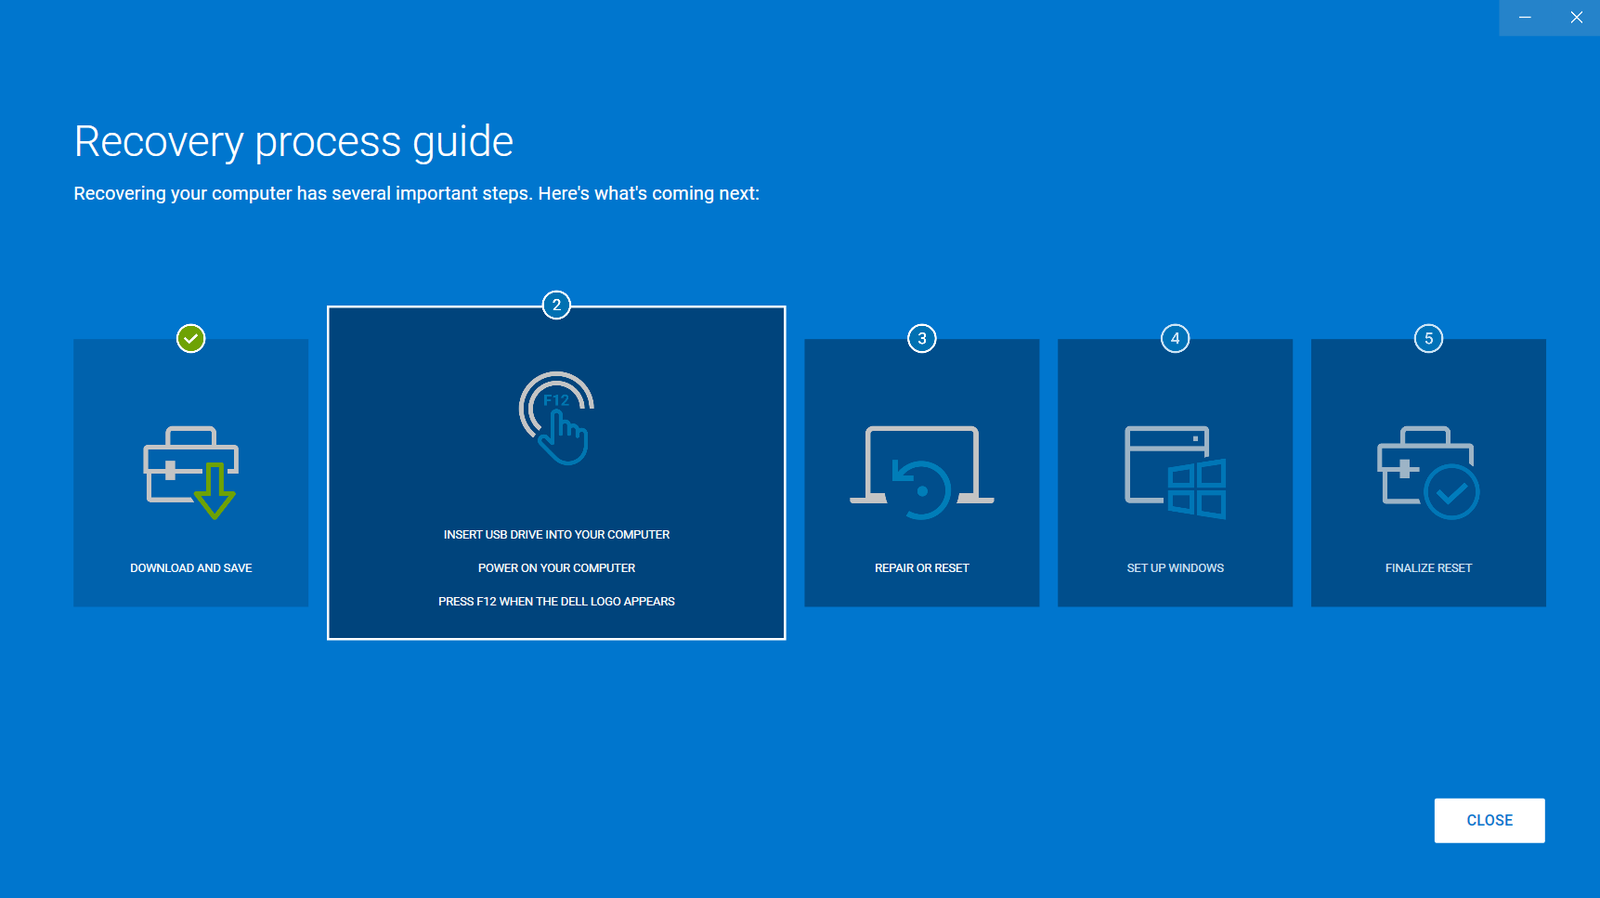
- After complete, a recovery process guide is displayed, may continue restart and reinstall OS to the required PC.
1.3 Windows Reinstallation #
1.3.1 Check Windows License #
- Open command prompt, type: slmgr.vbs /dlv to check windows license status.
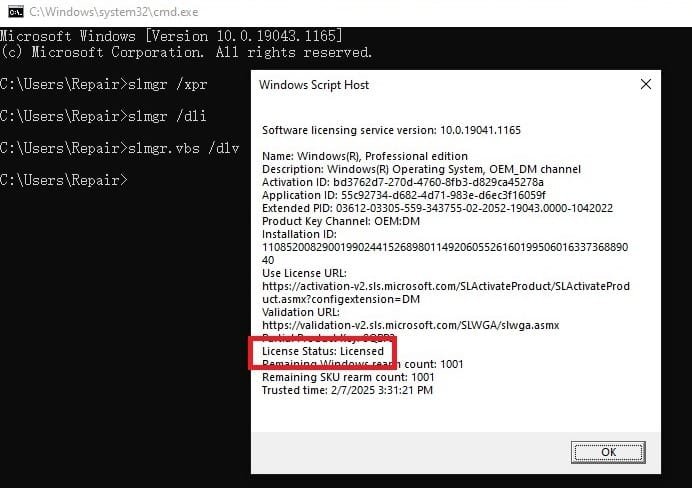
- Alternatively, type in: slmgr /dli

1.3.2 Reboot PC & Install windows #
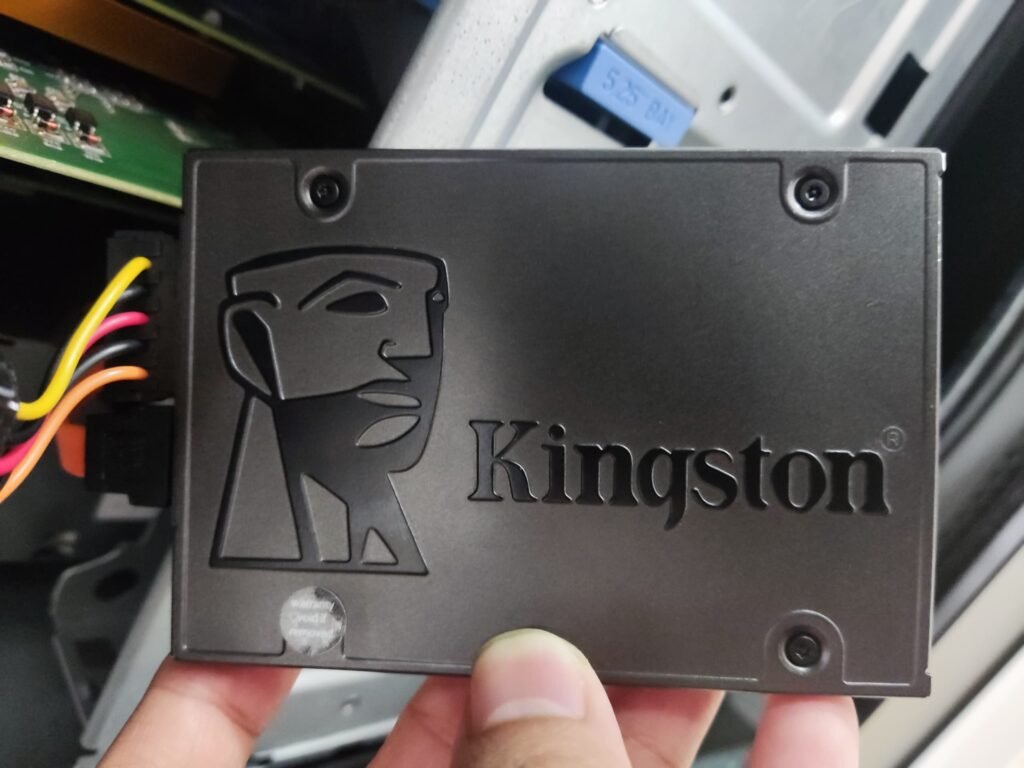
- In shutdown mode, connect new HDD/SSD as required to the PC.

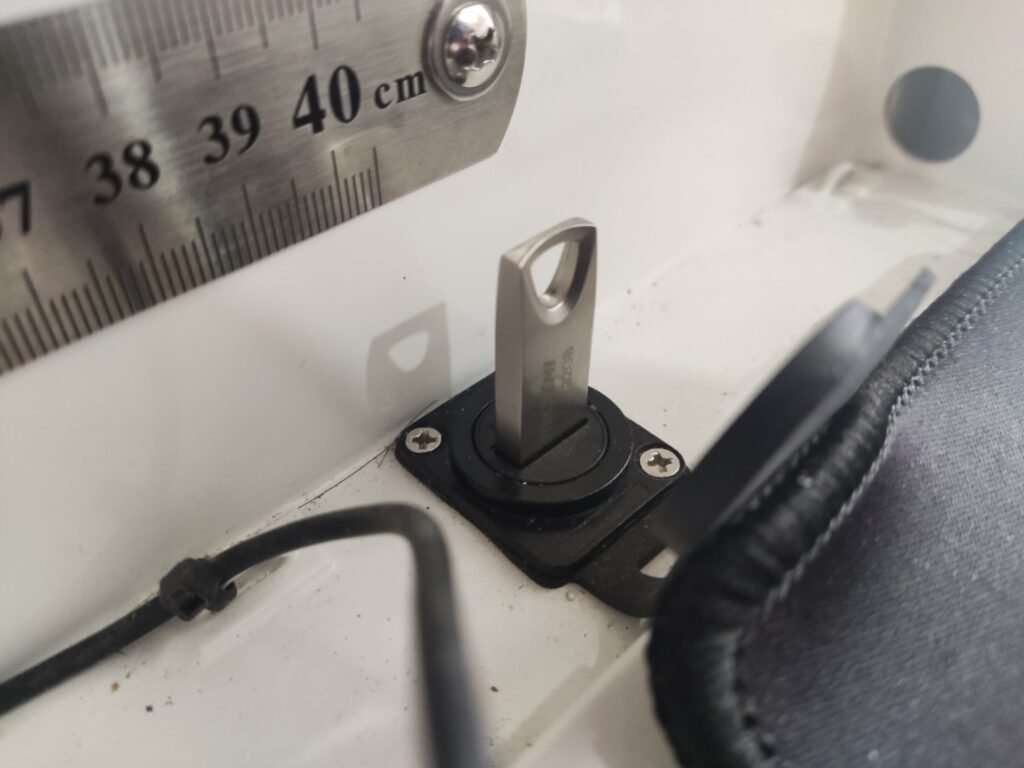
- Insert bootable USB to the PC.
- Restart PC
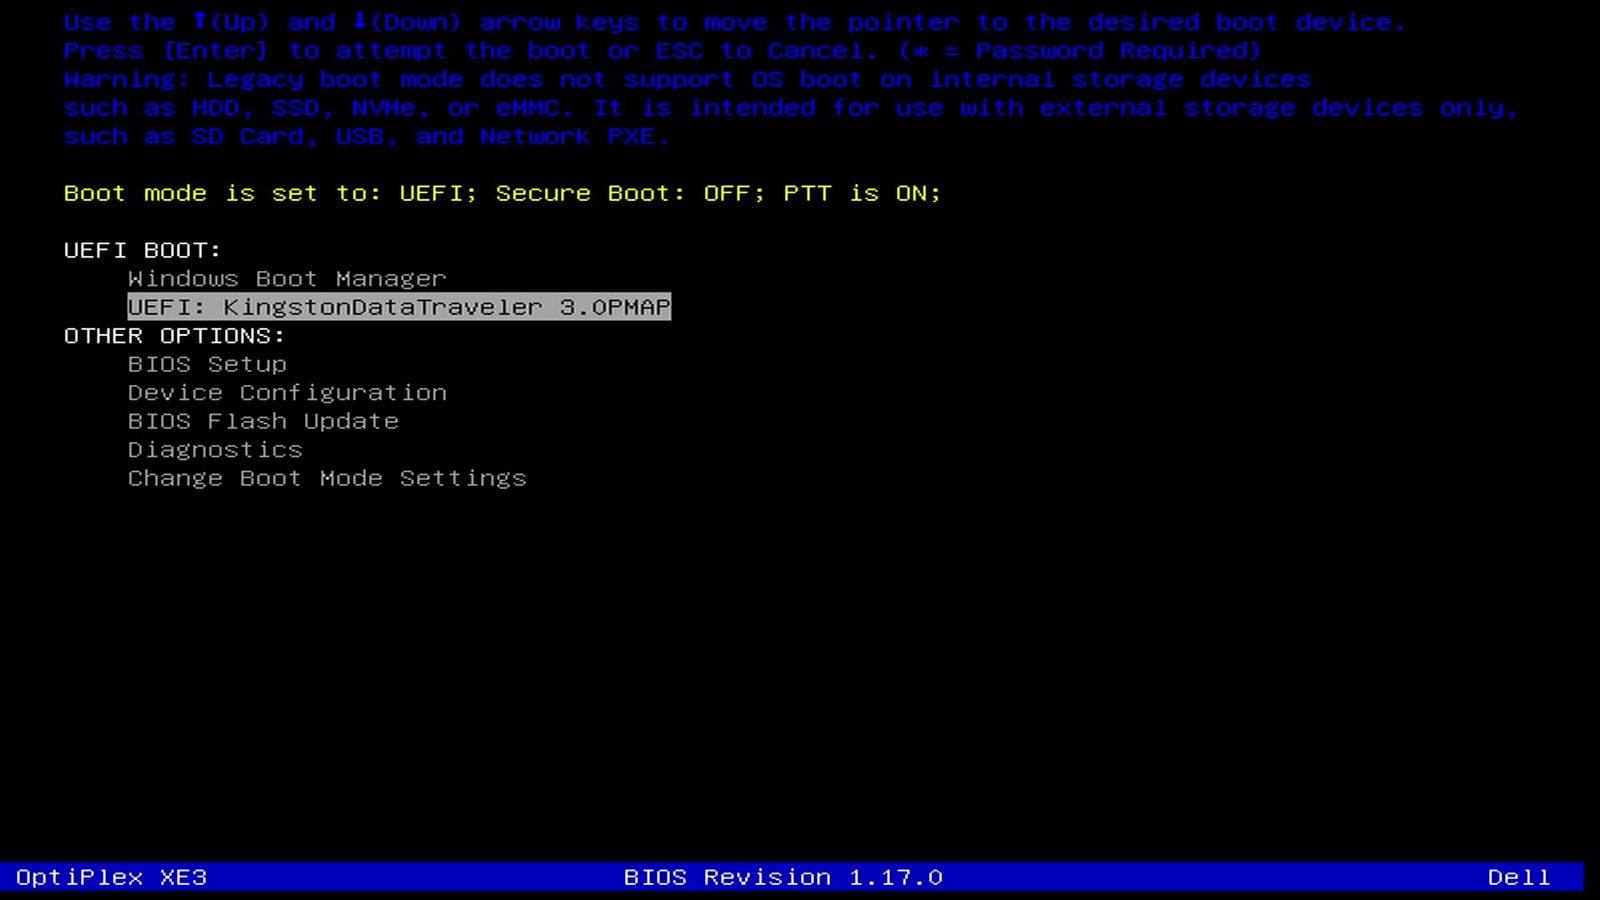
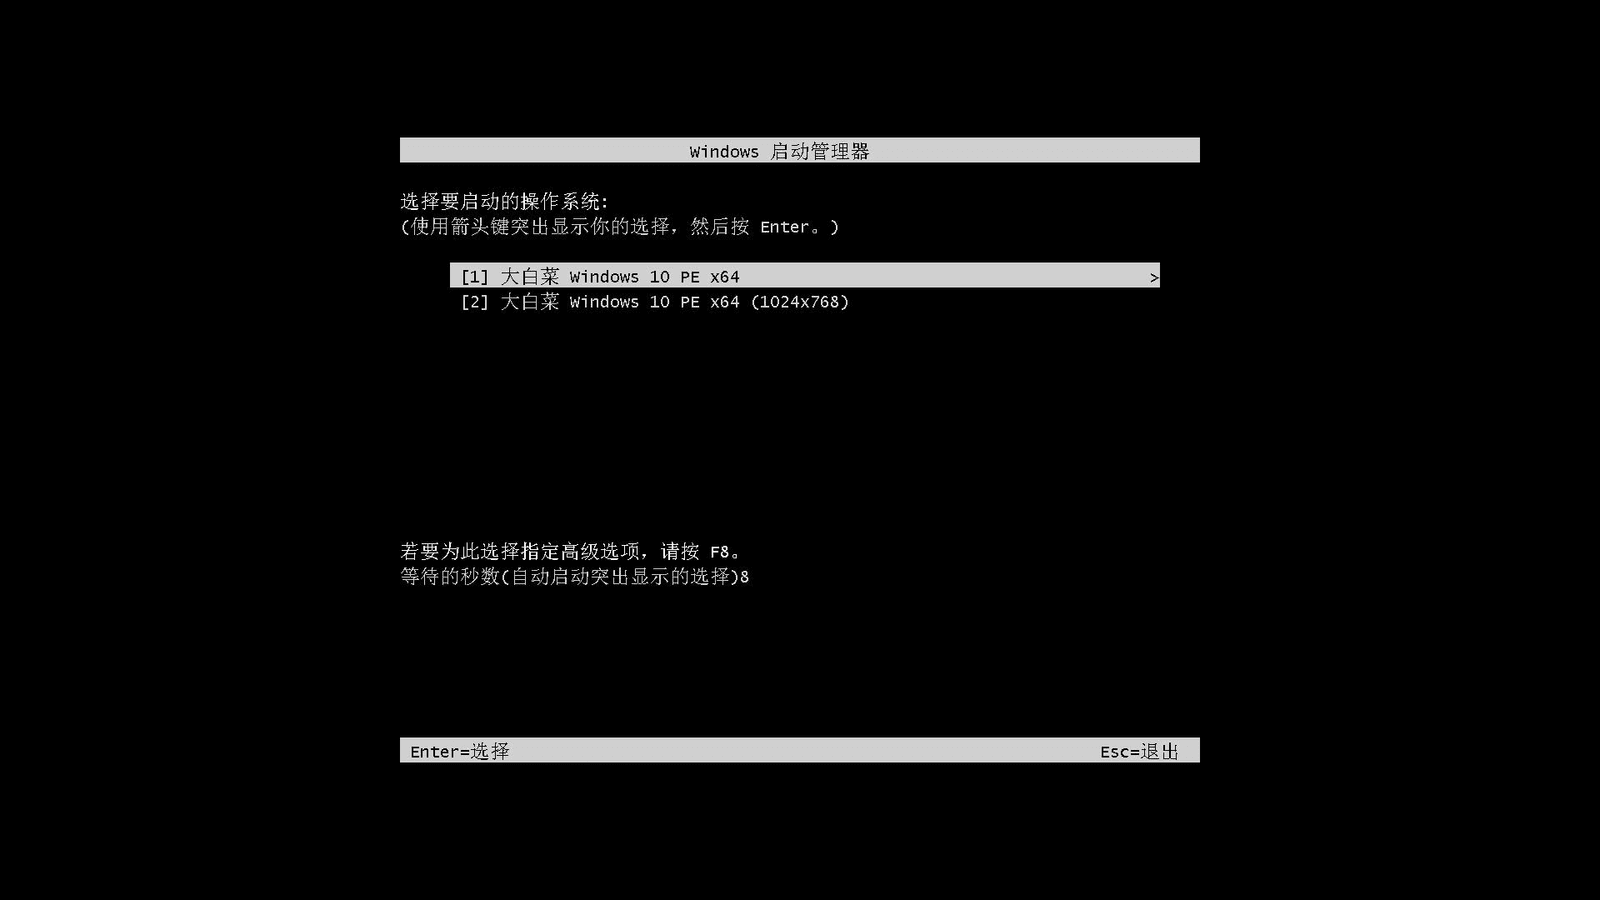
- At the Dell logo screen, press the F12 key repeatedly until you see the Preparing one-time boot menu in the upper right corner of the screen.
Details (Click to expand)

- On the boot menu, under UEFI boot, select the bootable USB drive and press the Enter key.

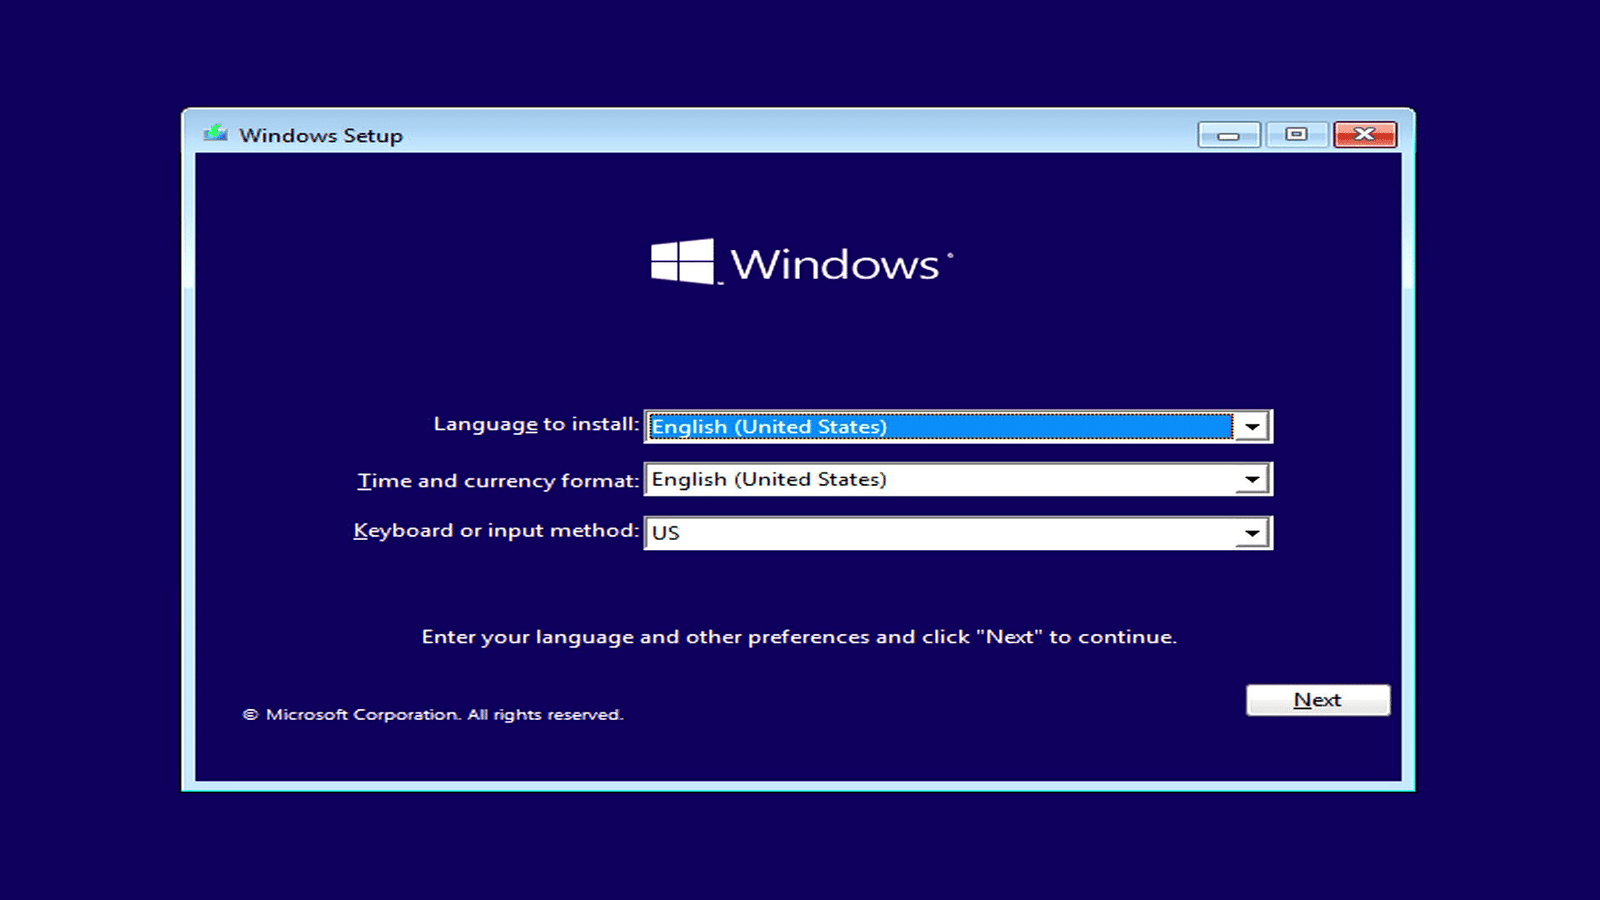
- When Windows Setup appears, select the language and keyboard preferences.
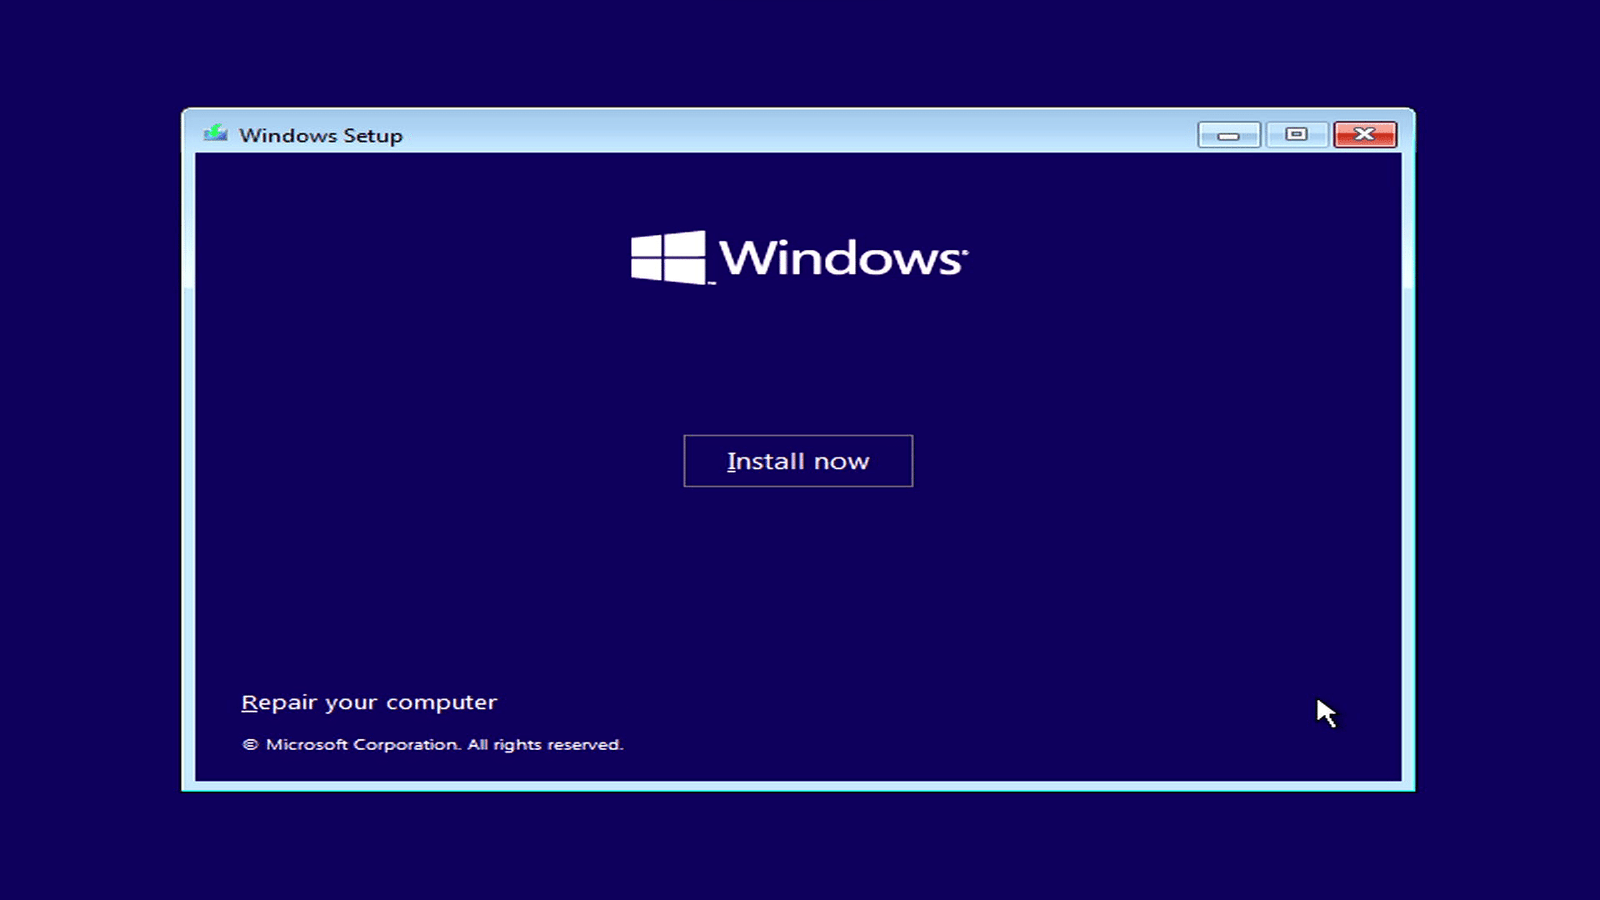
- Select install now
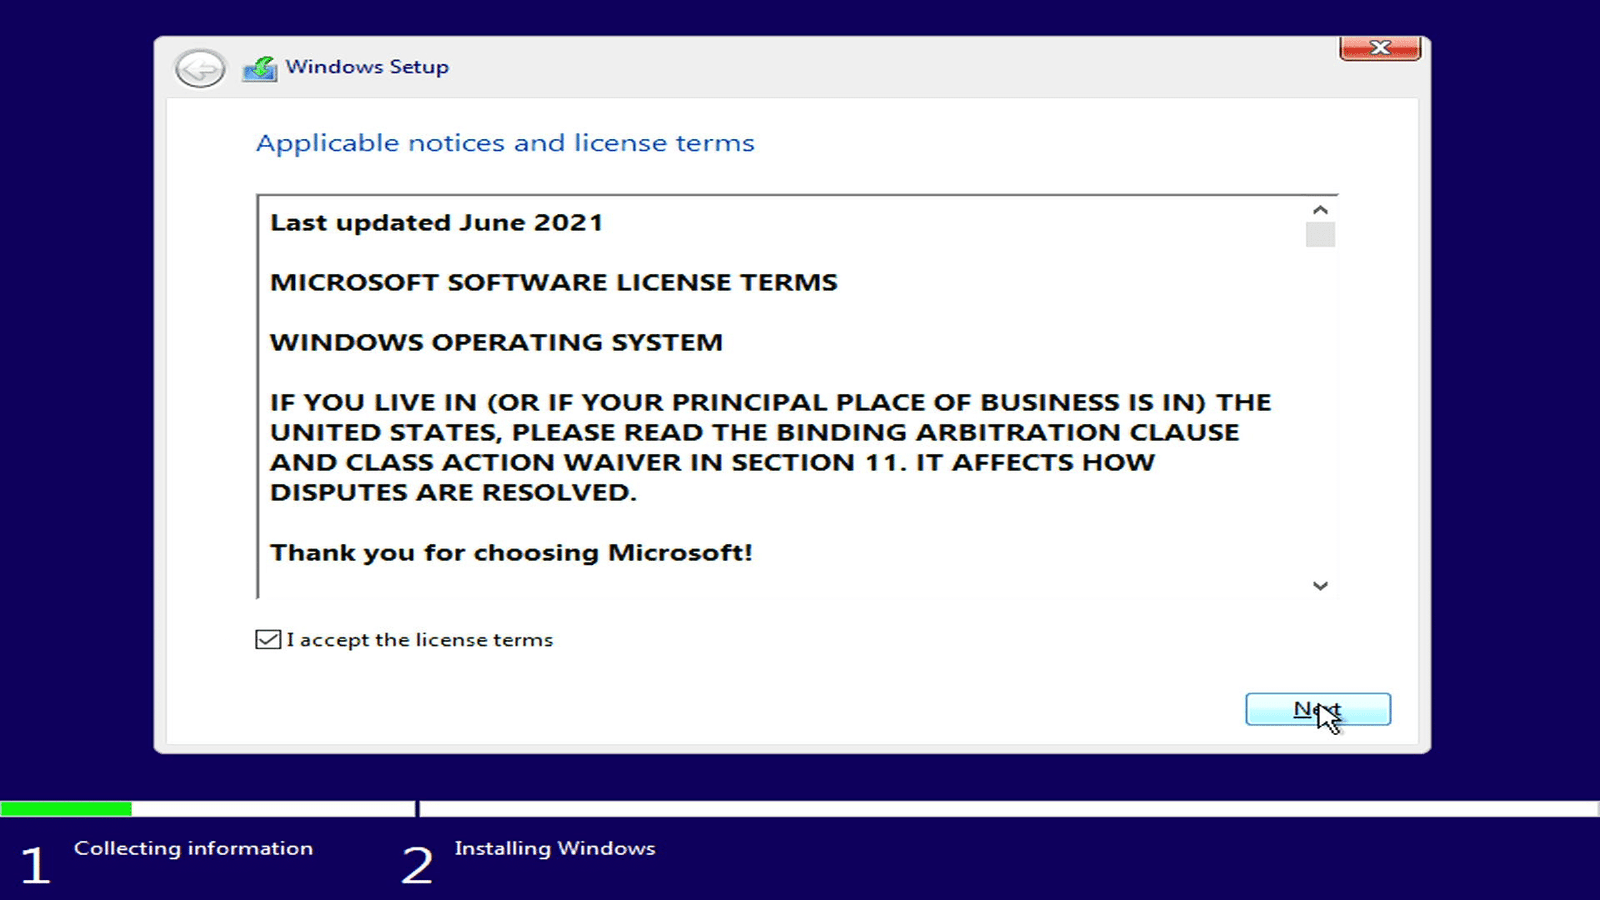
- Review the license agreement, and select I accept the license terms to proceed with the installation.
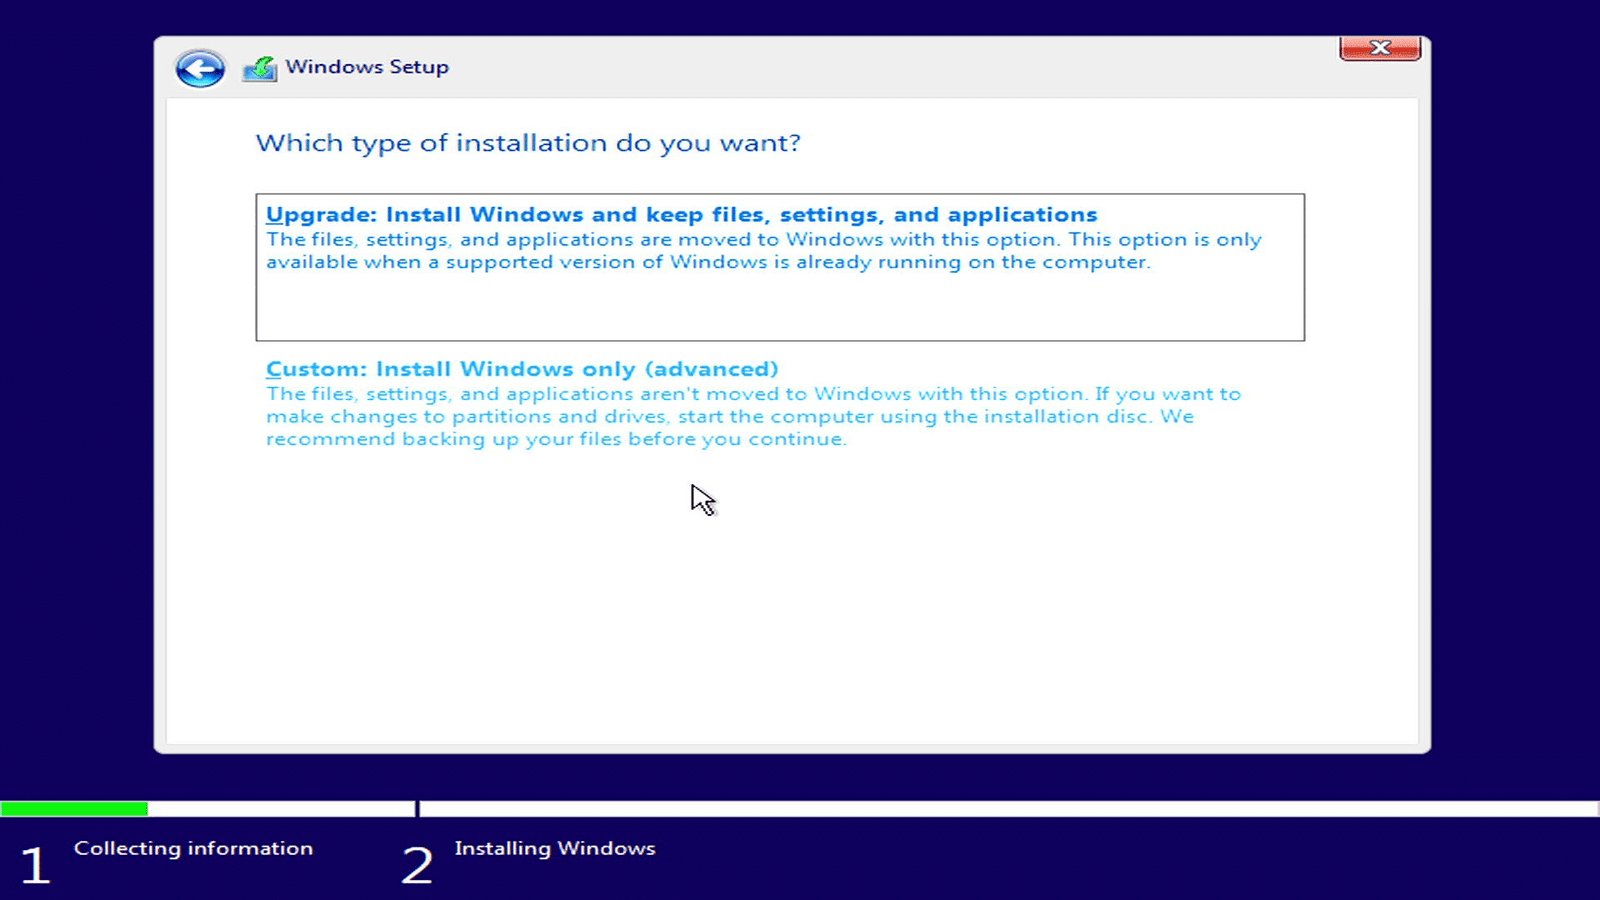
- Select install windows only
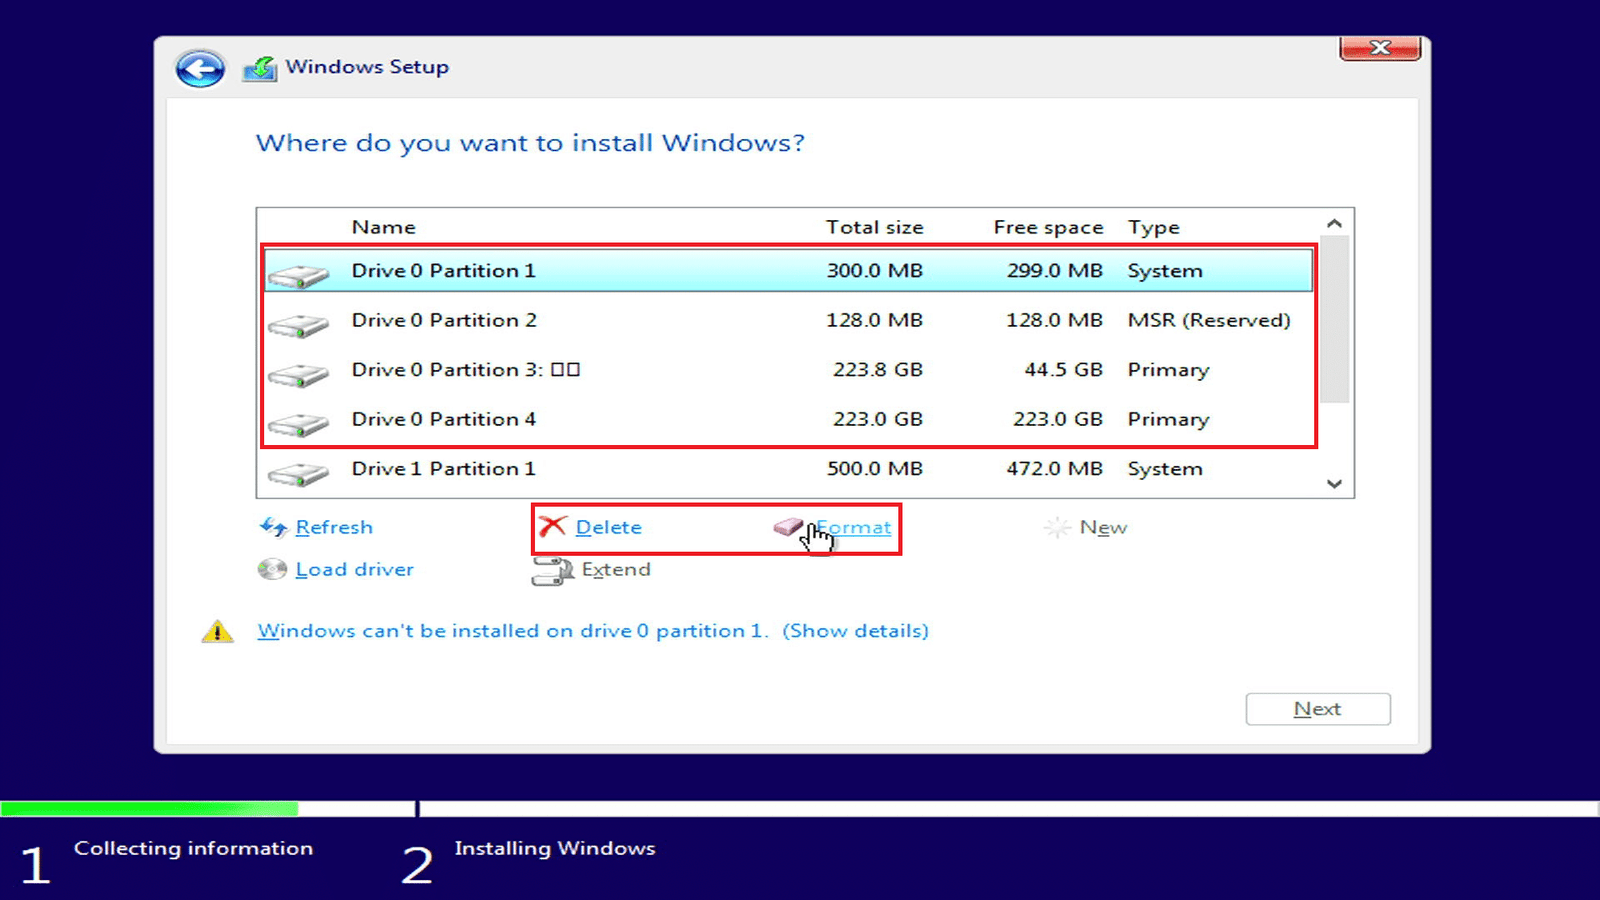
- A partitions lists will pop out, select which disk to install the windows.
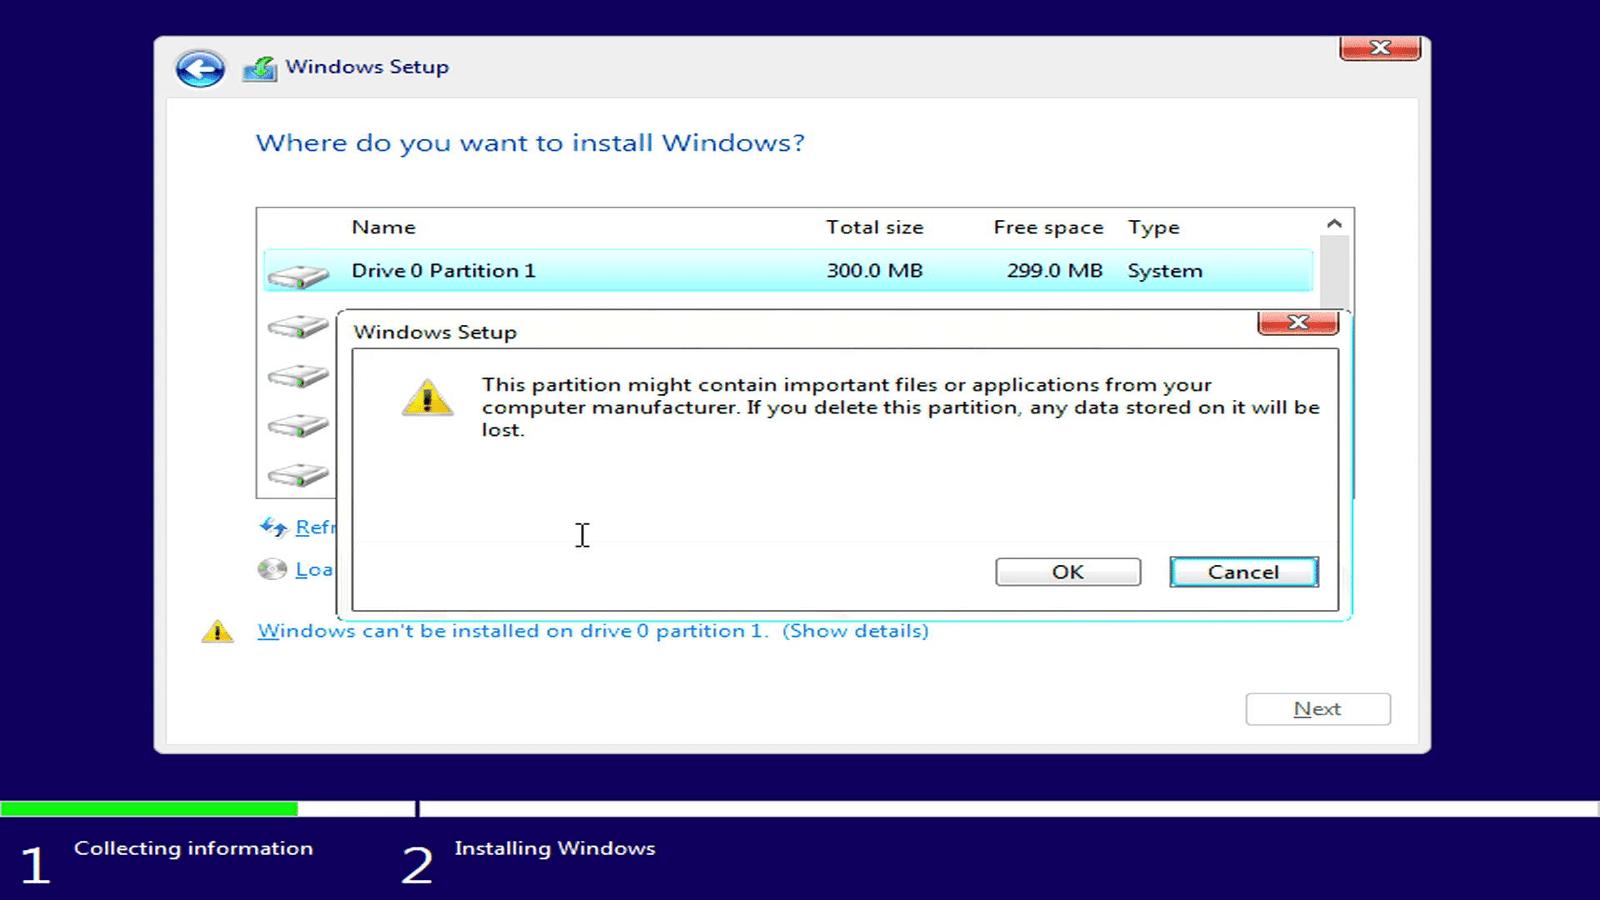
- Make sure to select correctly and reconfirm few times.
- If there is some used space, need to delete/format the drive.
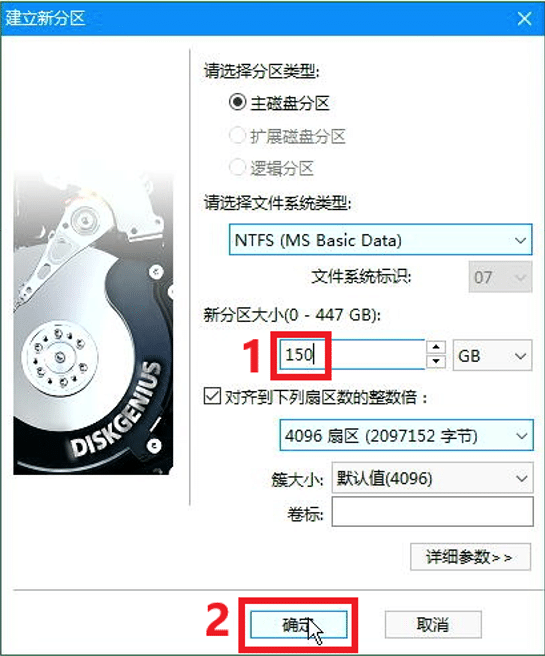
- After delete/format the drive, select the unallocated space and create new partitions.
- Fill in the size for the first partition, normally set 150 GB for C: drive, then click apply.
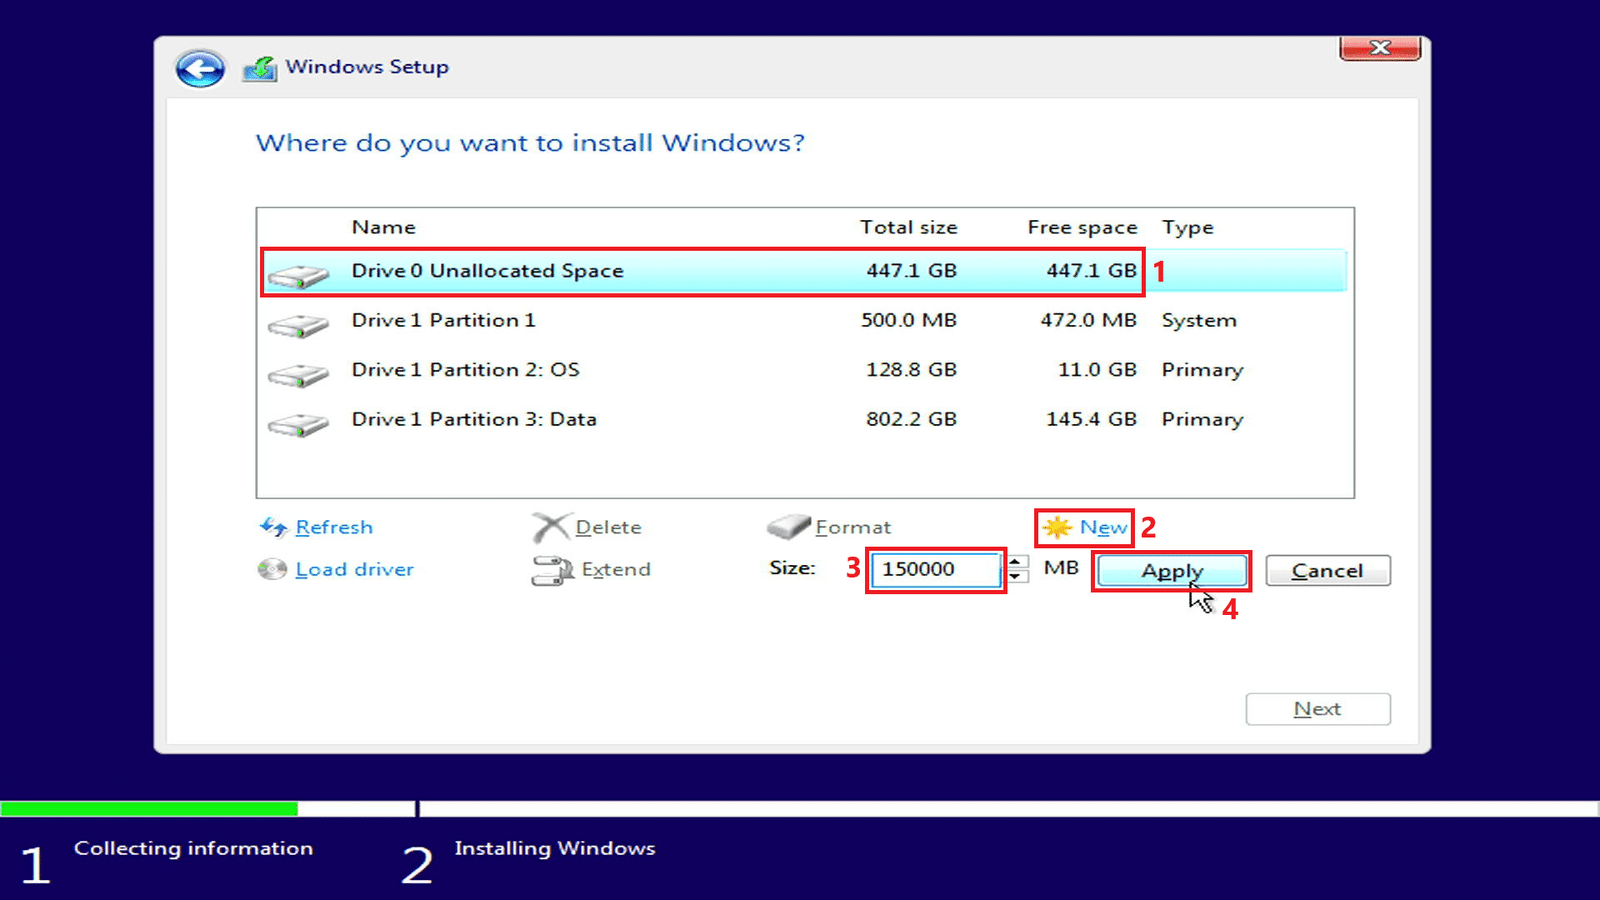
- Continue create new partition for the second unallocated space.
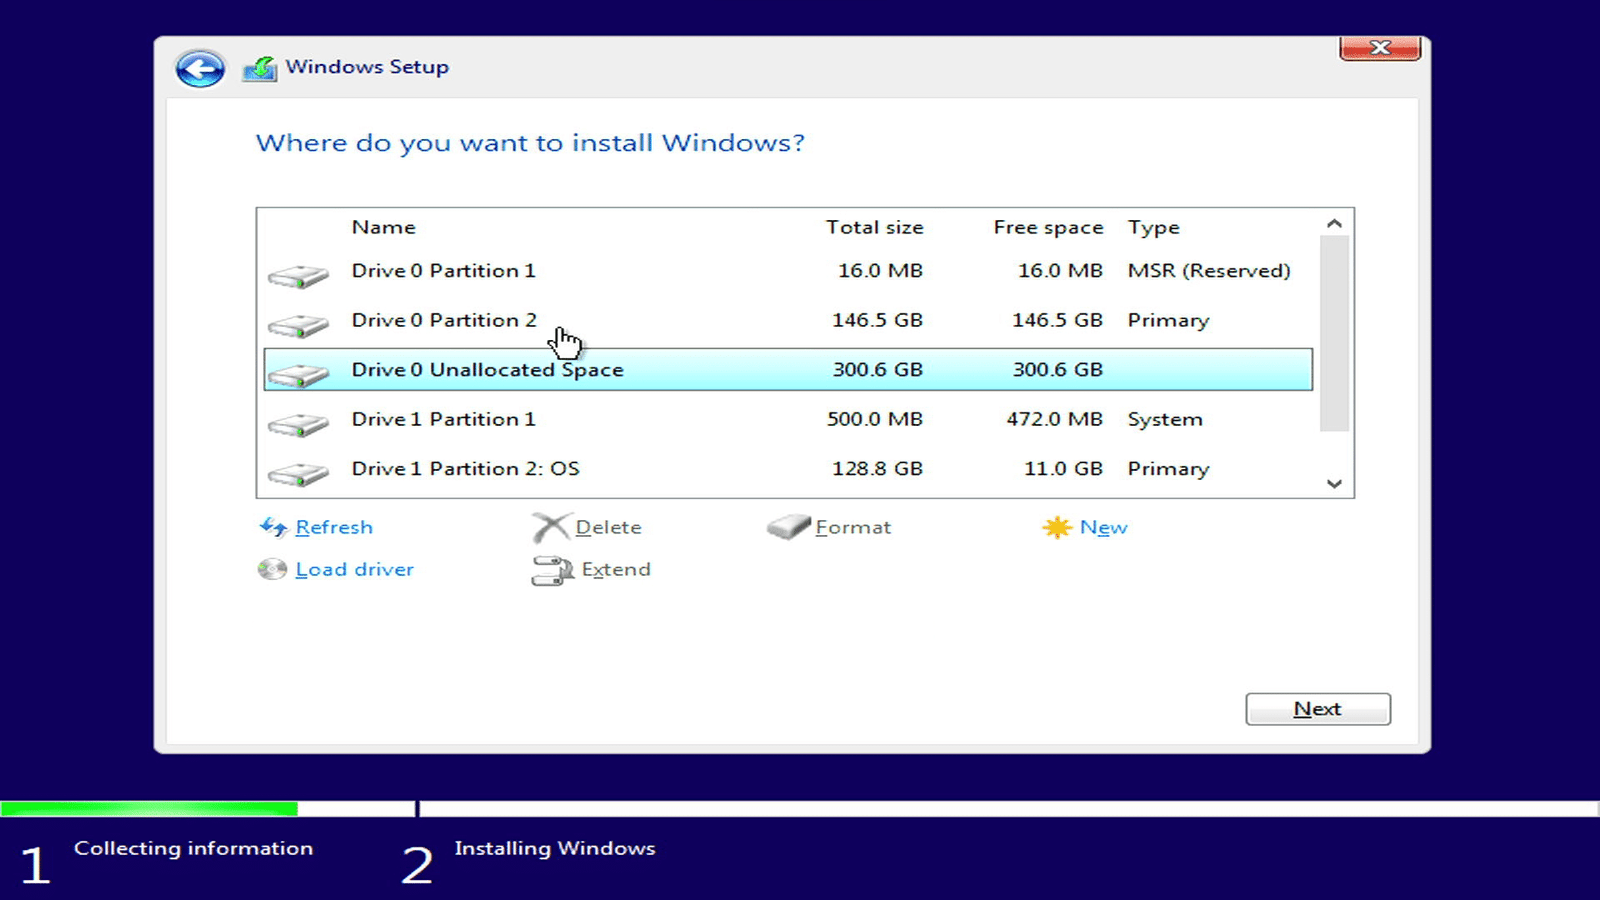
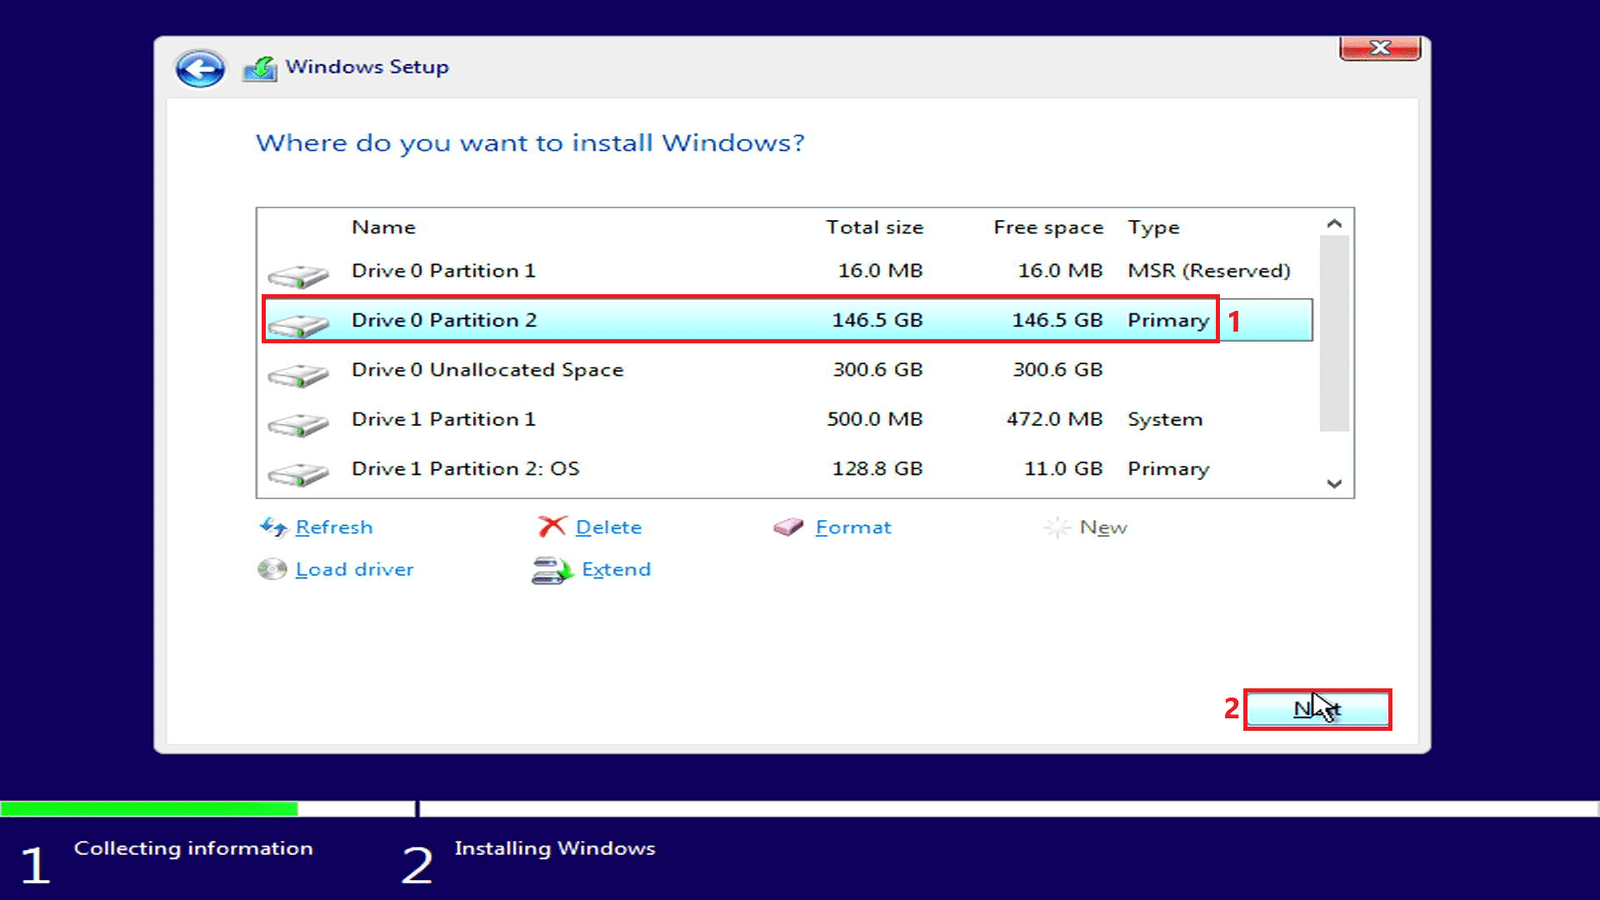
- After done create partitions, select the partition 2 which will be the C: drive and click Next to install the windows.
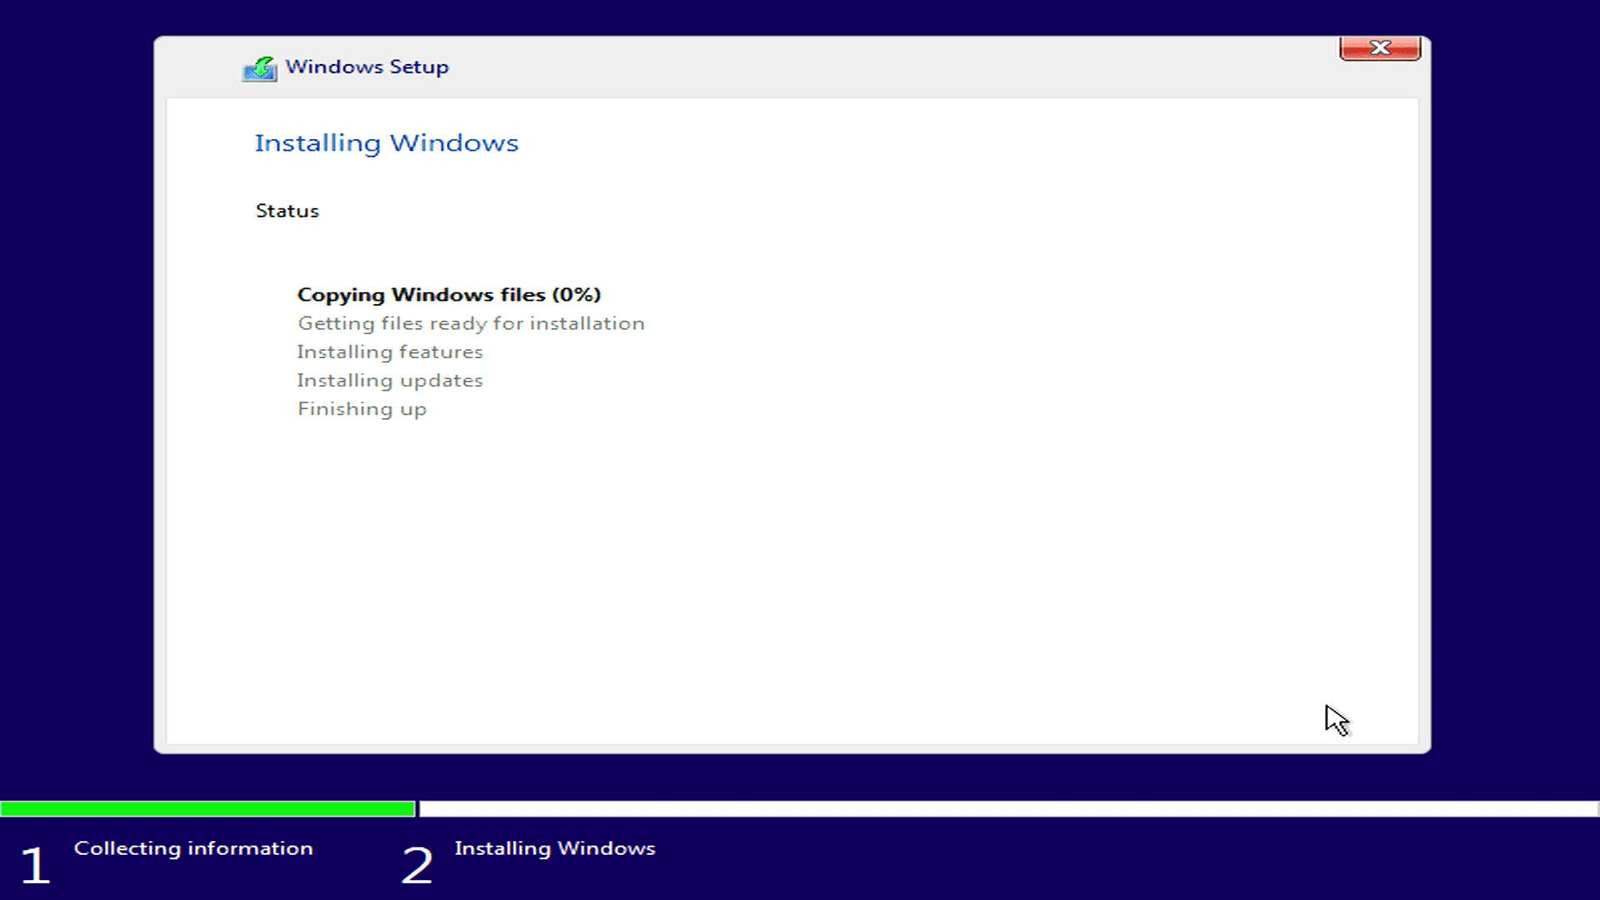
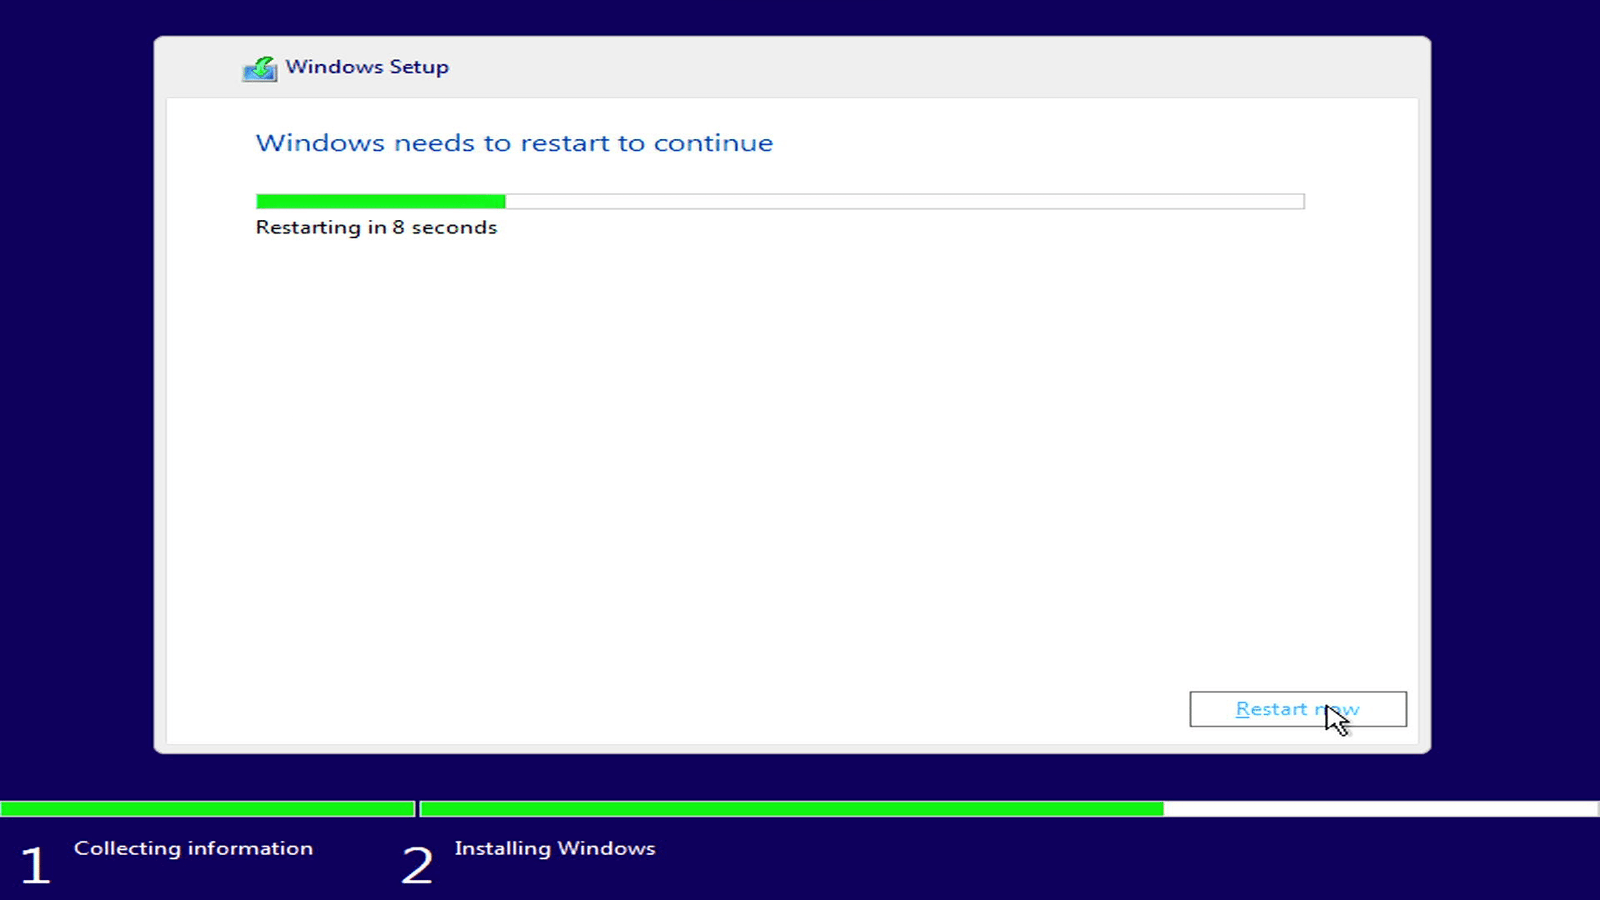
- The windows will now be installing into the drive.
- It may take a long time to install the windows.
1.4 Set Up Windows #
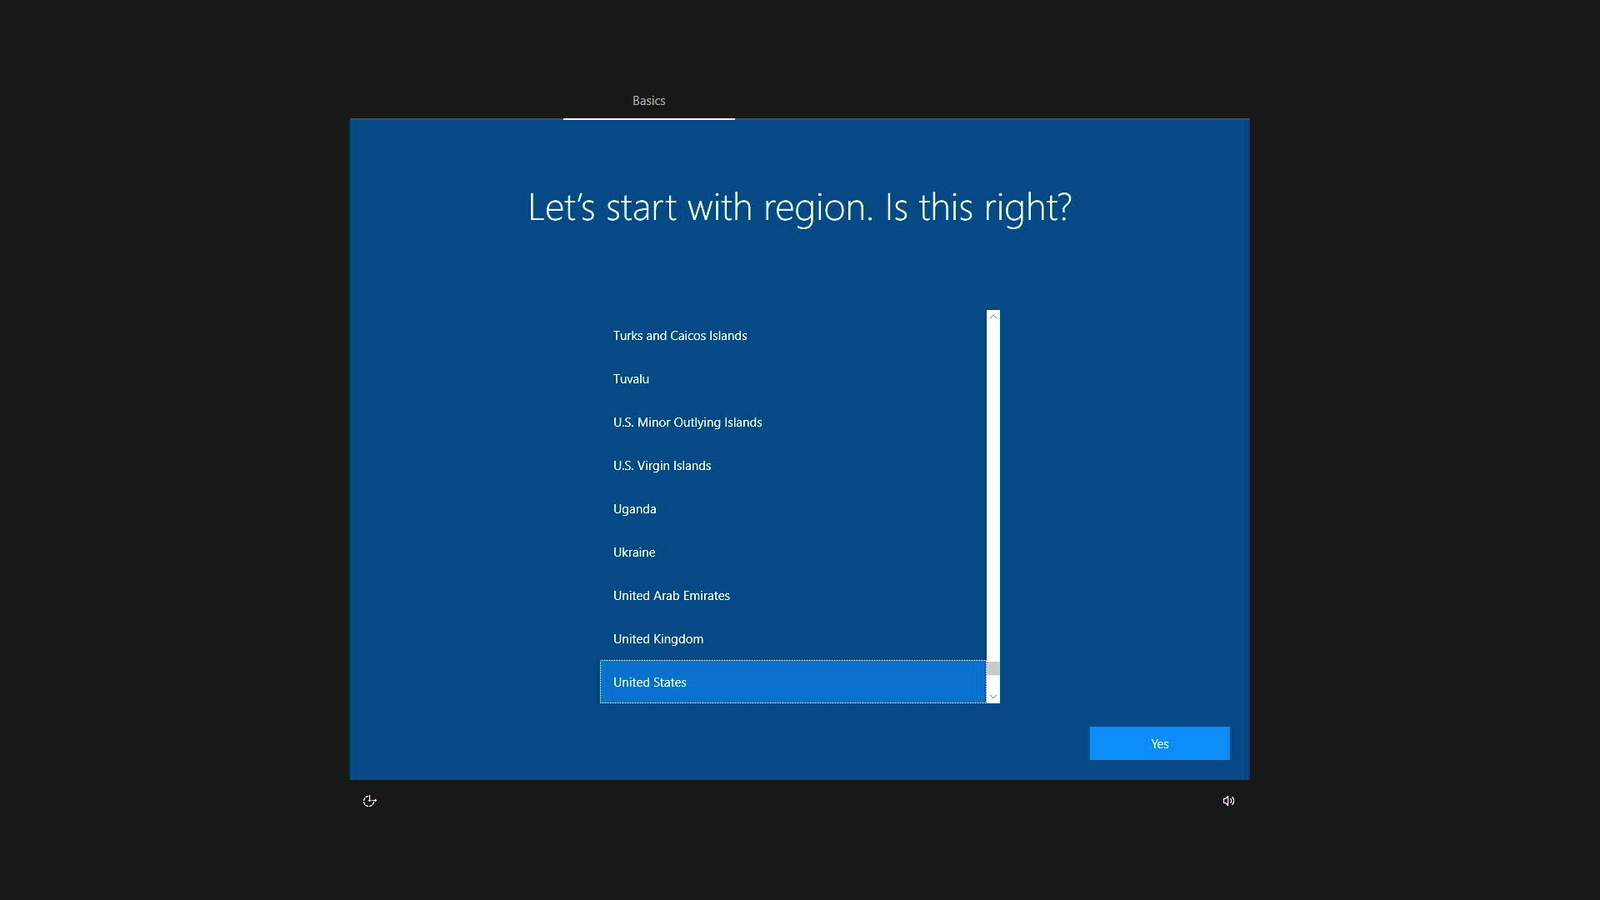
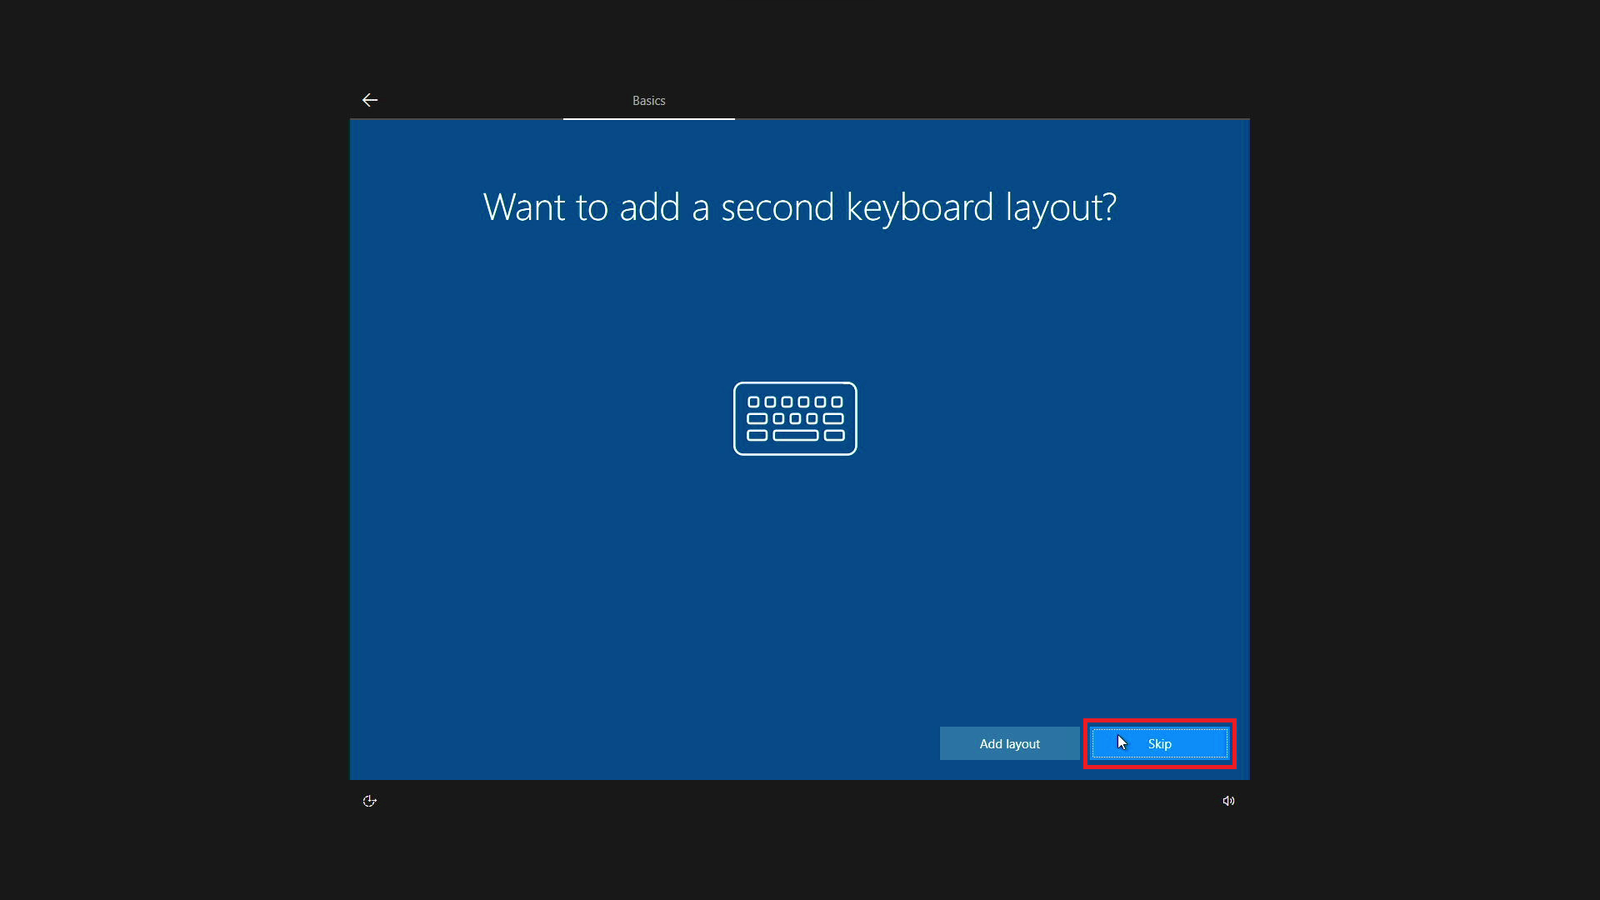
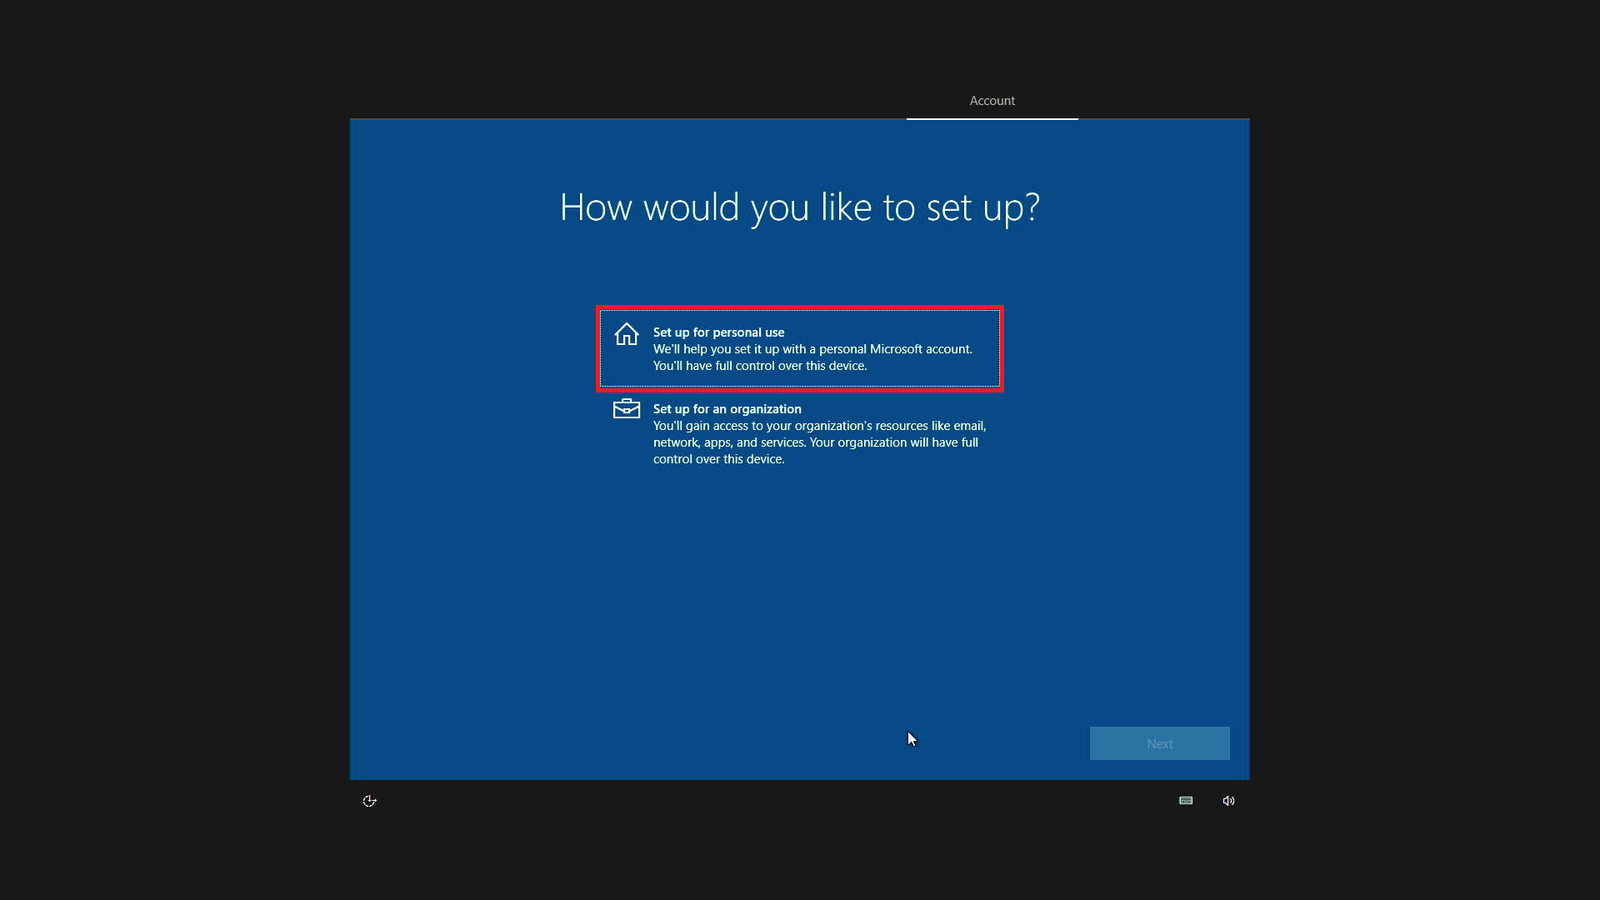
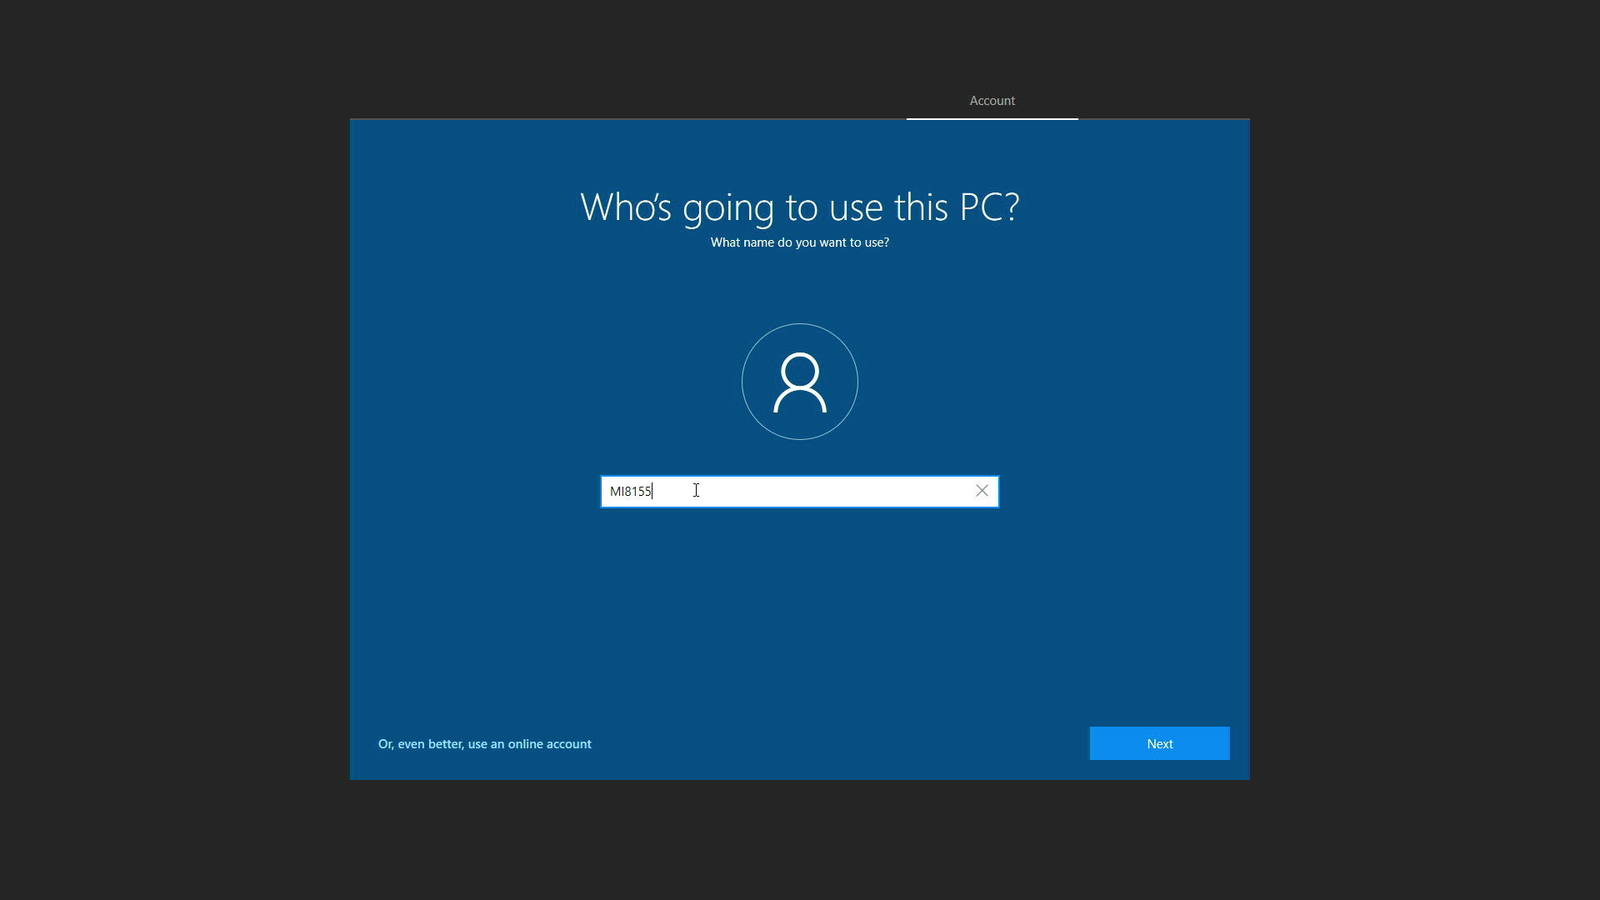
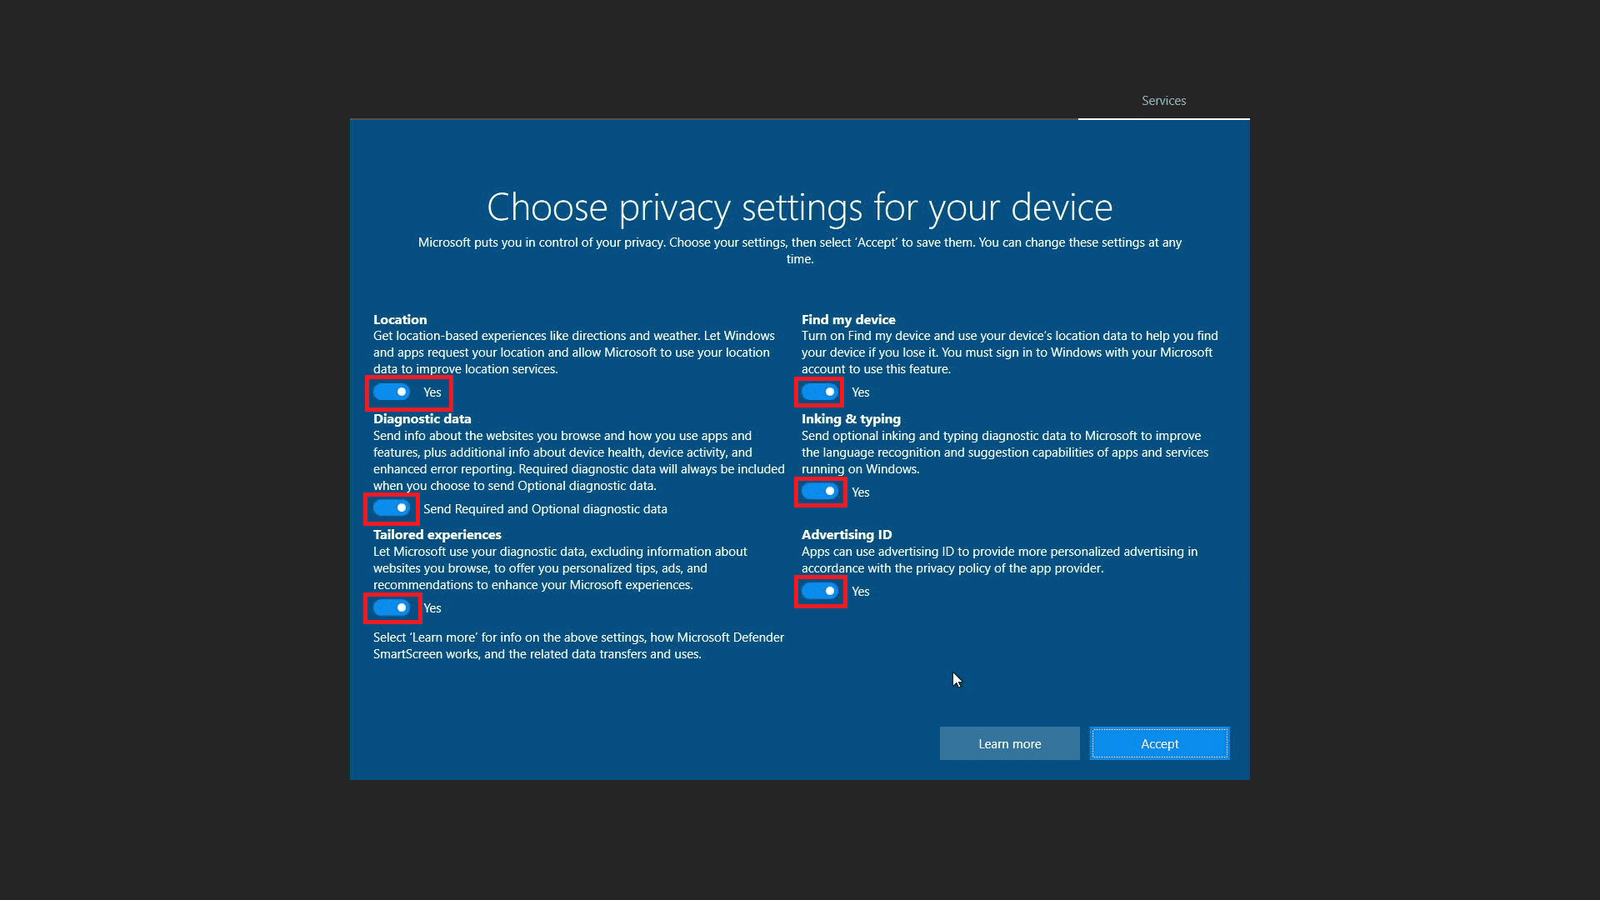
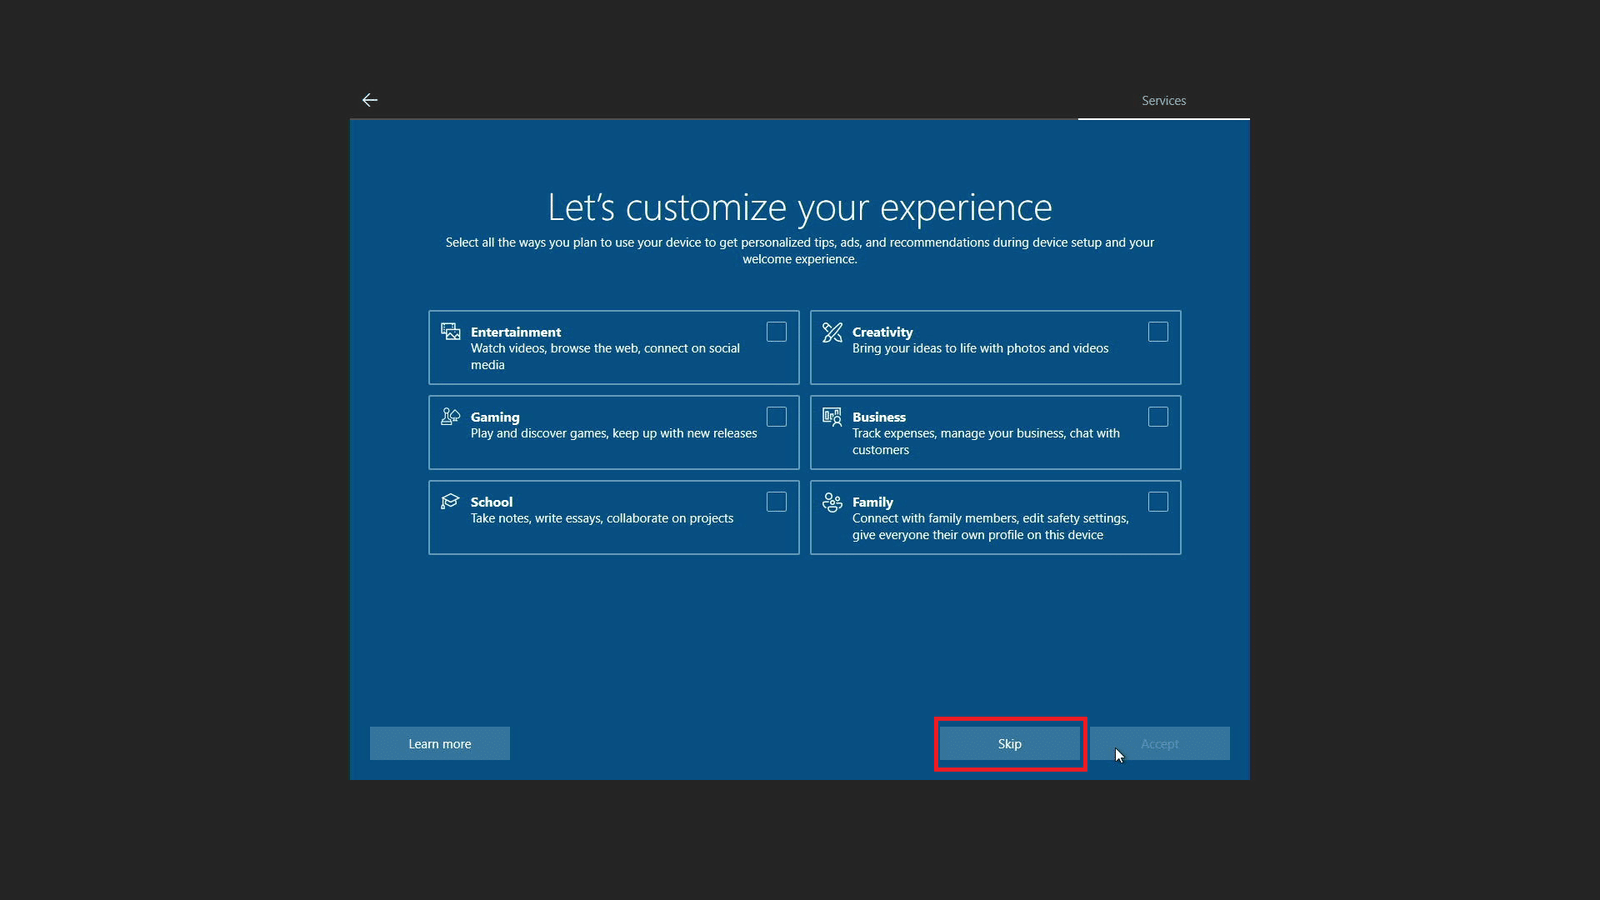
- After done installing the windows, the PC will automatically restart and need to do some normal PC set up, may skip some steps first but select the English US as language and keyboard for easier usage.
Details (Click to expand)

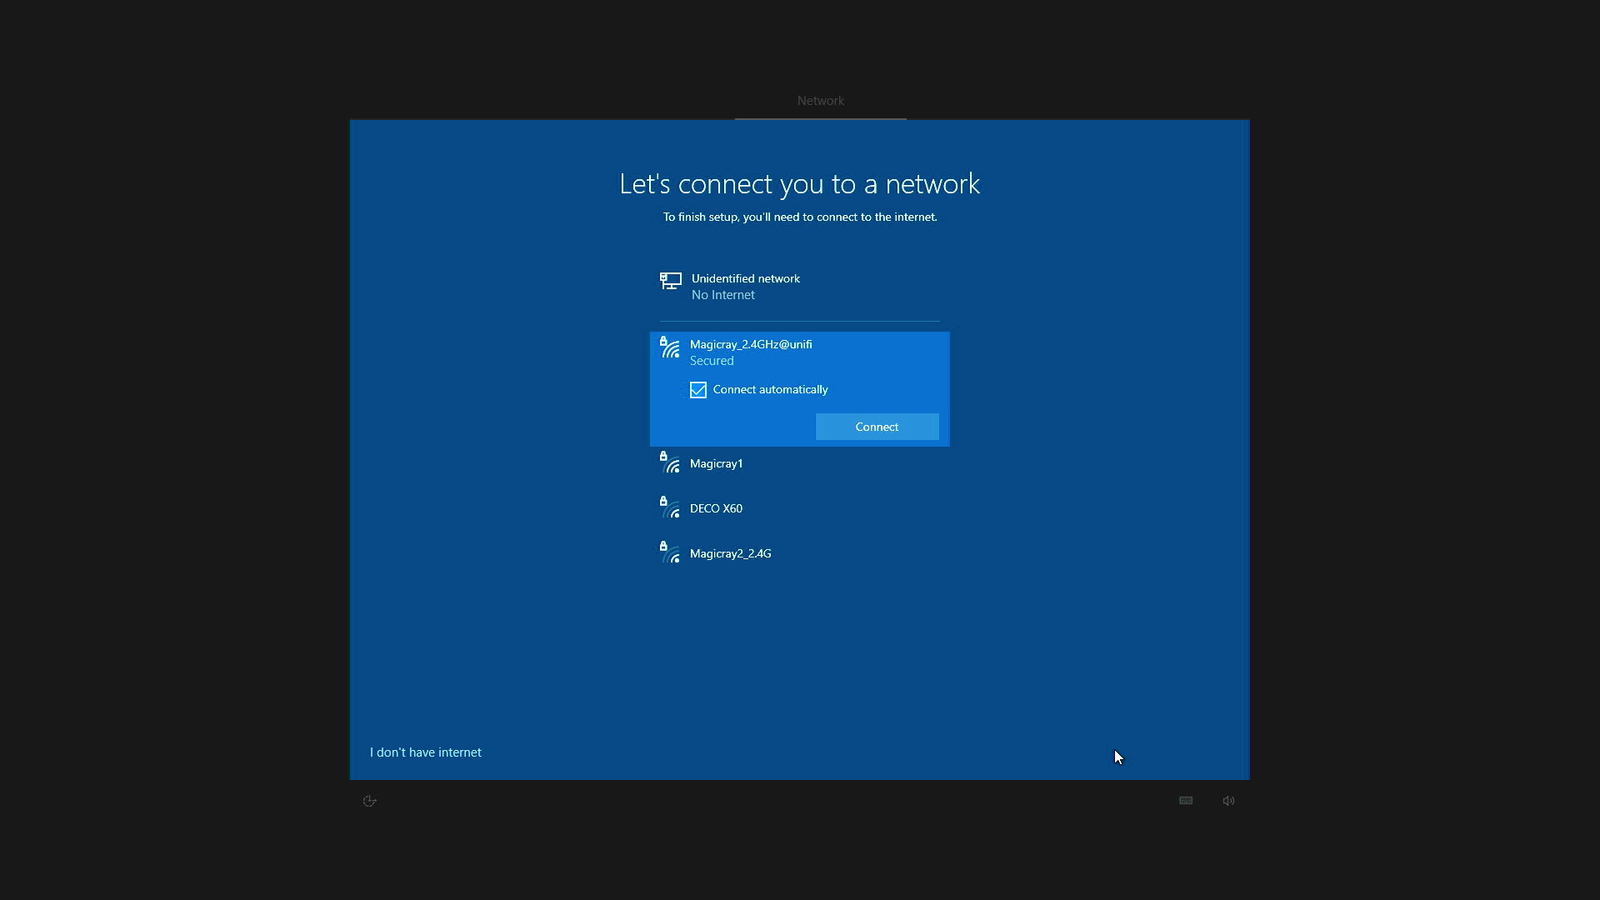
- Connect to WiFi if available
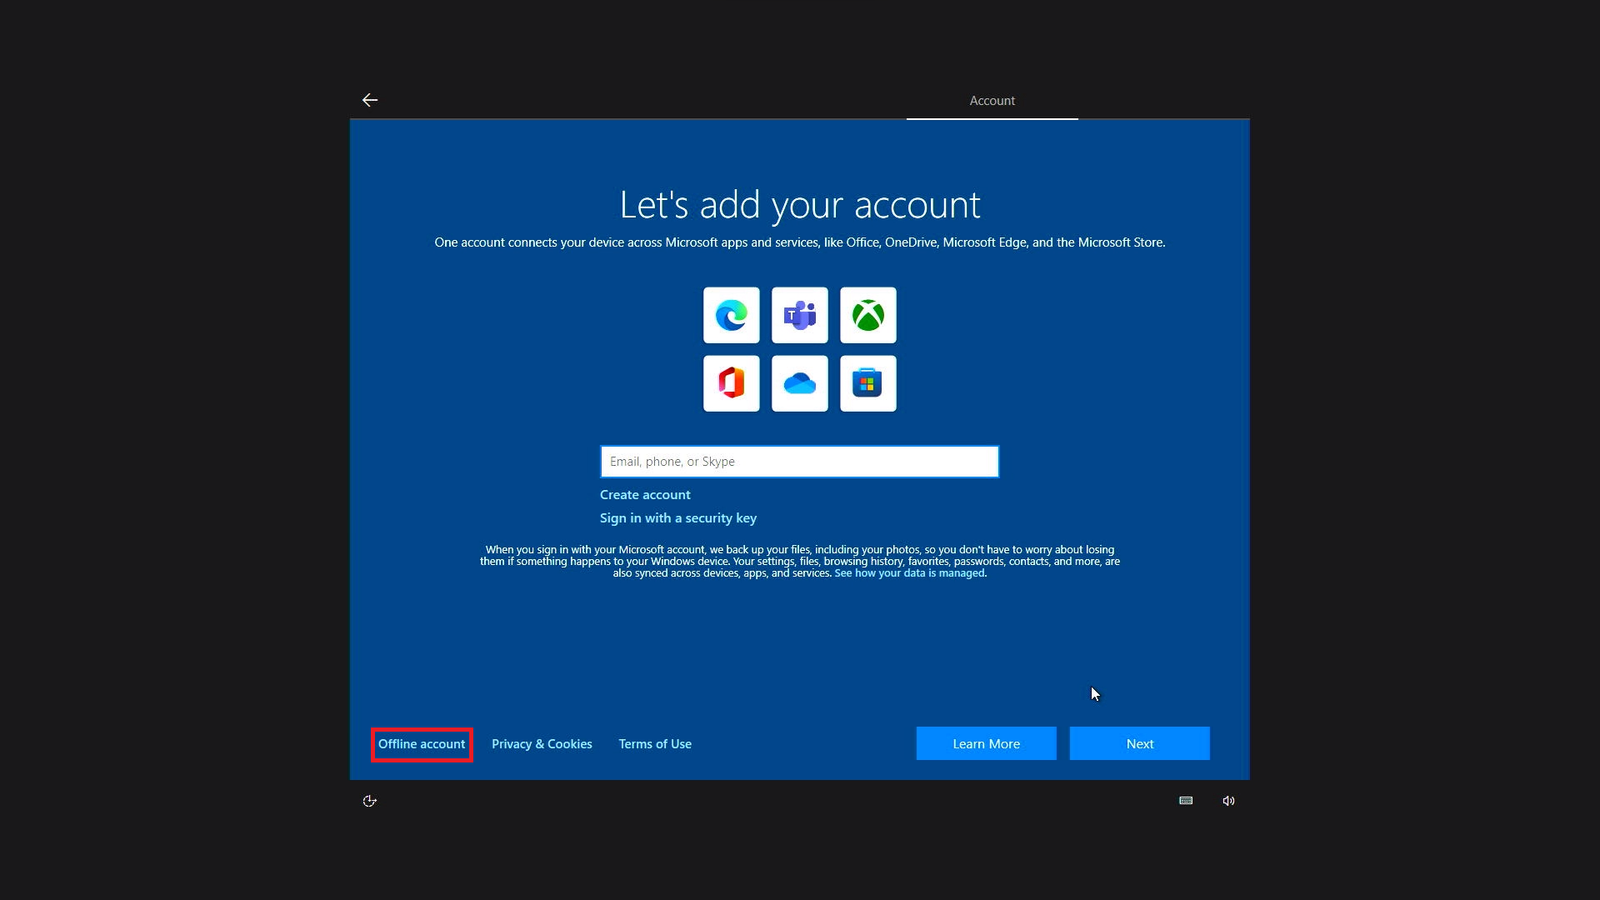
- For PC user name can set the machine serial number as name or any name request by customer.
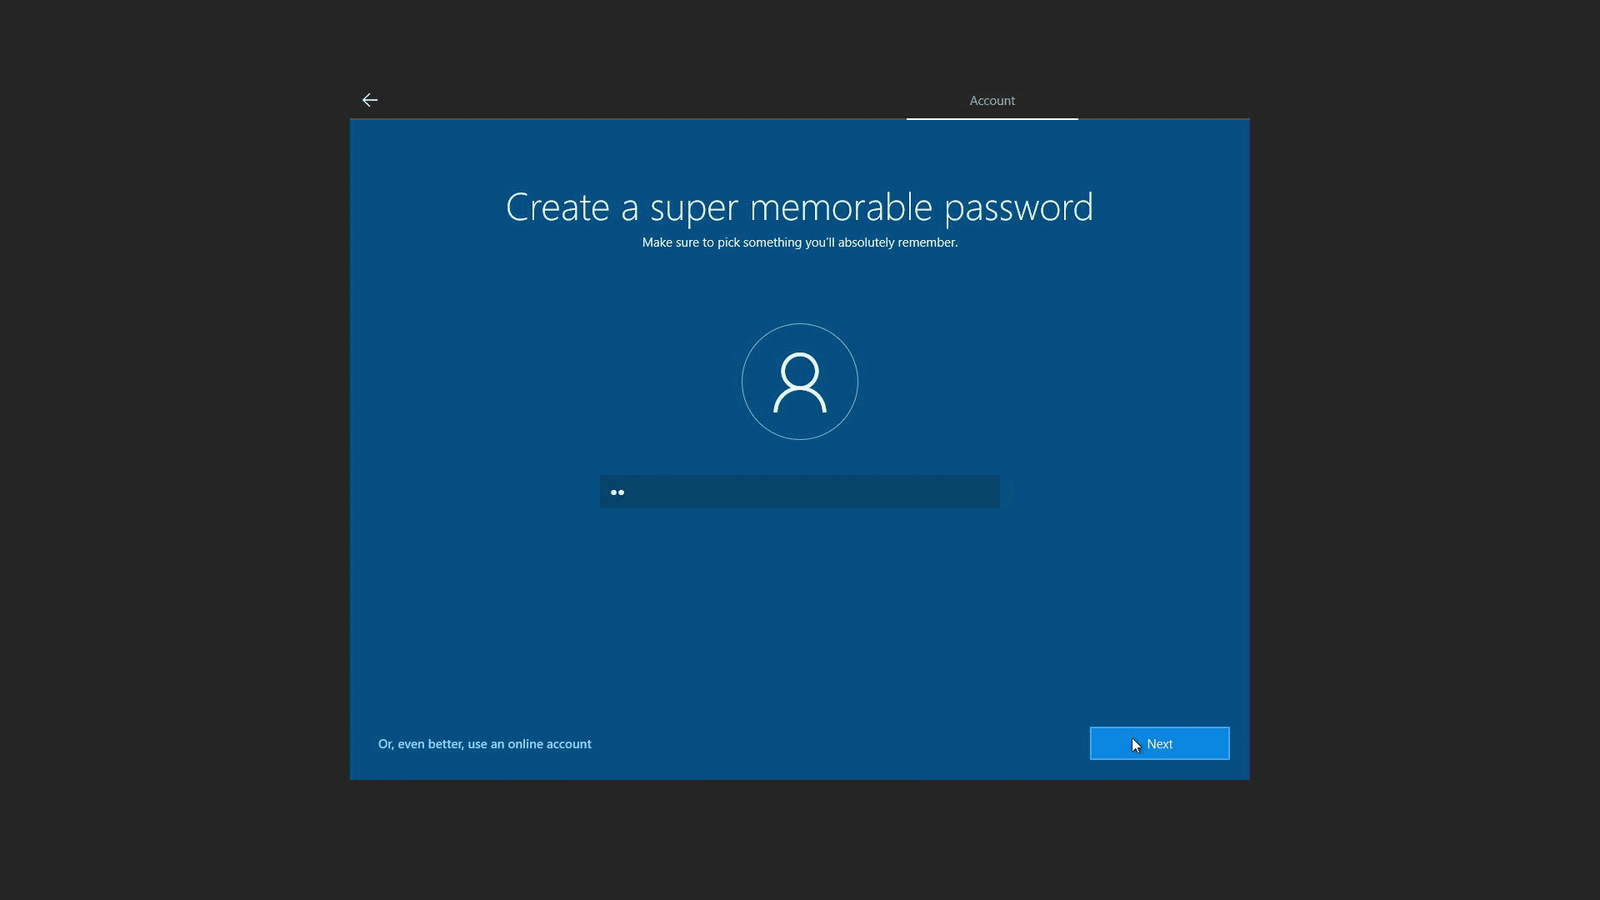
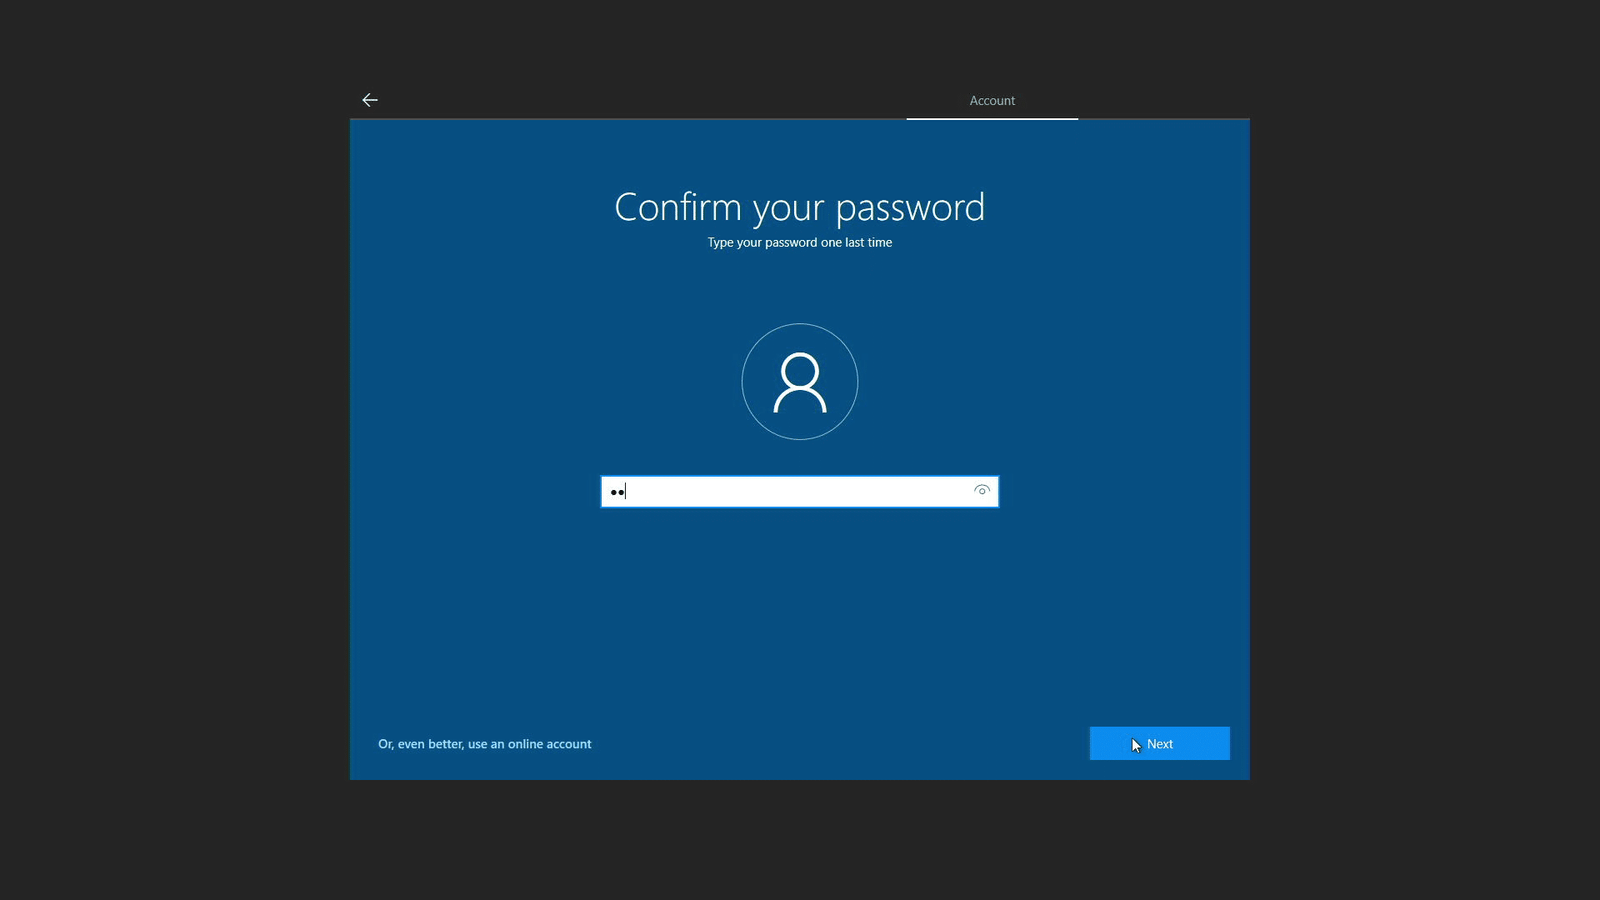
- Password as default set as double space.
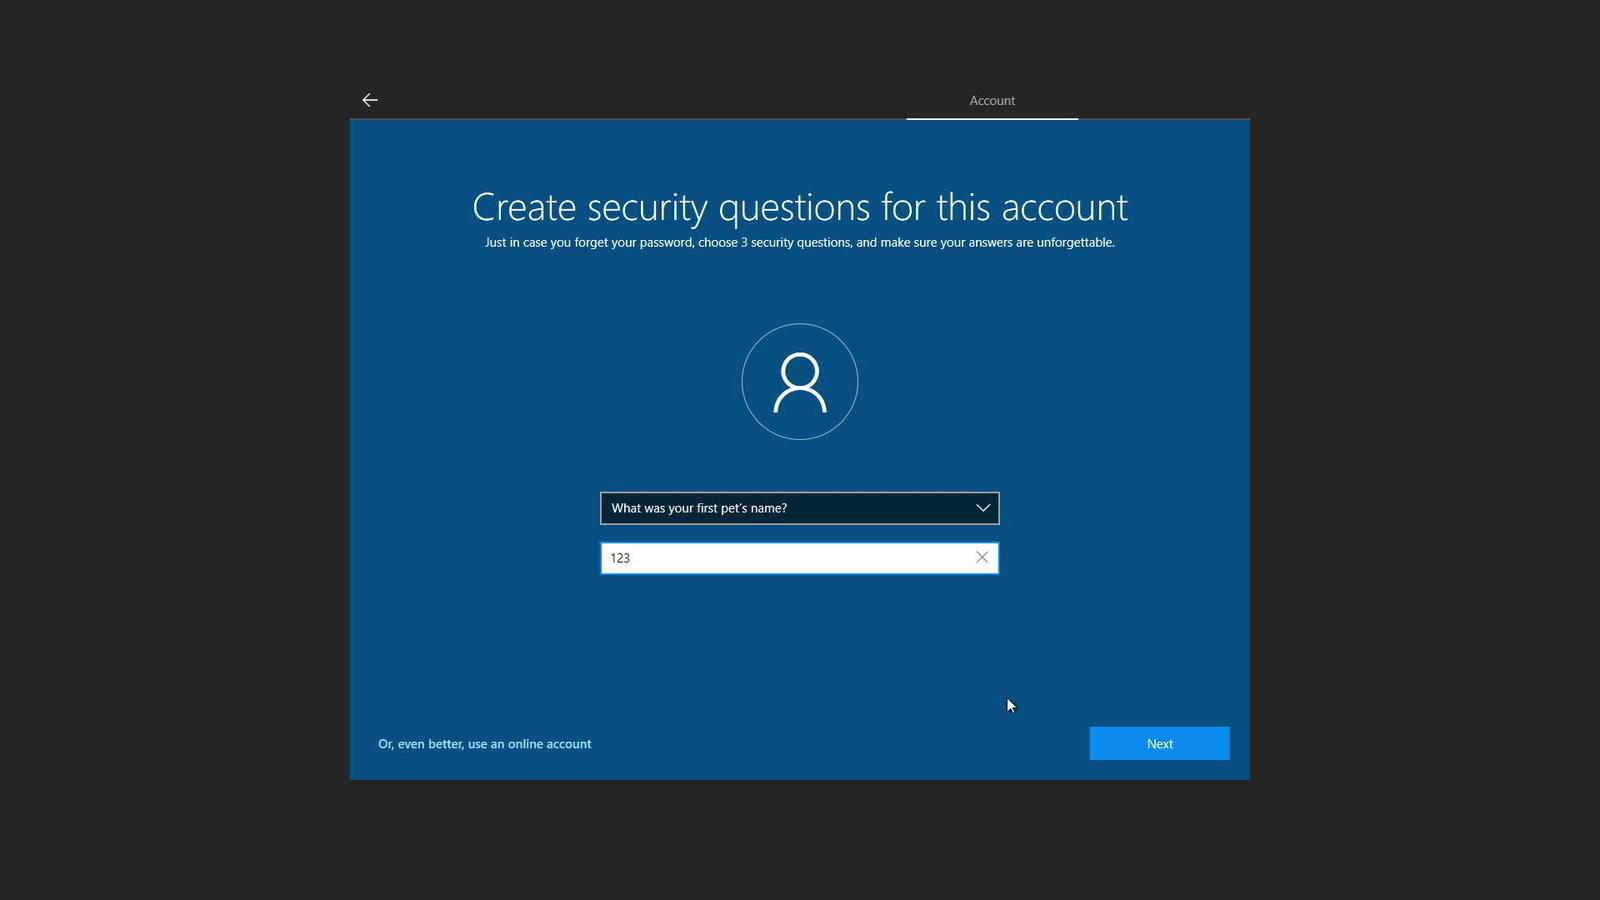
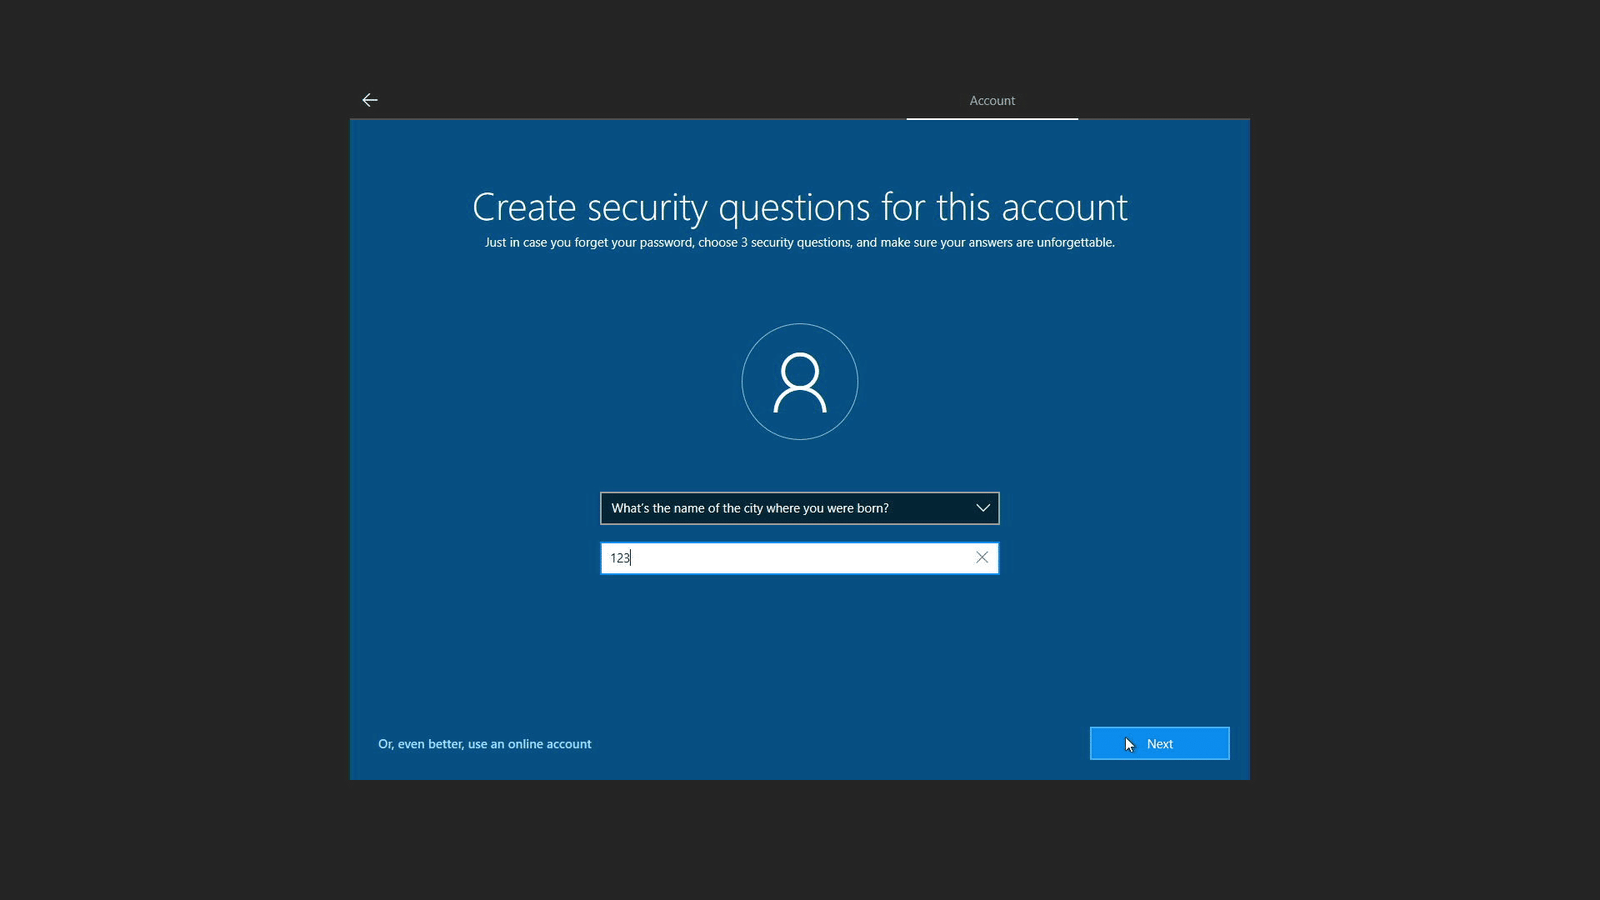
- For security question can select any 3 questions and enter ‘123’ as the answer or can be fill by customer.

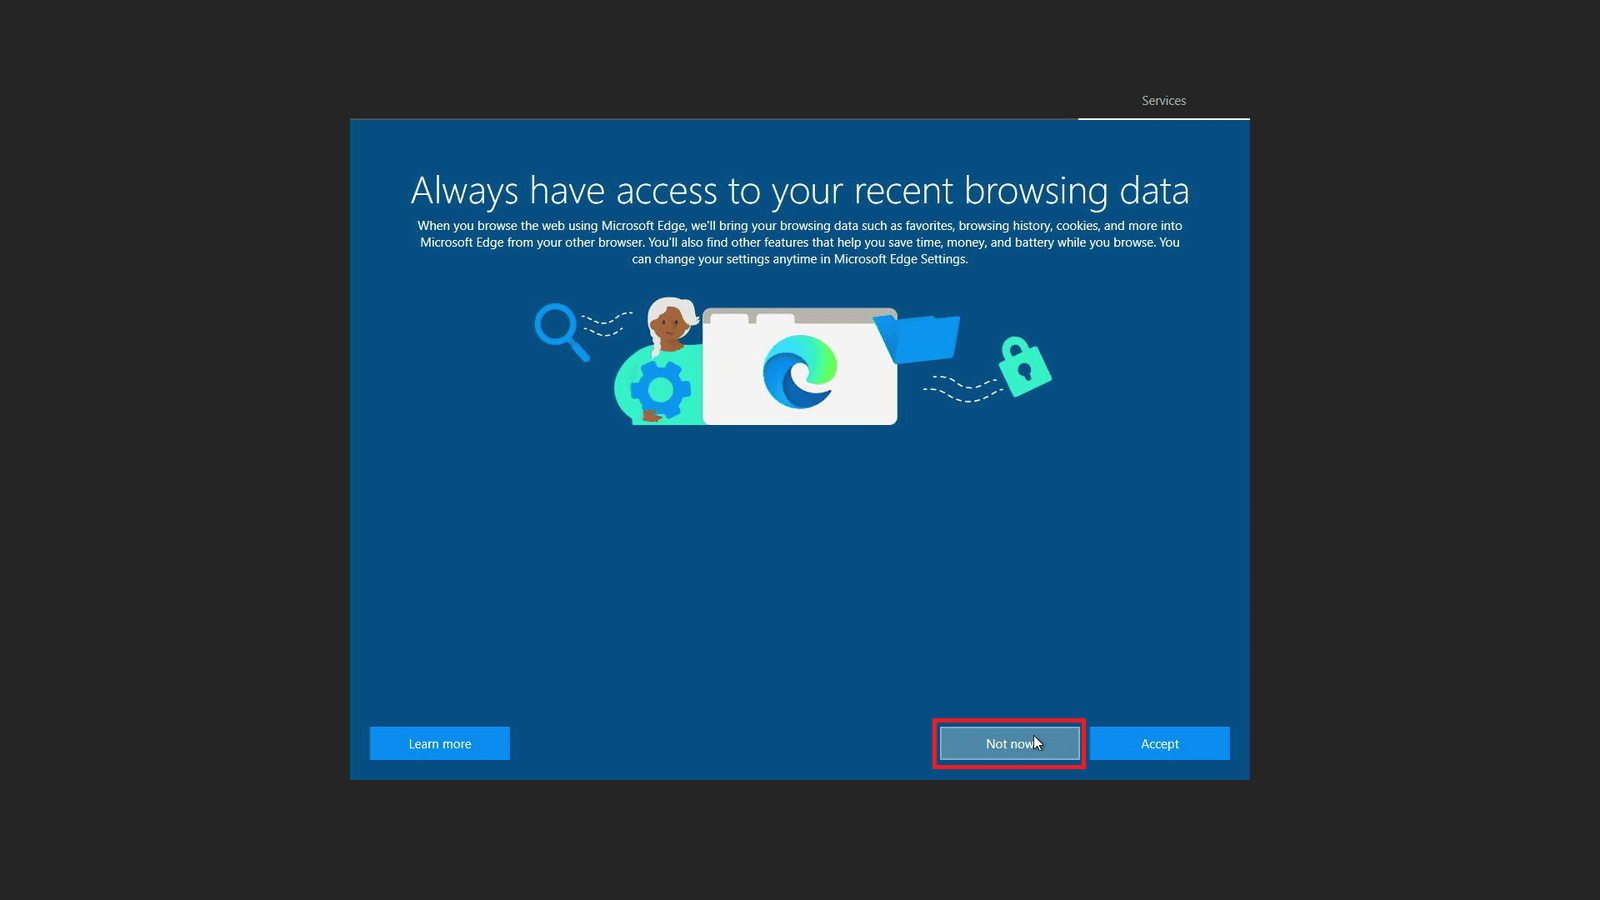
- May close/turn to ‘No‘ for all this option.
- After done, the PC will reboot and enter windows as normal, may login and use the PC.

1.5 Configure Devices & Install Driver #
1.5.1 Before download drivers #
- Do some set up before install drivers.
Details (Click to expand)
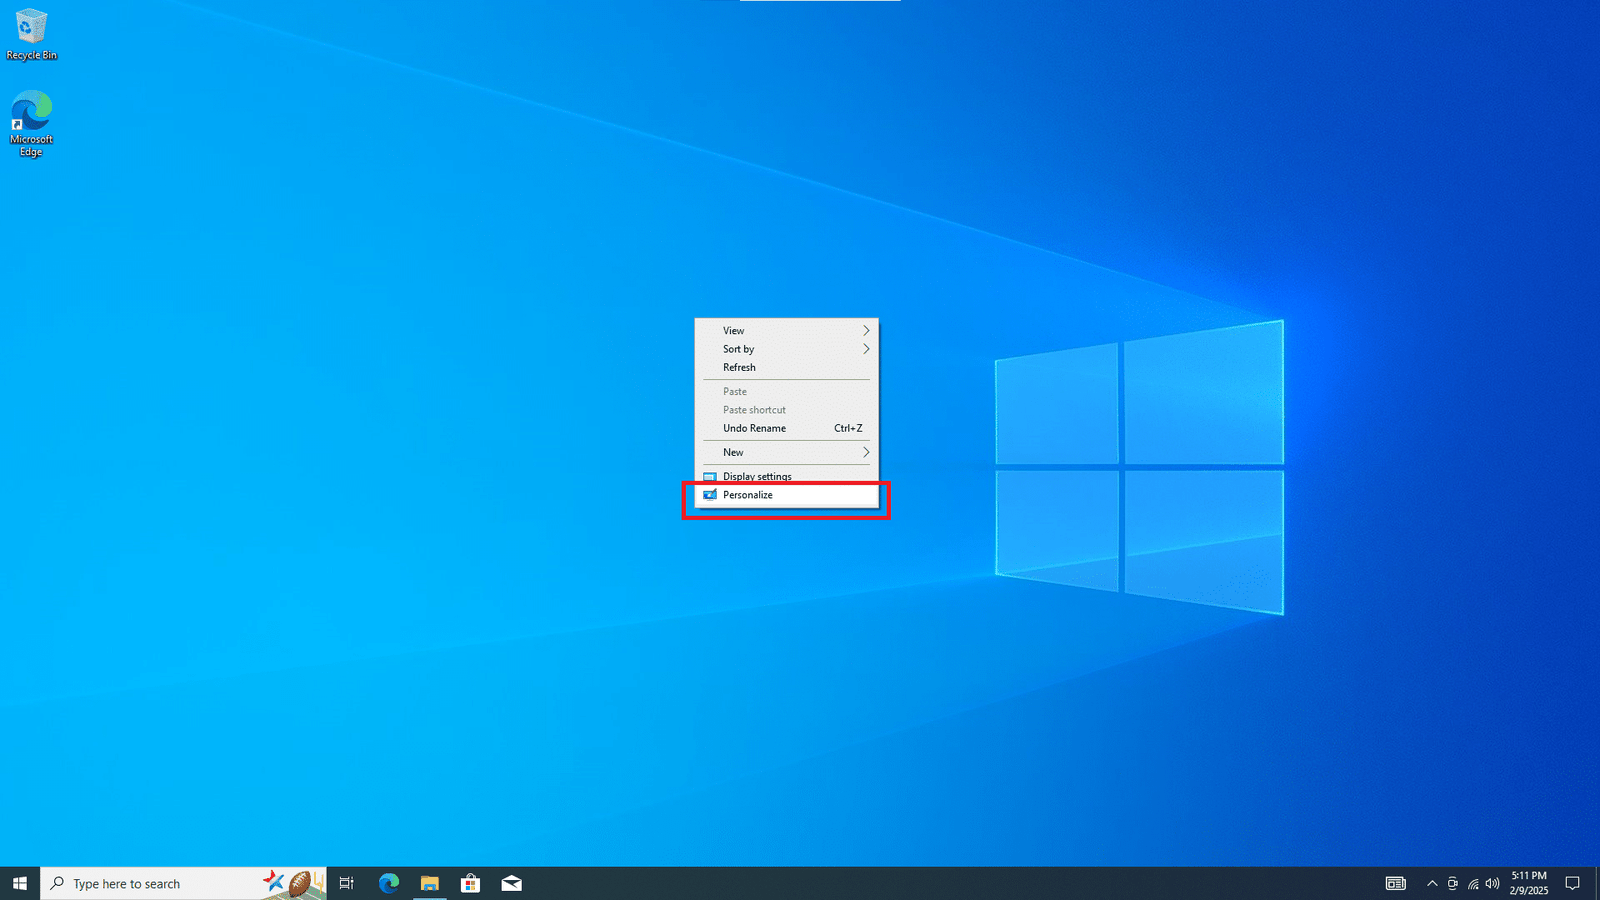
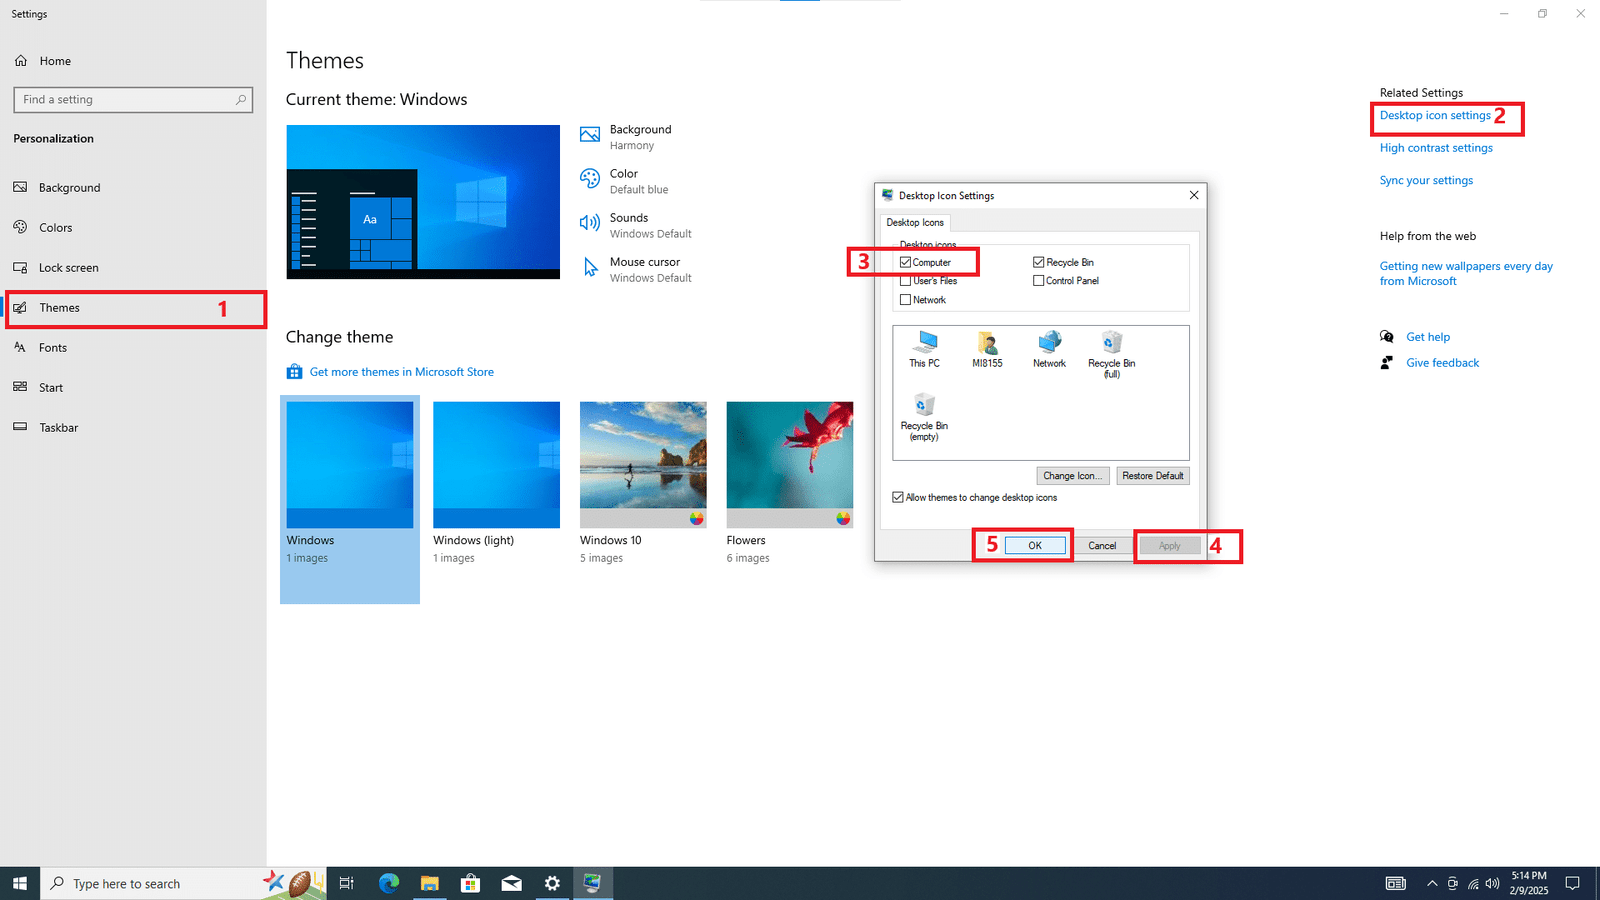
- After login, right click on desktop and select personalize.
- In personalize, follow the steps to generate “This PC” icon.

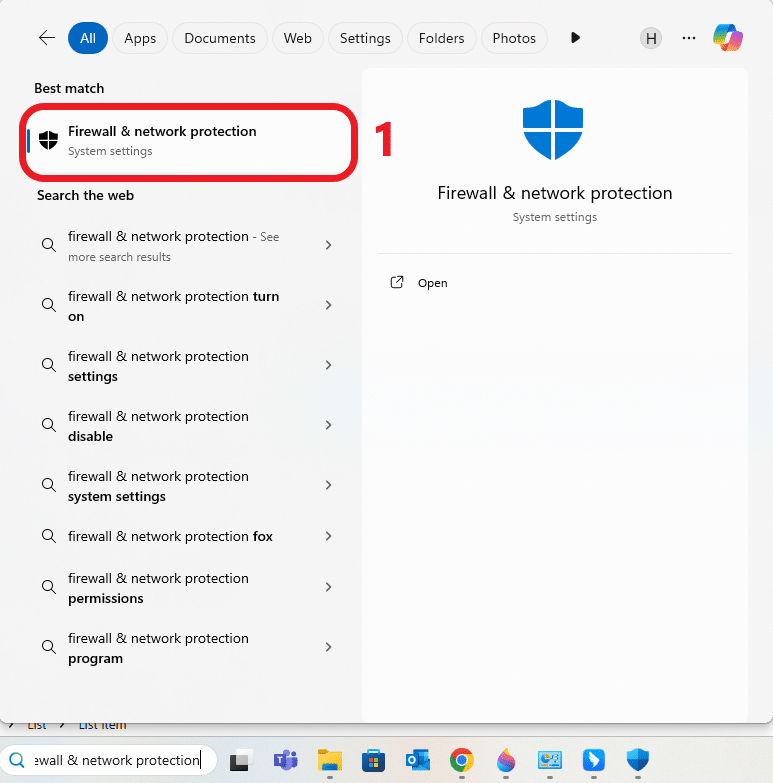
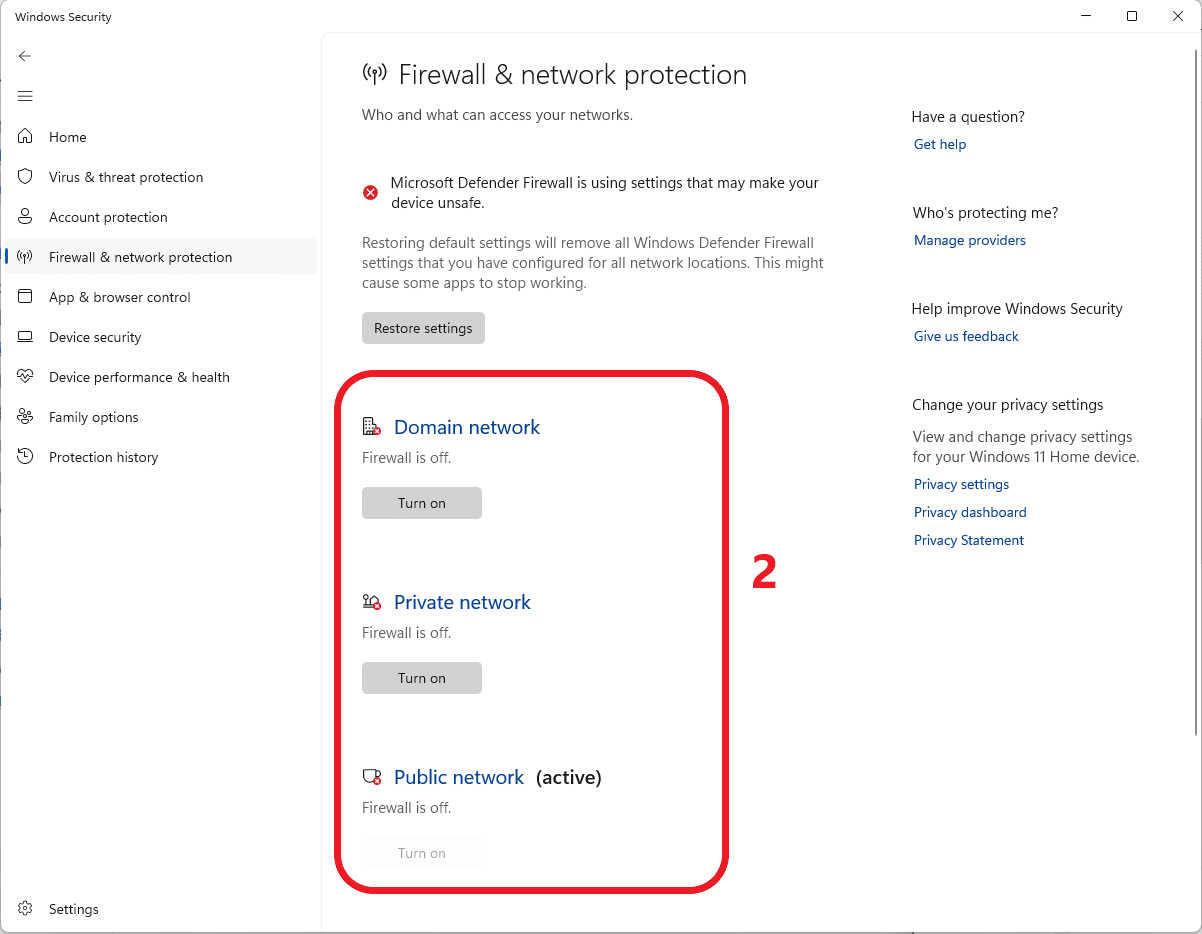
- After that, in setting look for firewall & network protection, turn off / disable firewall.
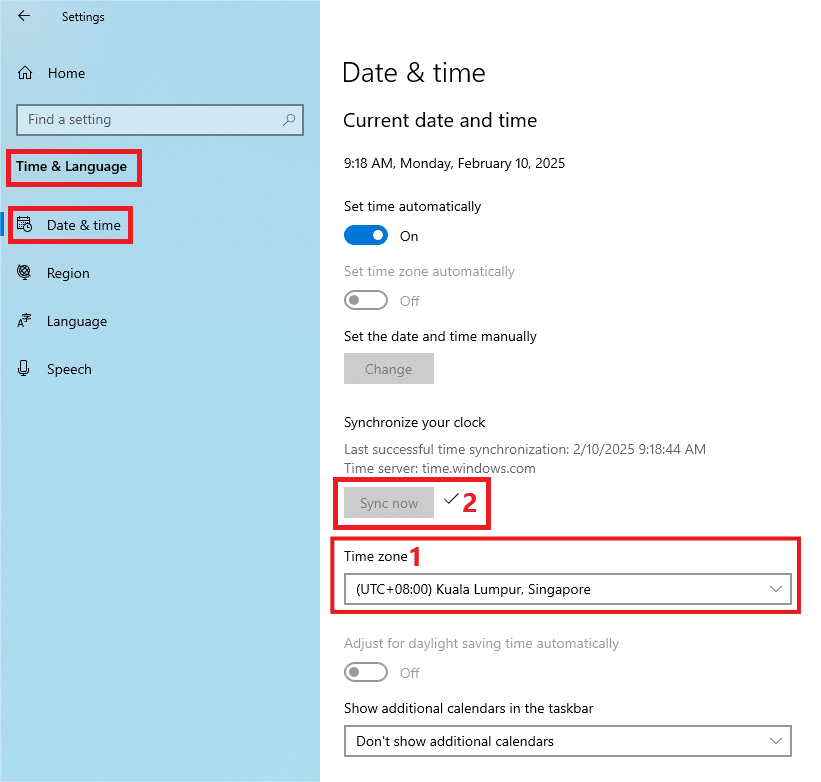
- In setting, Time & language tab> Date & Time > Time zone: set according to location & click sync now.
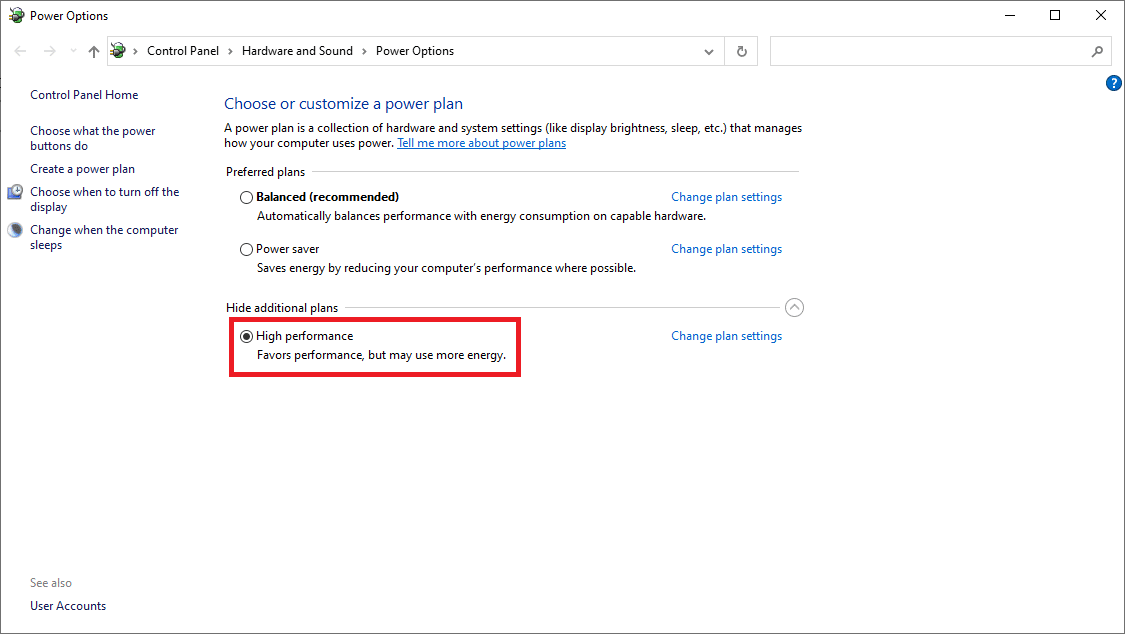
- In system > Power & Sleep tab > set sleep time to NEVER, then continue by click on additional power setting.
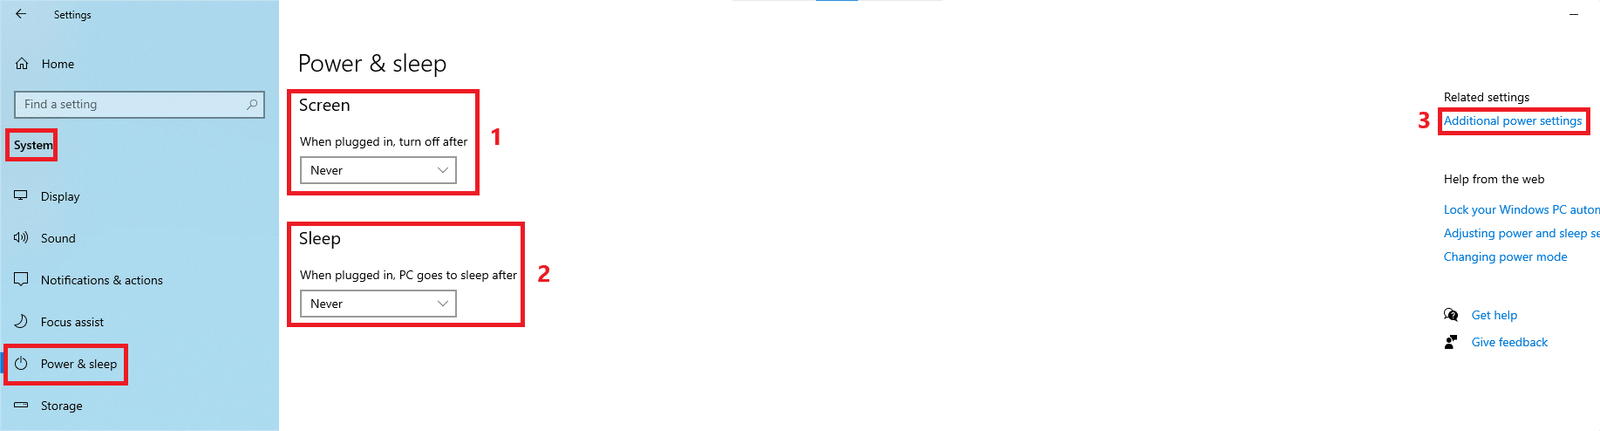
- Set the the power plan to High Performance.
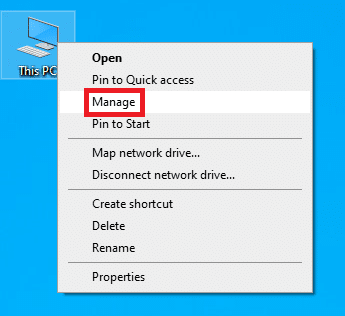
- After that, right click on ‘This PC’ > Manage > Open disk management, check and configure the disk name/label.
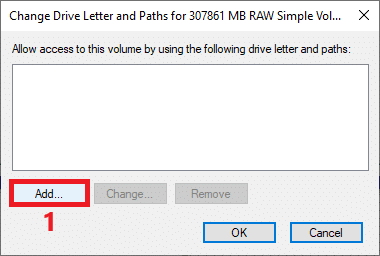
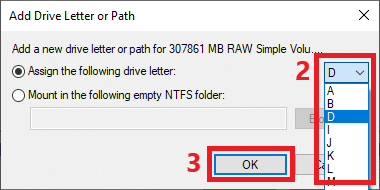
- Right click on the disk to change/assign their drive letter.
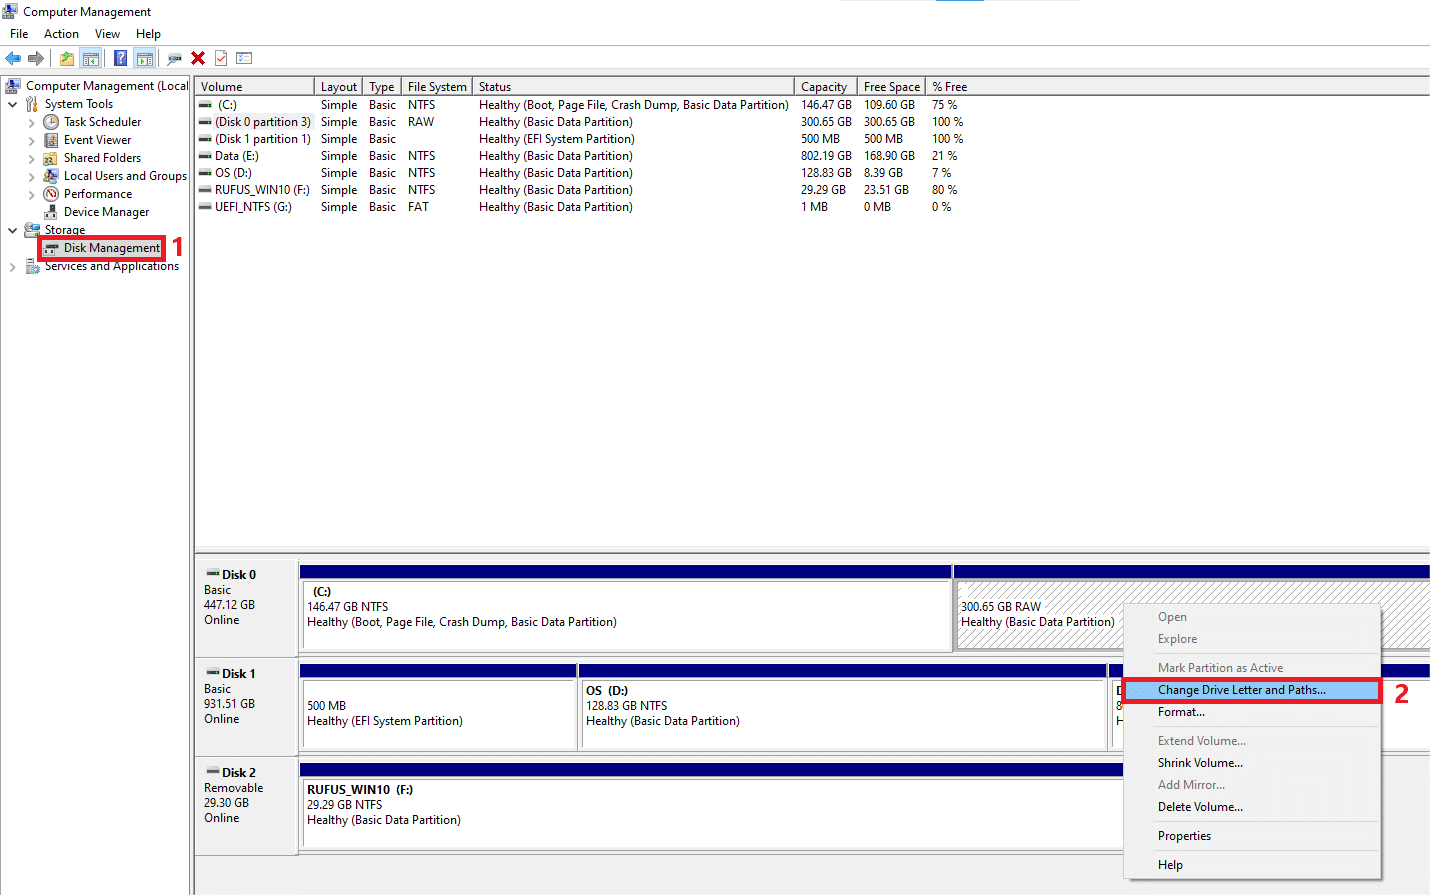
- Follow these steps to assign letter.
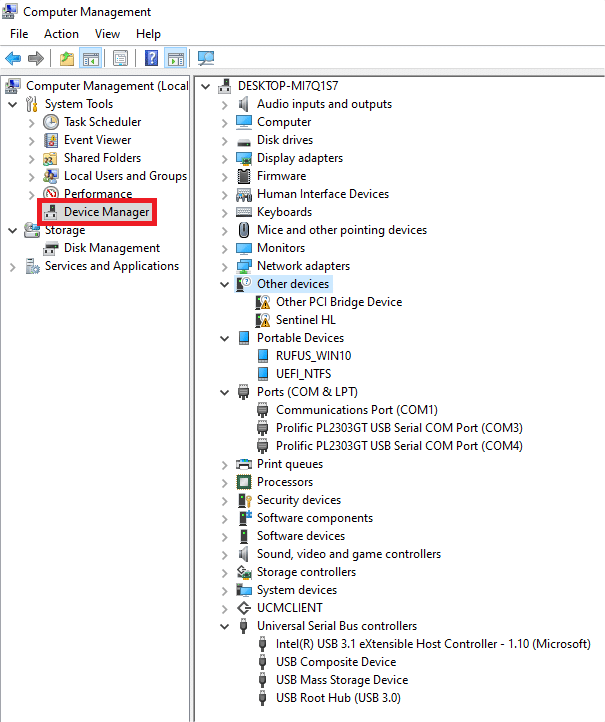
- Lastly, open device manager, check port & install needed driver.
1.5.2 Download & install drivers #
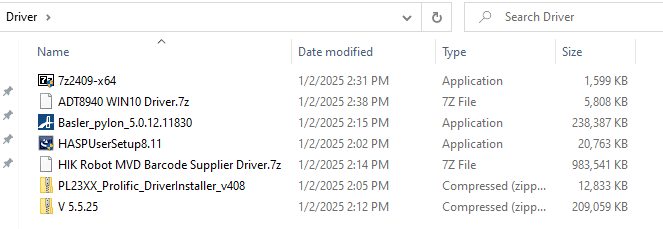
- There are several drivers needed so that the machine can function normally.
- Can be found in magicray-support website.
- Can prepare early by download/copy to pendrive.
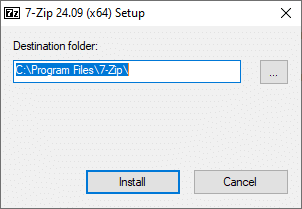
1.5.2.1 Install 7 Zip Driver #
- This driver is use to compress or extract 7 Zip File.
- Launch the software to install driver.

Details (Click to expand)
- Simply click install & installation is done.

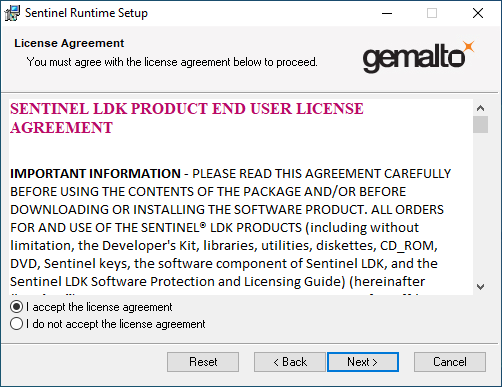
1.5.2.2 Install Dongle key Driver #
- This driver is use to decode and enable the dongle key to be readable.
- Launch the software.

Details (Click to expand)
- Simply proceed with next button and accept the license agreement to install driver.

1.5.2.3 Install Barcode Driver #
- This is a barcode supplier driver, make sure install to enable the HIK key to be readable.
- In the driver folder, there are some photos showing steps that need to follow.
- Install the driver by launching the software in order of step 1 then step 2.


Details (Click to expand)
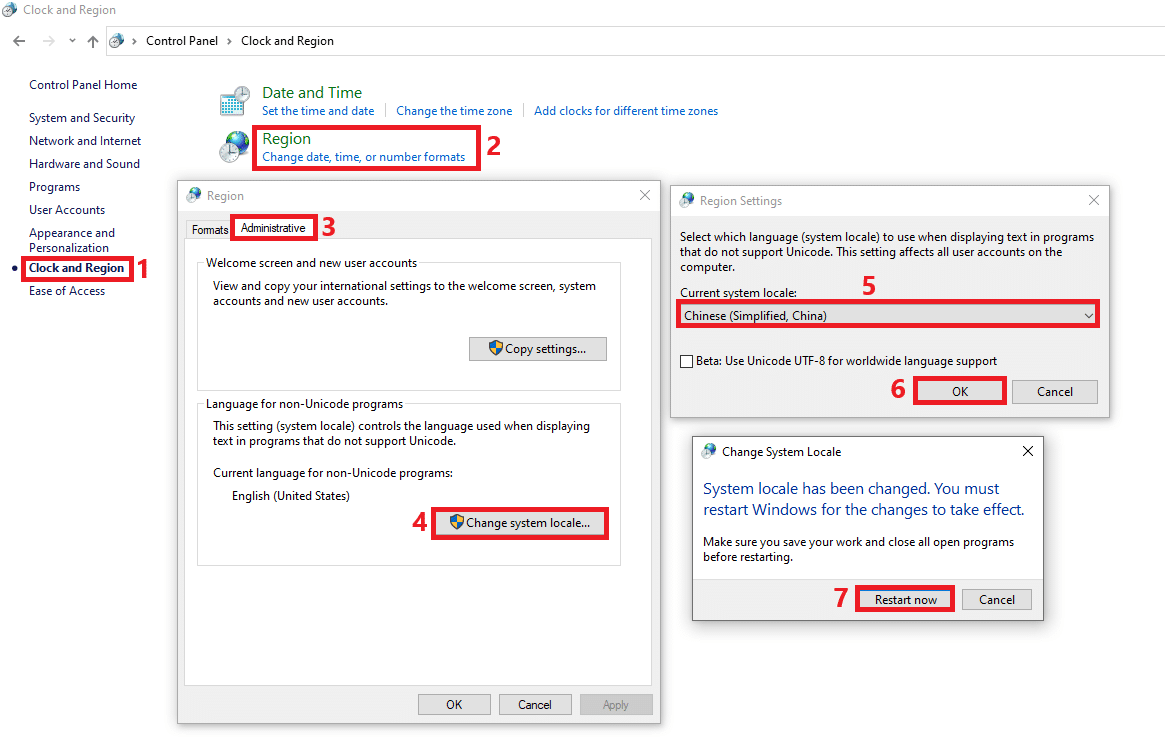
- In control panel, change the non-Unicode language to Chinese if the software is in garbled text by following the steps below.
- ‘Step 1’ application installation guide.

- ‘Step 2’ application installation guide.

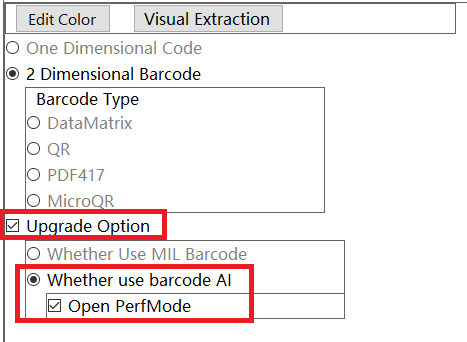
- After install, in AOI software need to enable the following option to use the barcode reader.
1.5.2.4 Install USB to RS232 adapter Driver #
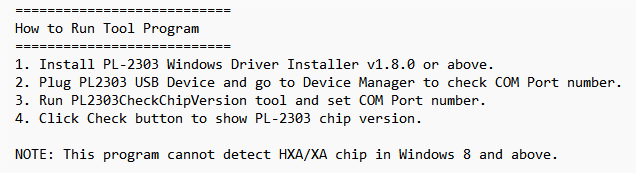
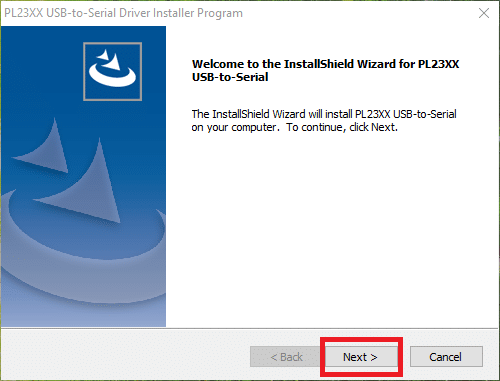
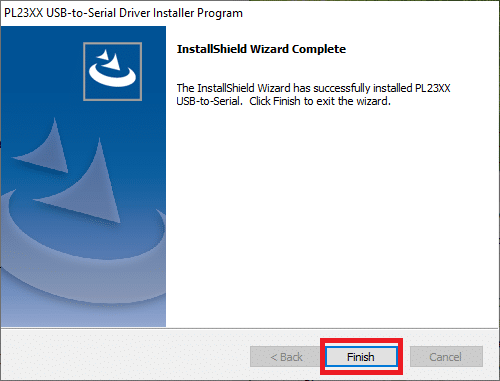
- This driver use to enable connection between USB to RS232 adapter/converter.
- You may found some installation guide in the driver folder.
- Can manual install/automatic install through windows update if internet connection is available.

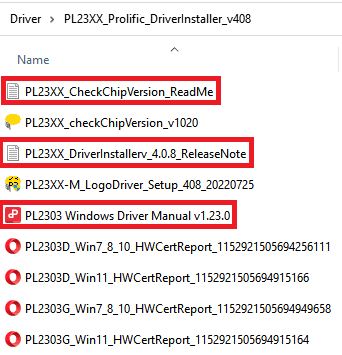
Details (Click to expand)
- Check Chip Version application is simply use to check the version of chip use by the adapter.


- Driver installer


Refer to PL23XX Windows Driver User’s Manual for more details (click to expand).
1.5.2.5 Install Motion Card Driver #
- This driver is use to enable controls of the mechanical part in machine.
- The installation steps will be different from other drivers, follow the steps below to install.

Details (Click to expand)
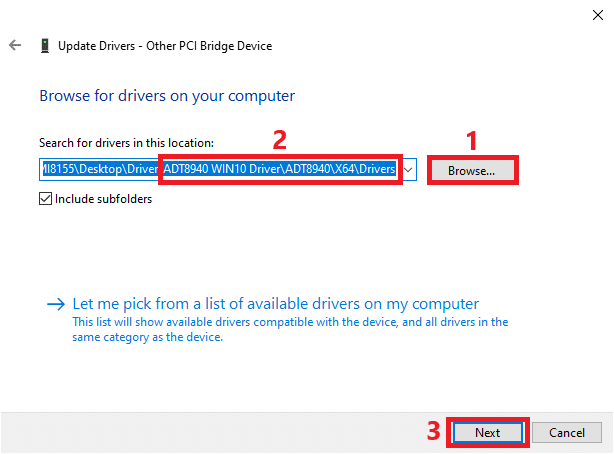
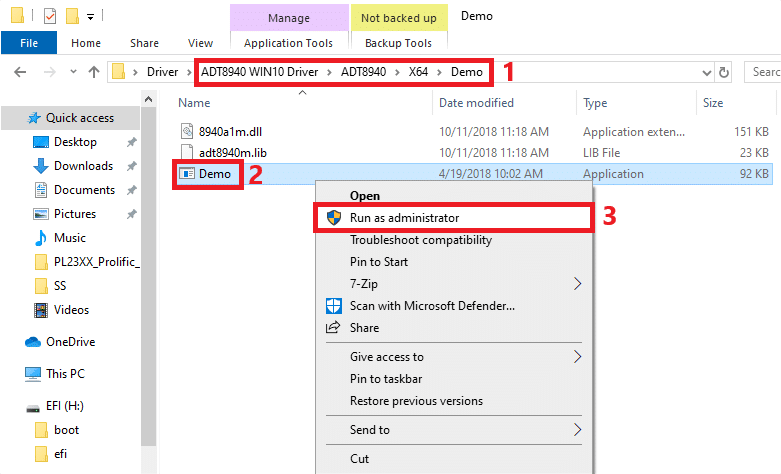
- In device manager, look for the ‘Other PCI Bridge Device‘, right click on it and update driver.
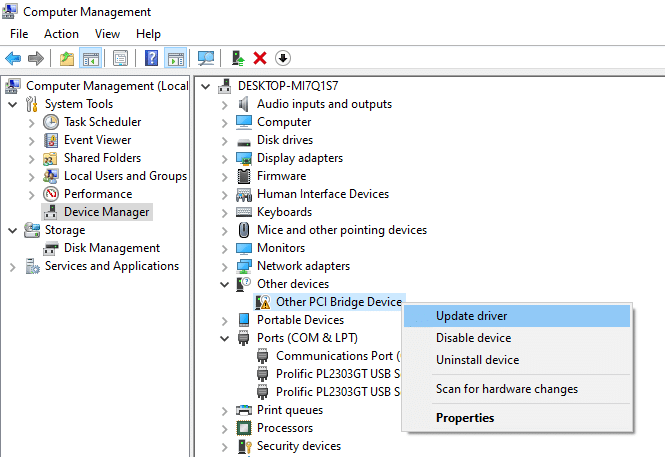
- Choose ‘browse my computer for drivers‘.

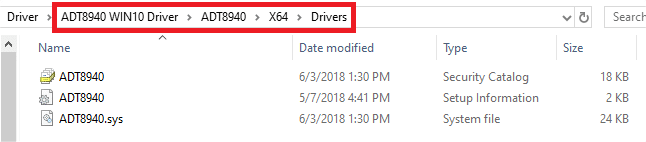
- Click browse & look for the ‘Drivers’ folder as below, then continue with Next.
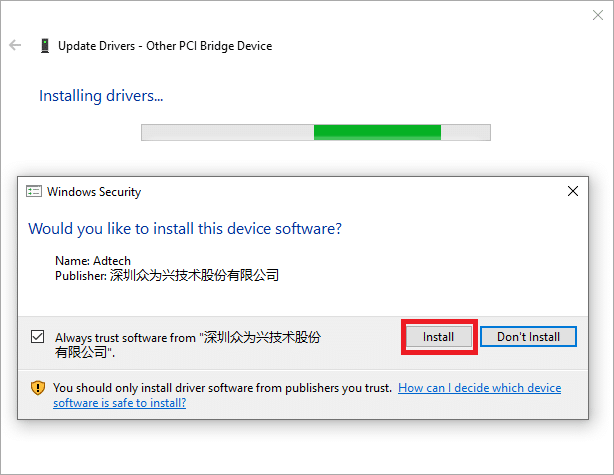
- Continue to install & close after done.
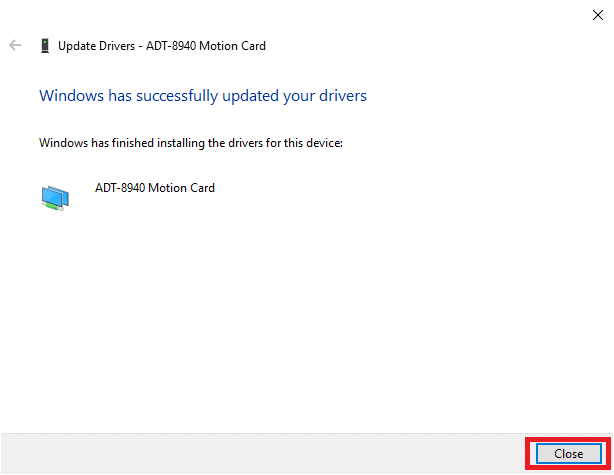
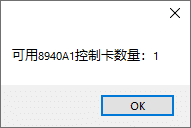
- After done install, look for ‘Demo’ application and run as administrator.
- A message will pop out, and this mean that the motion card is detected and can be use to control the mechanical parts.
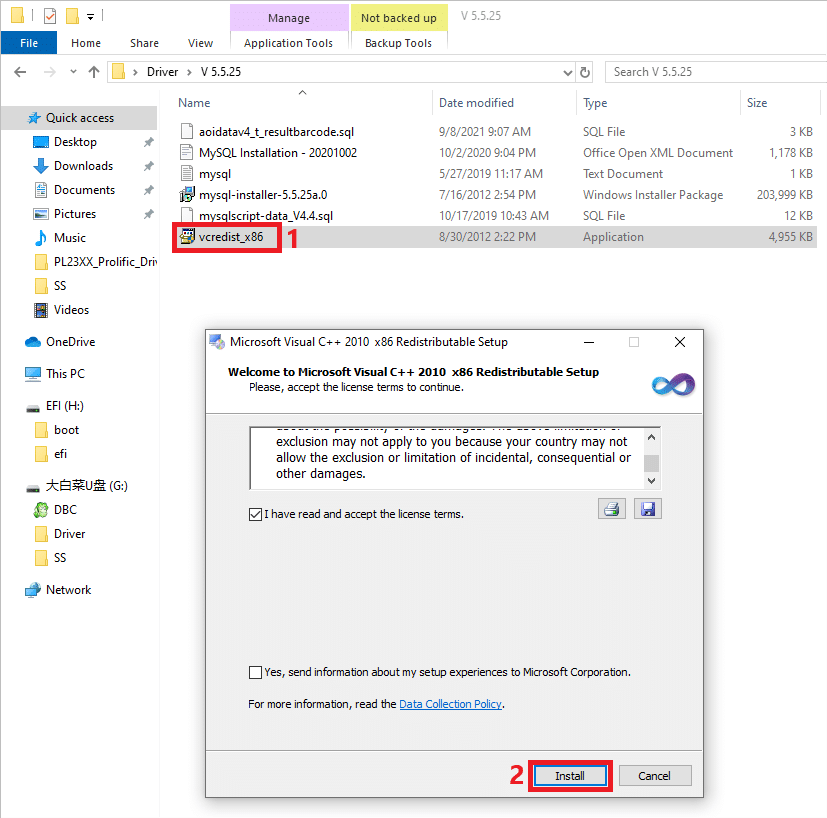
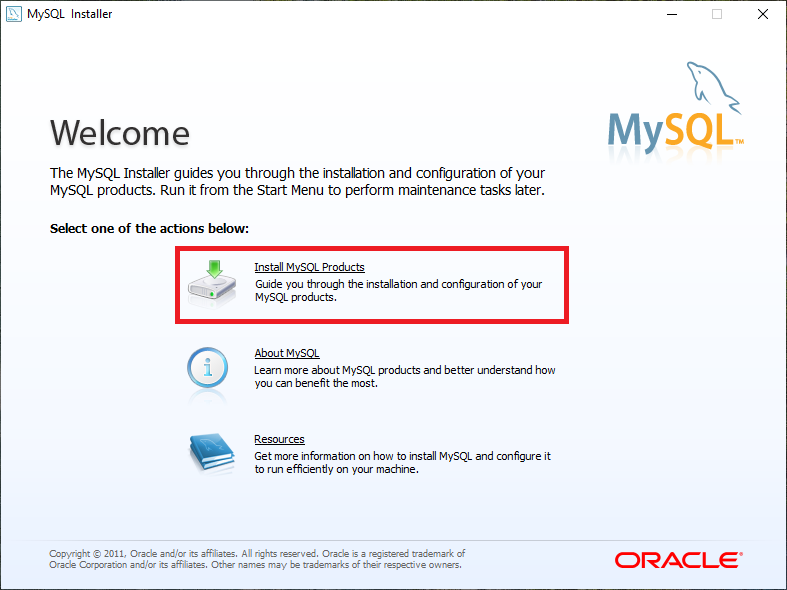
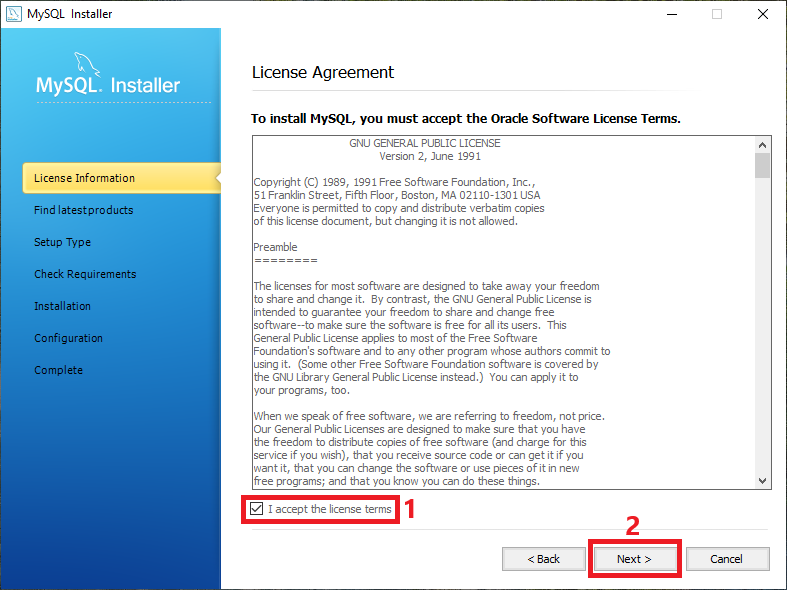
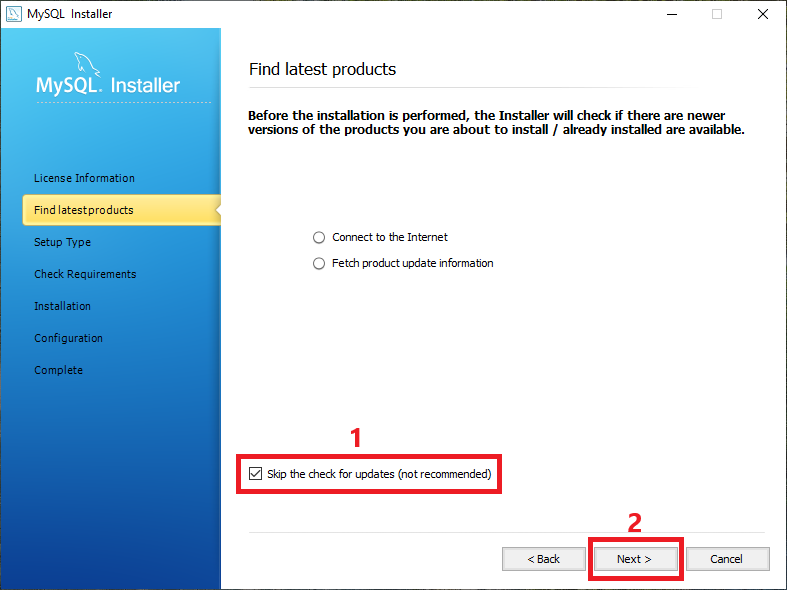
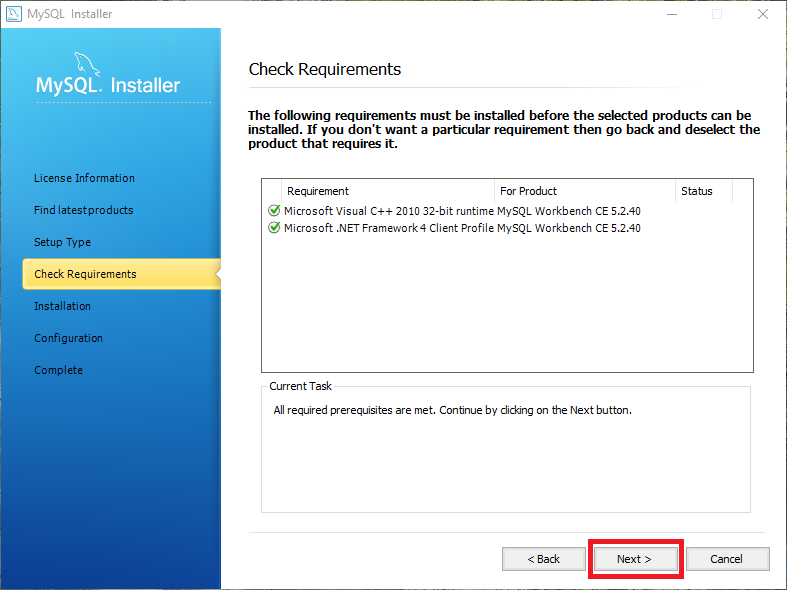
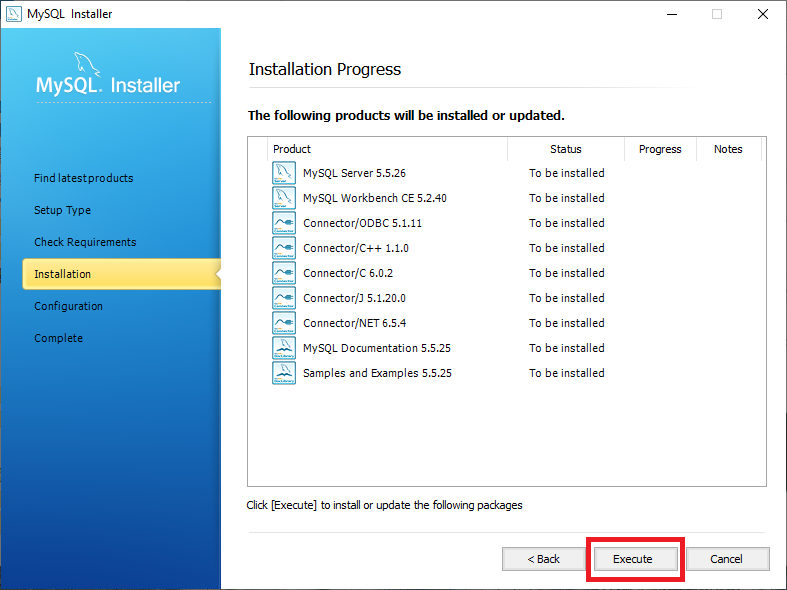
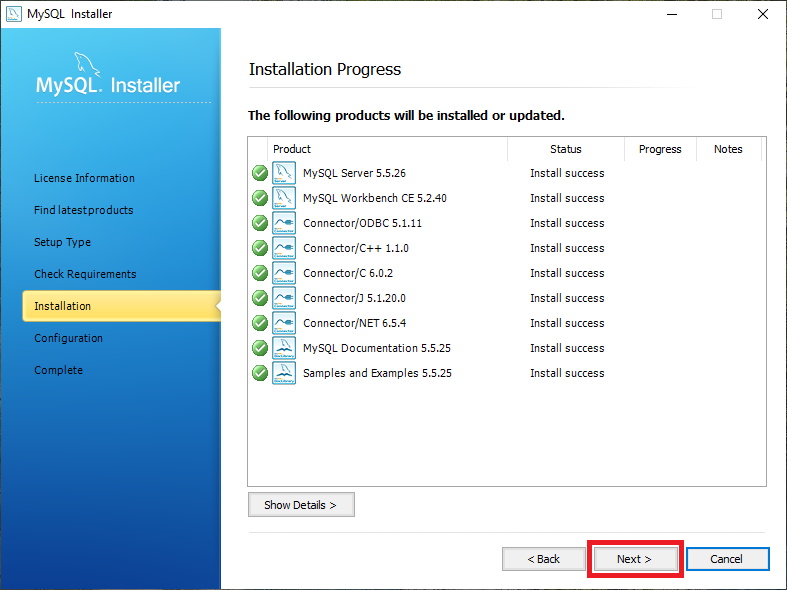
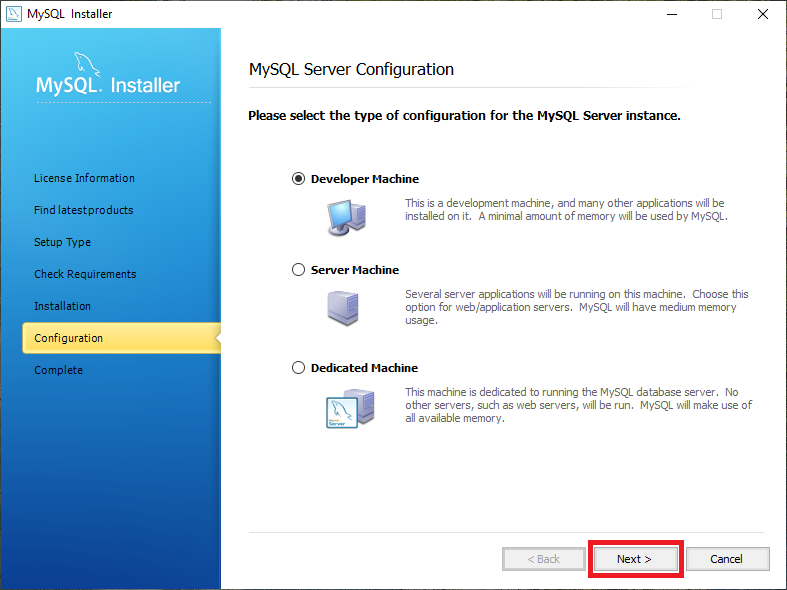
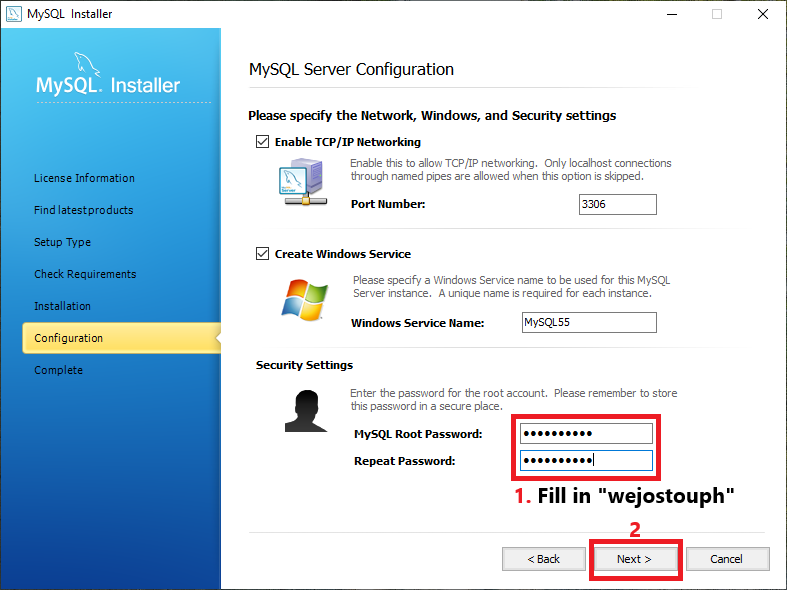
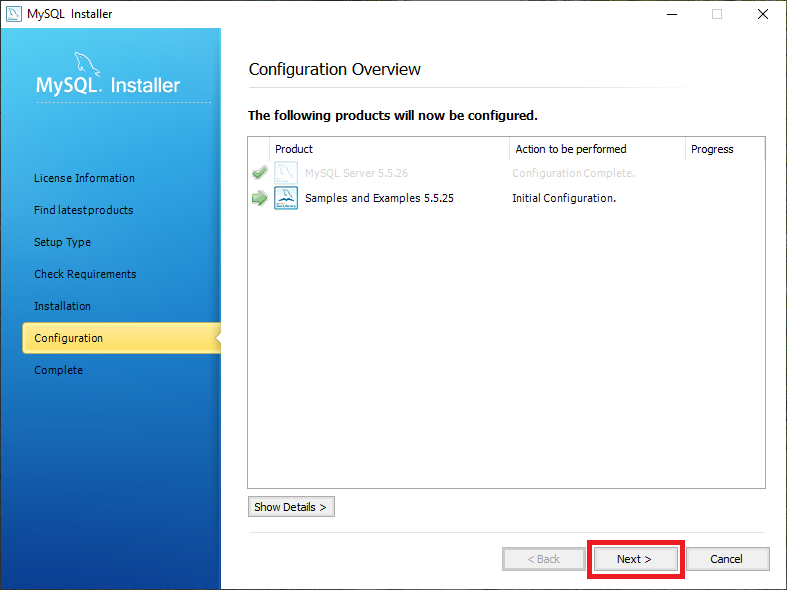
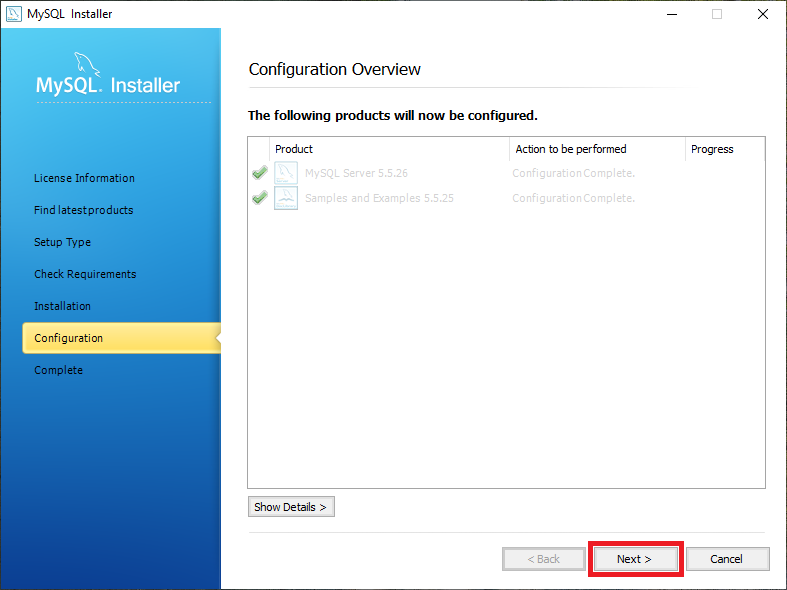
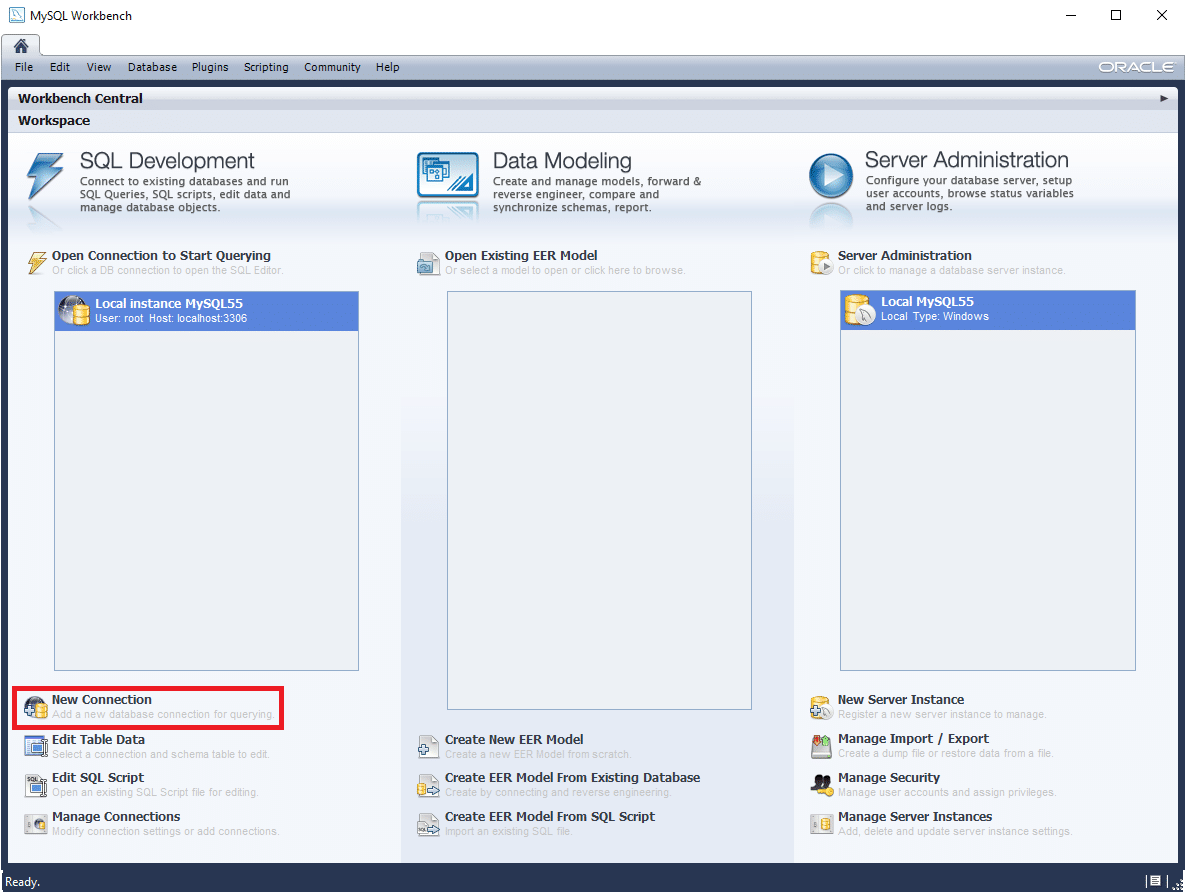
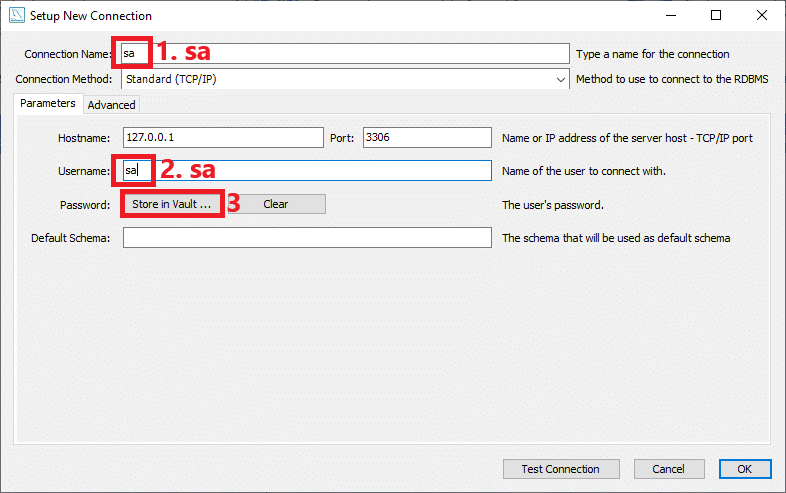
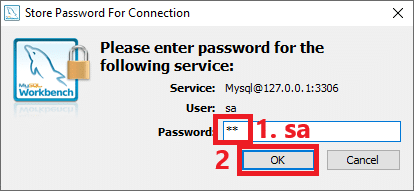
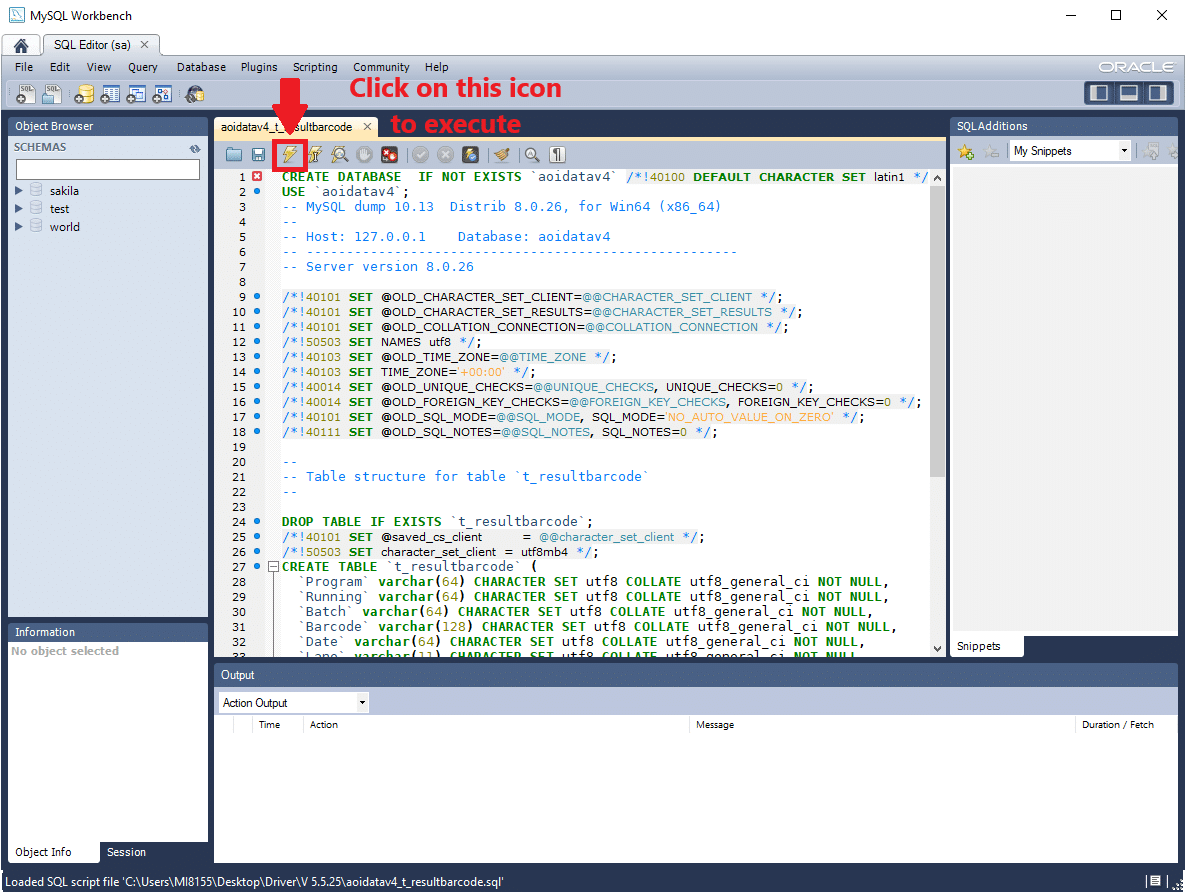
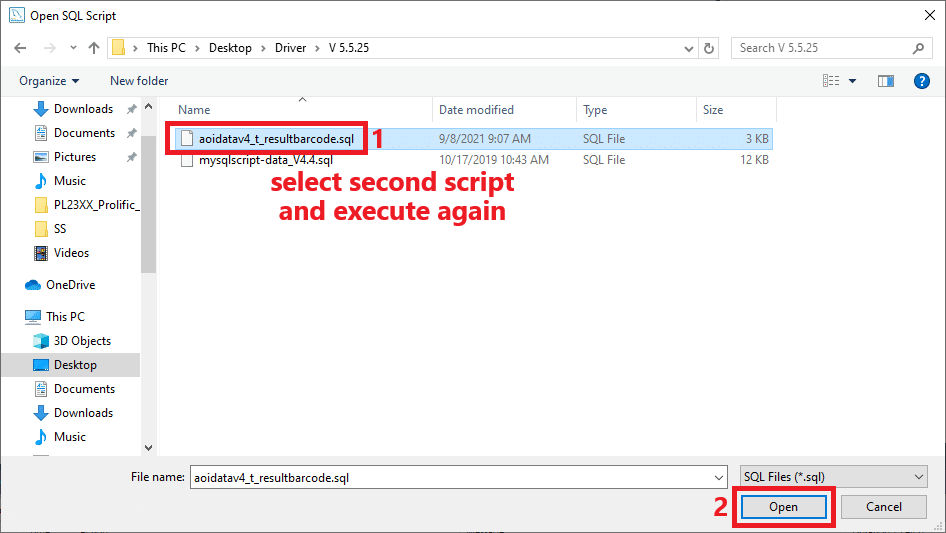
1.5.2.6 Install MySQL Driver #
- This is a database to store inspection results of AOI.
- Follow these steps to install.

Details (Click to expand)
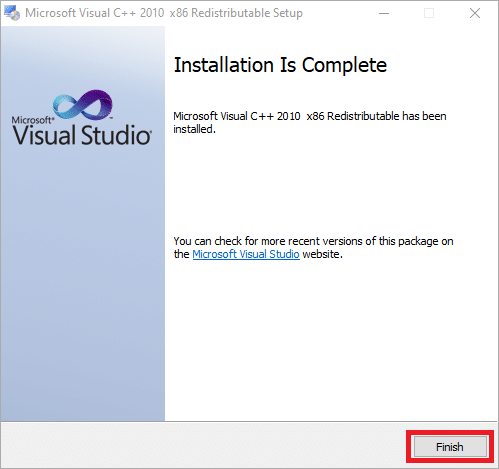
- First, launch vcredist_x86 and install.
- Next, launch mysql-installer and install by following these steps below.


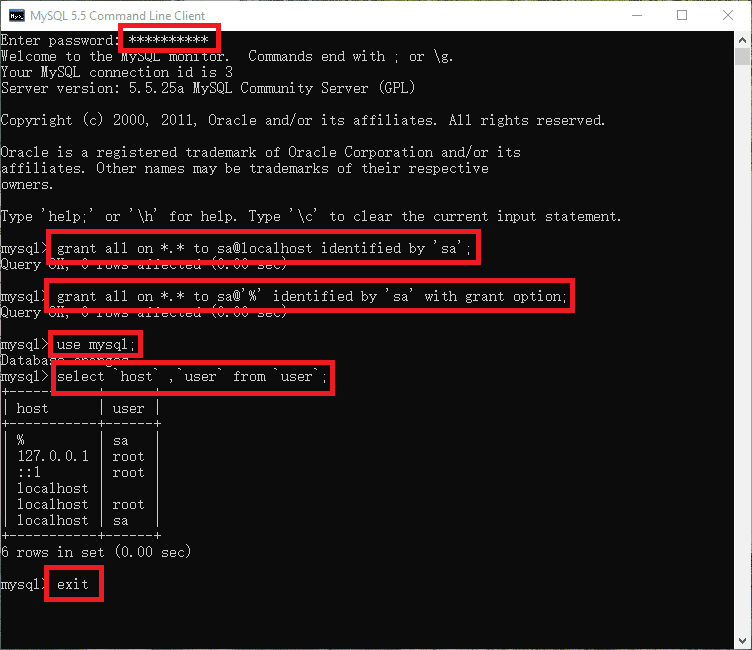
- Configuration of MySQL 5.5 Command Line Client to grant user permission.
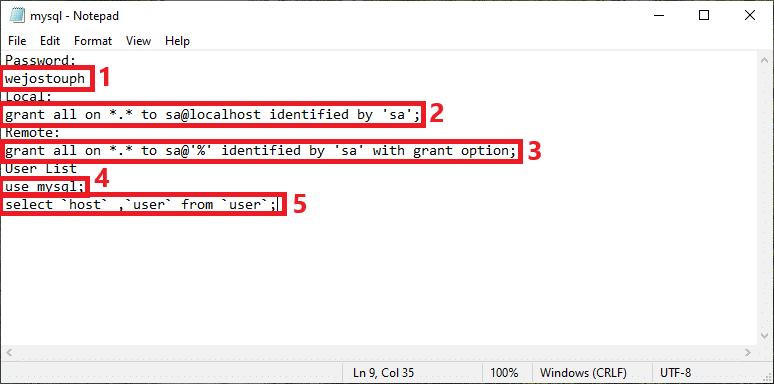
- In the driver folder, look for and open mysql text file.
- Copy and paste the line 1 by 1 in MySQL 5.5 Command Line Client.

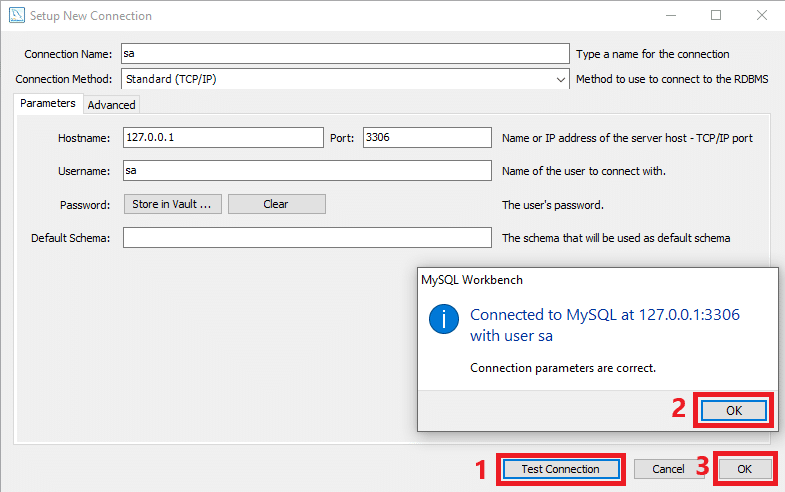
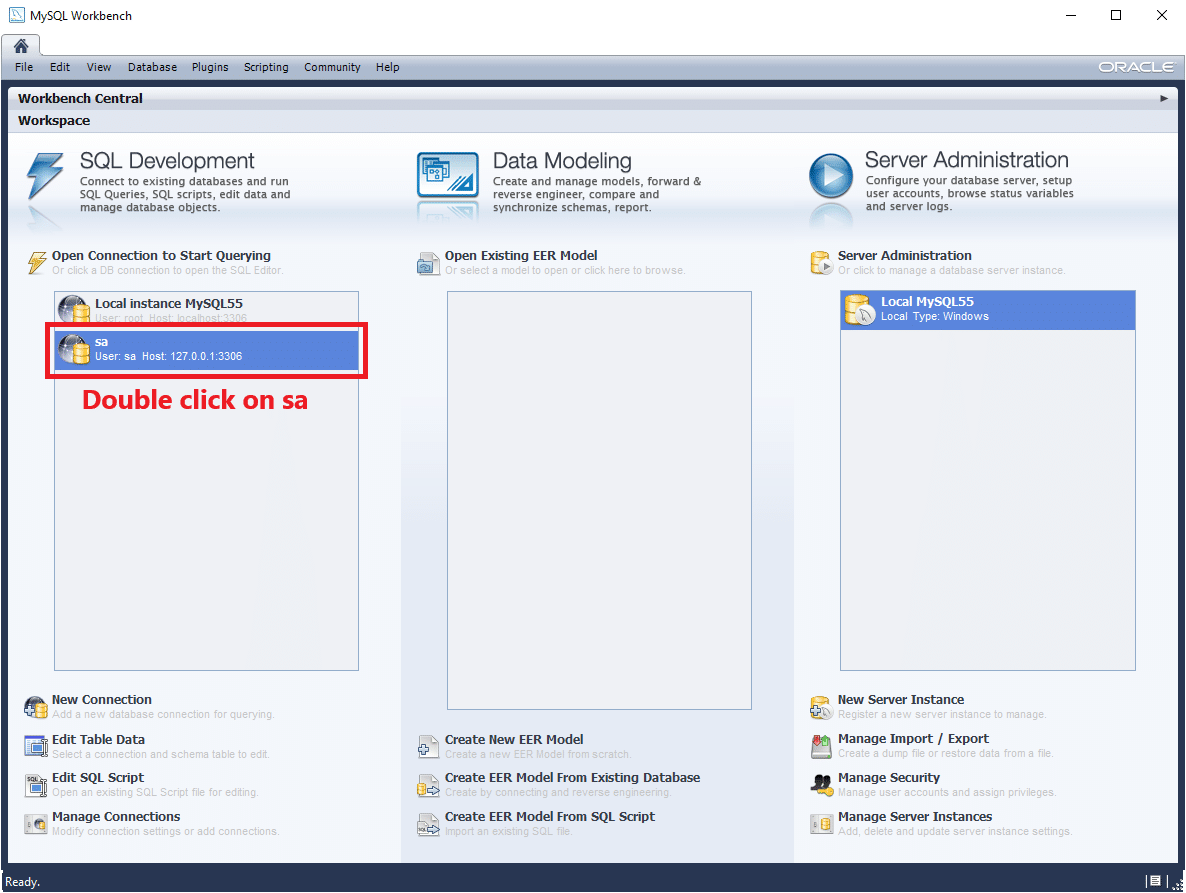
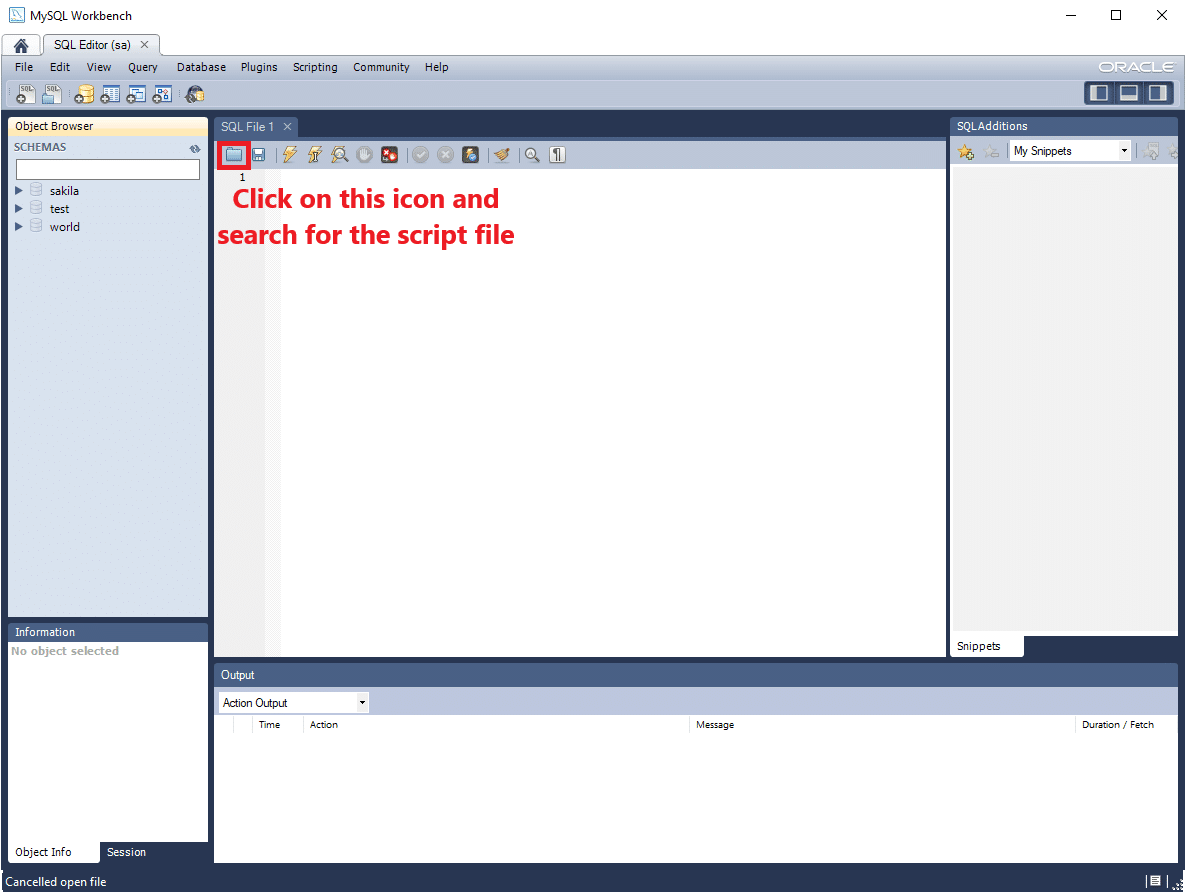
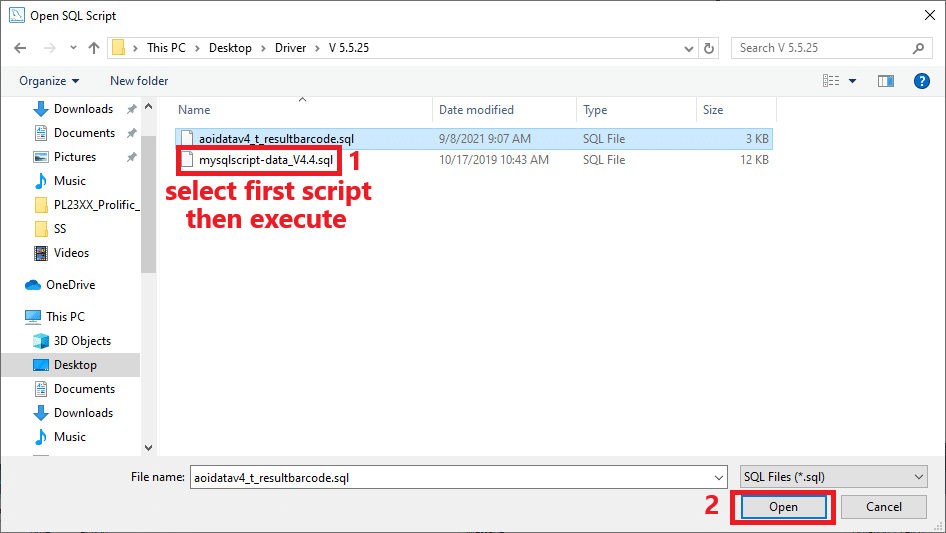
- In MySQL Workbench 5.2 CE, create new user and execute new script.
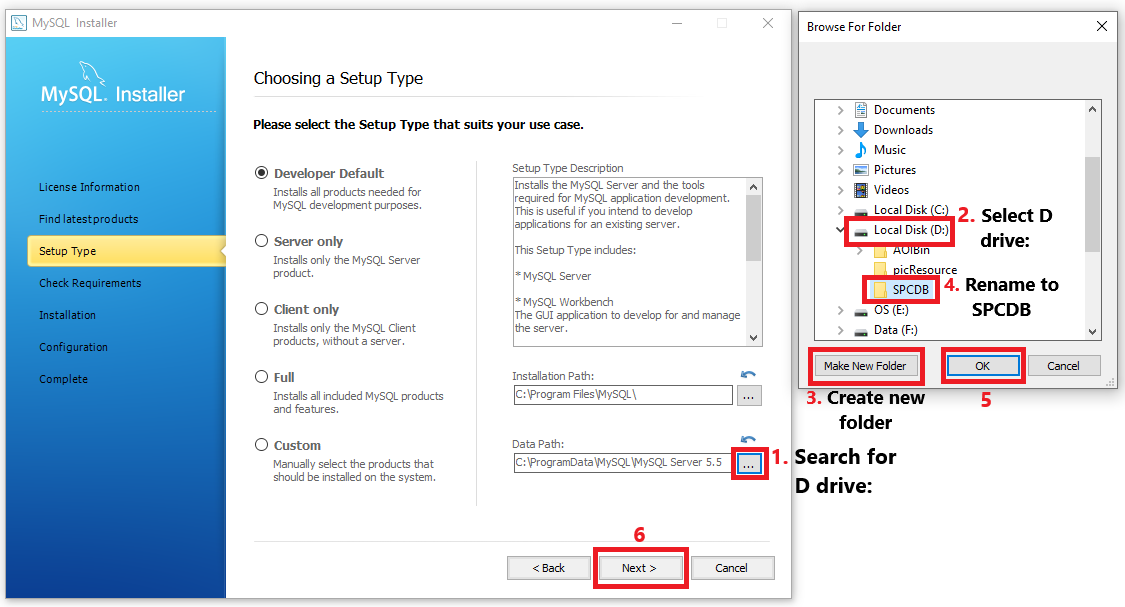
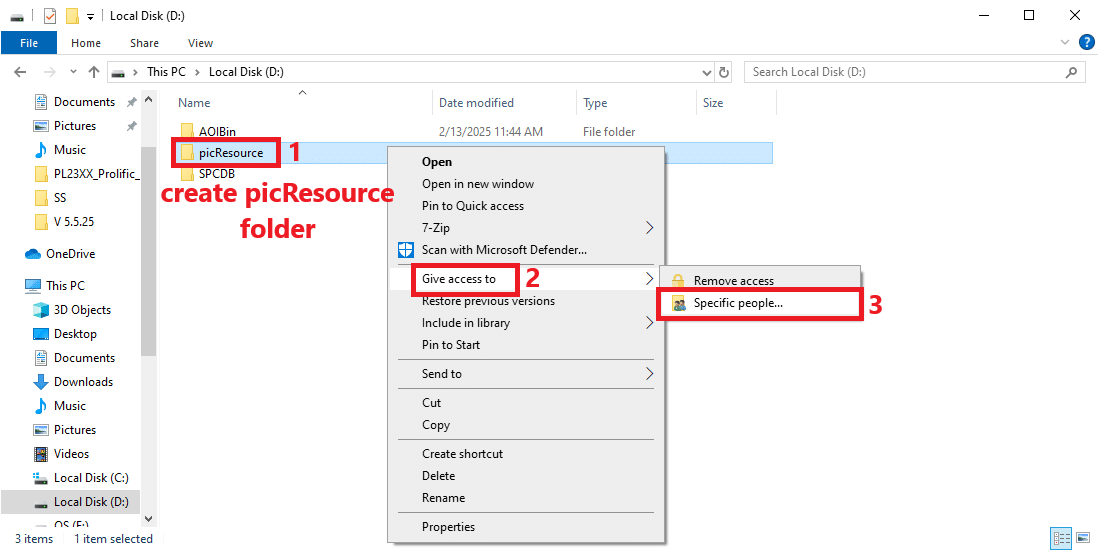
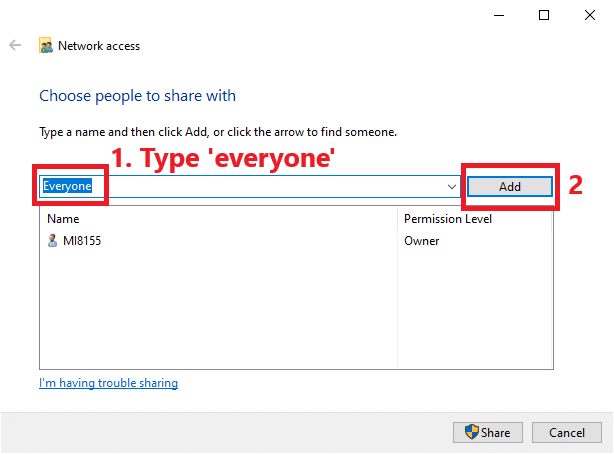
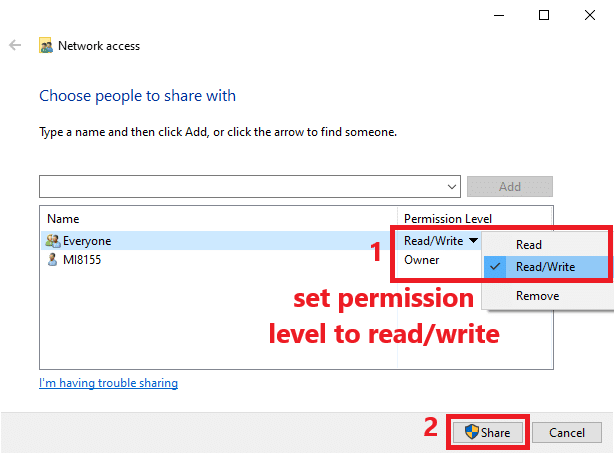
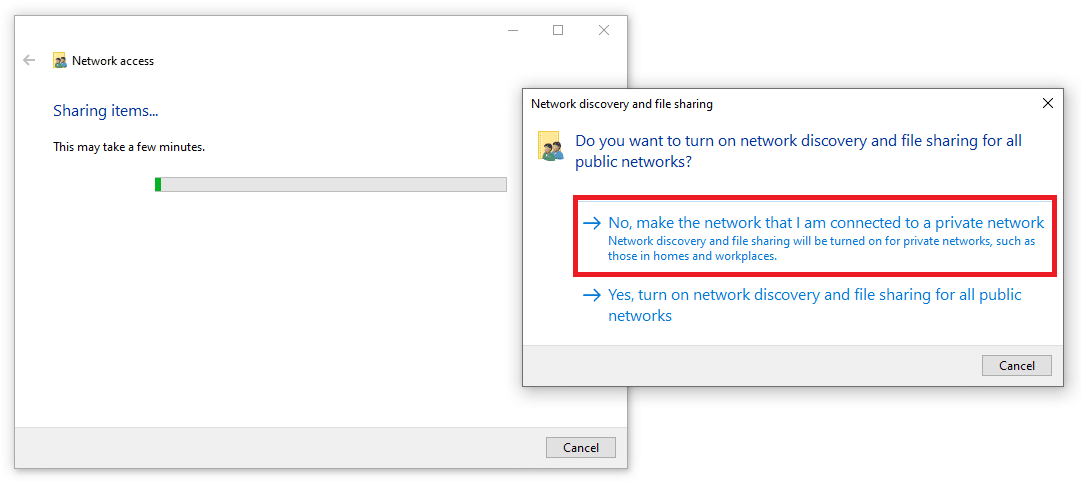
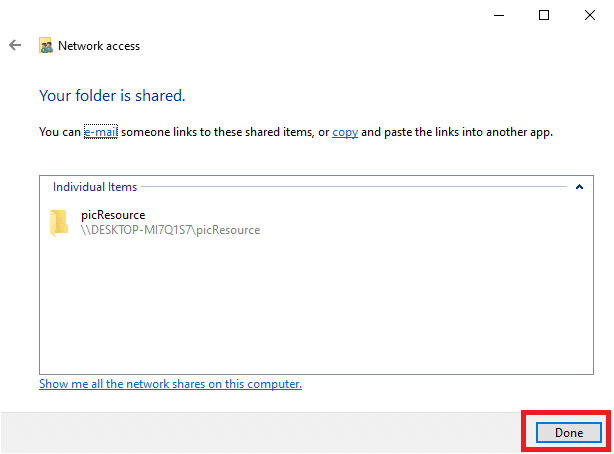
- Create a new folder in D drive, rename to picResource, share folder, create ‘everyone’ user & allow permission to read and write. Folder Sharing of picResource
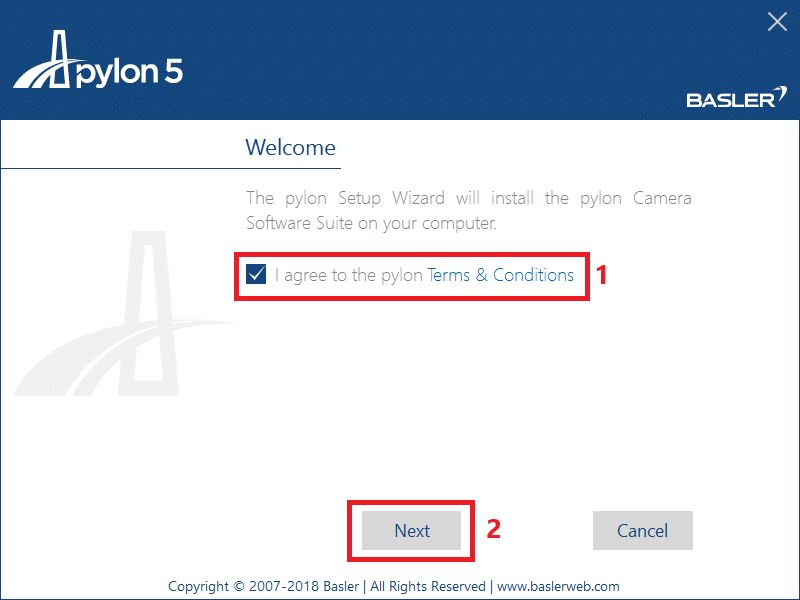
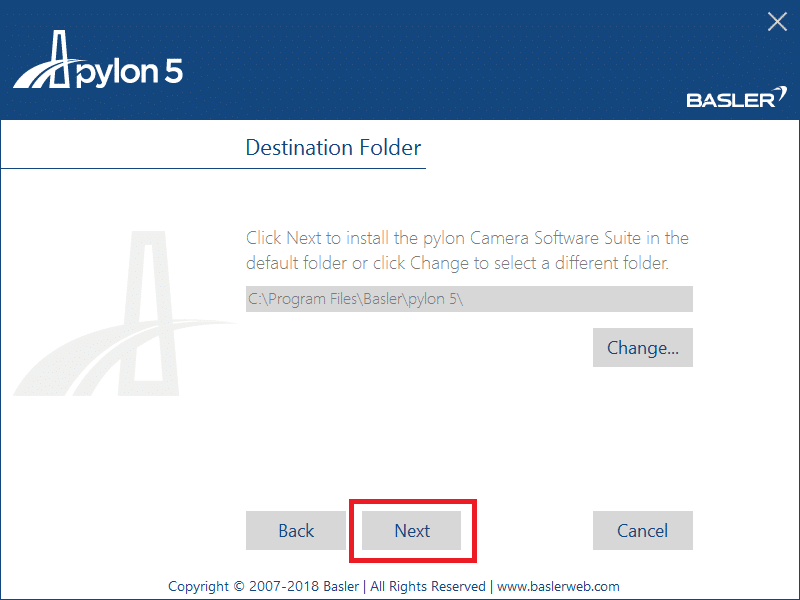
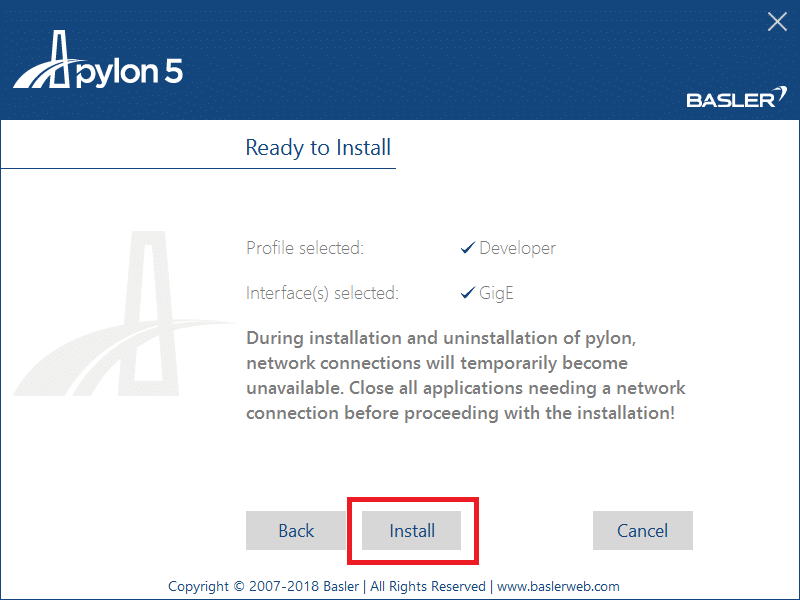
1.5.2.7 Install Camera Driver #
- This software is used to configure the IP settings of camera.
- Once the camera’s IP is configured using Pylon IP Configurator, the Pylon software (Pylon Viewer) will identify the camera.

Details (Click to expand)
- Launch the software and follow these steps to install.
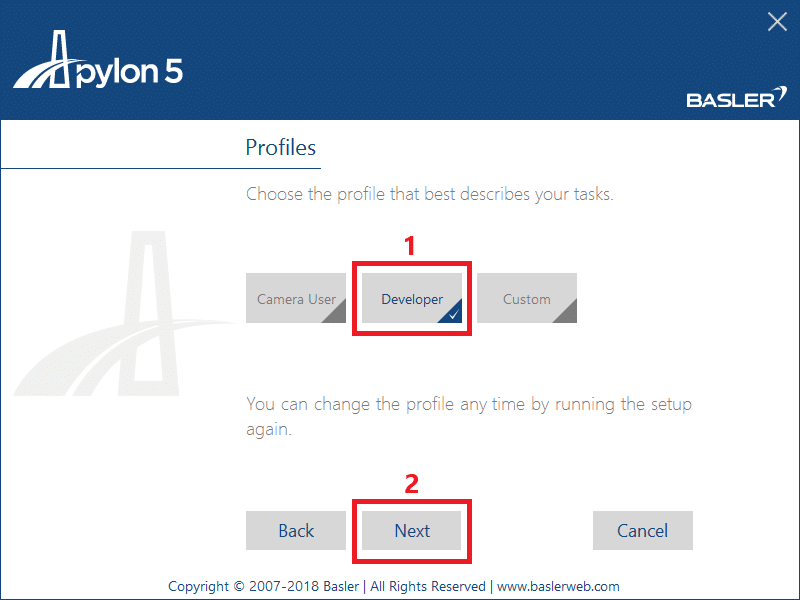
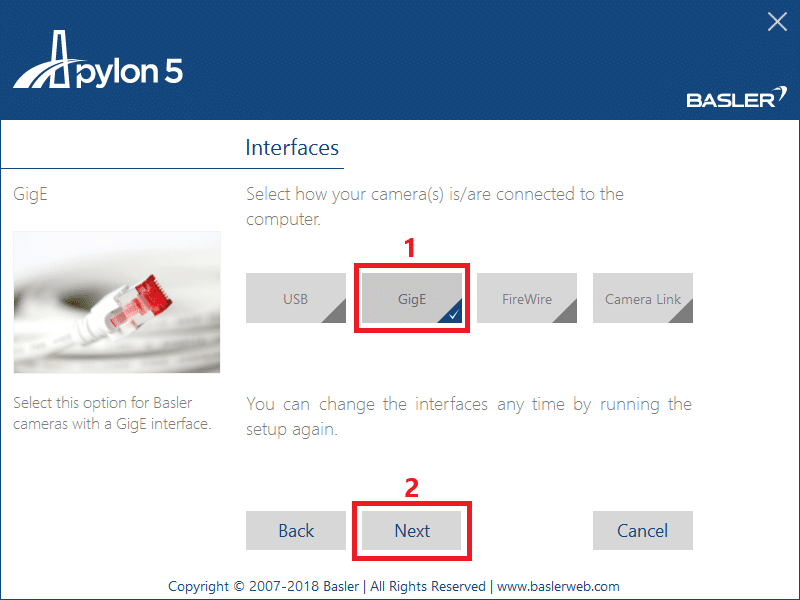
- Configuration of Camera IP.
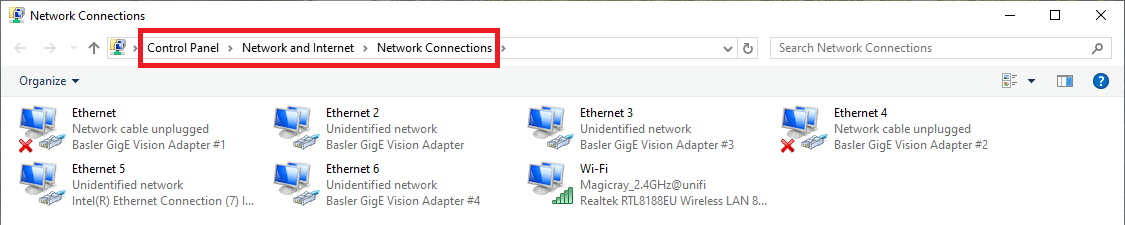
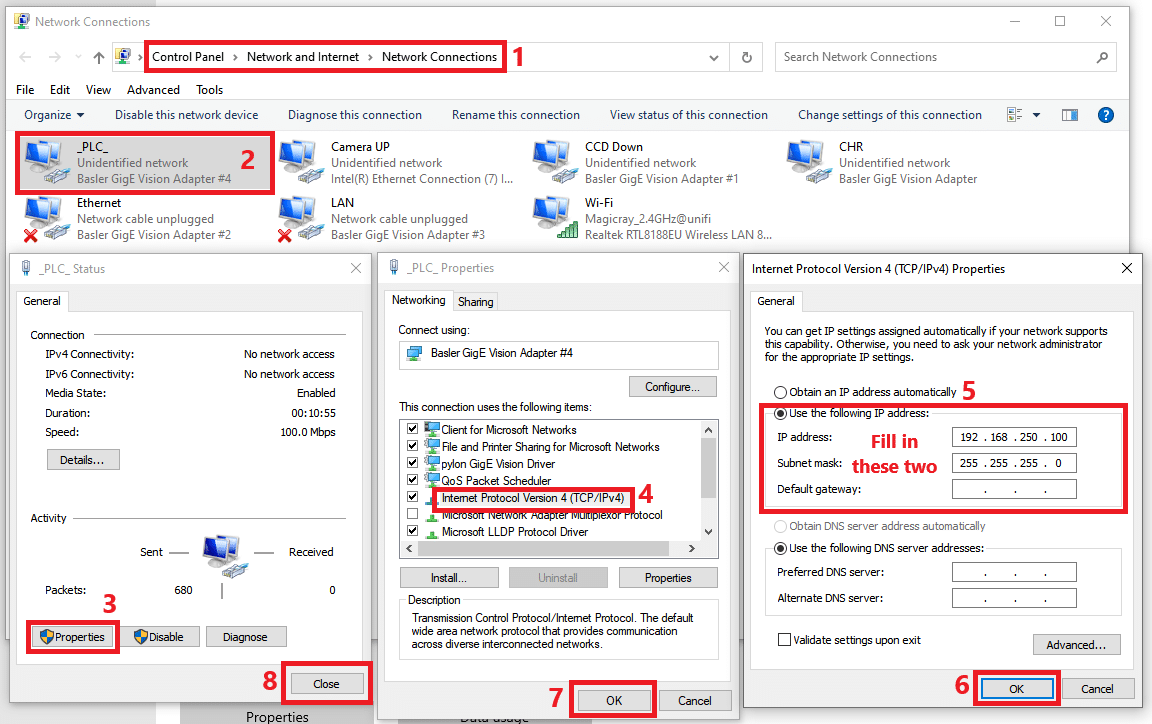
- Before that, we can check and rename the LAN port name in control panel’s Network Connections for better usage/control.
- Unplug & plugin again the LAN port to see which one is the connected port, rename according to their respective hardware part.

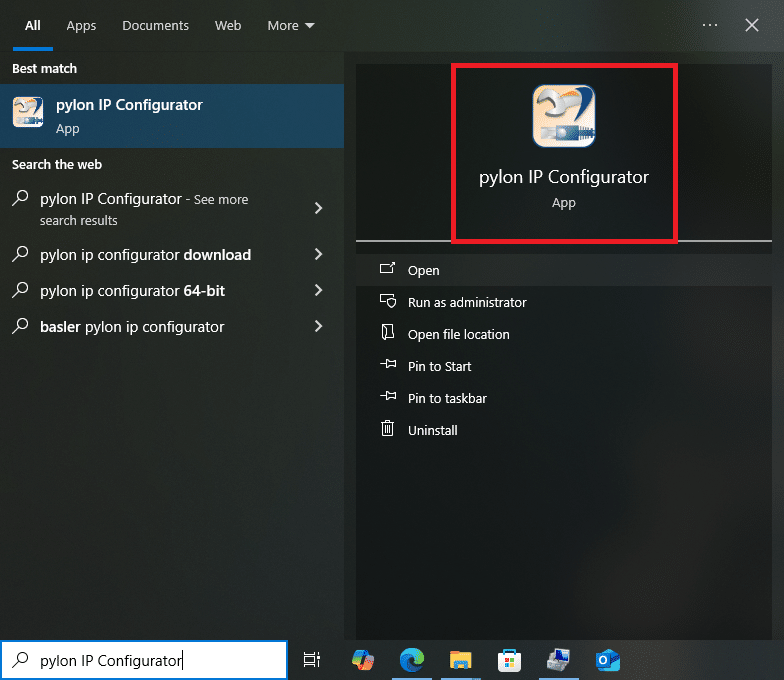
- Search and open pylon IP Configurator and follow these steps below to configure the camera IP.
- Camera UP
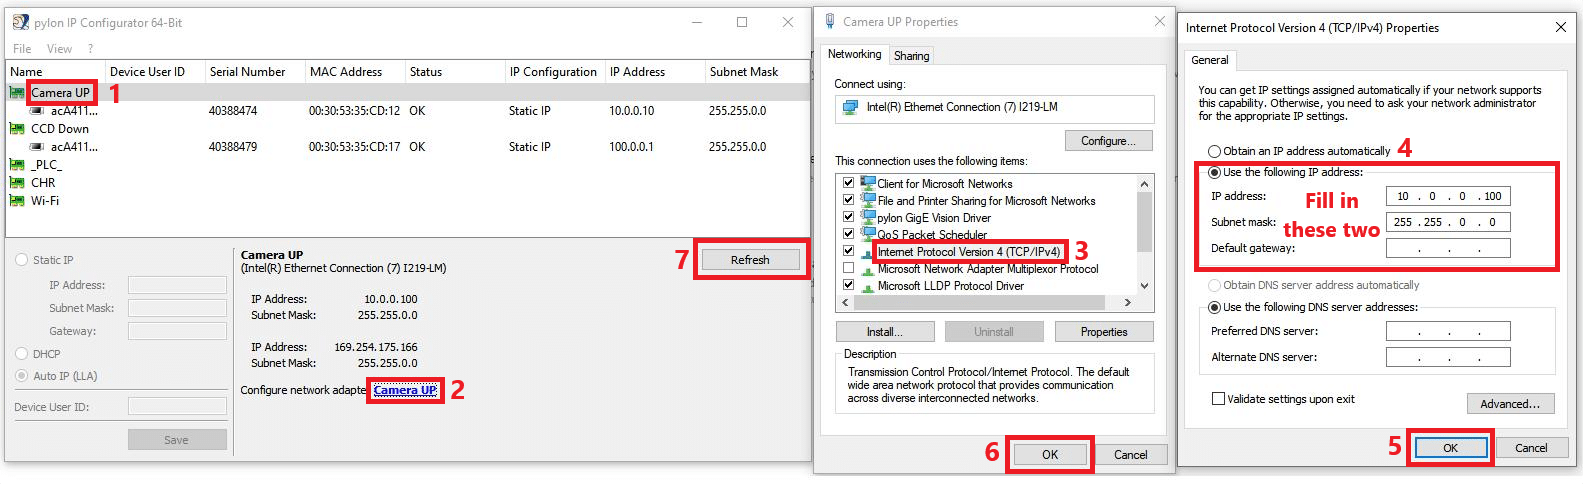
- Camera down

- Configuration of PLC IP
- Configuration of PLC IP can be done in control panel, the steps is same.
1.5.2.8 Install AOI/CCI/SPI software #
- In Magicray Support website, look for AOI/CCI/SPI software base on their respective model and version then download & install the newest version of it.
1.6 Post-Reinstallation Verification #
- Run AOI software and test
- Check software functionality
- Check PLC functionality (Motion)
- Check camera functionality
- Check AOISPC functionality
Read the full checklist to get started!
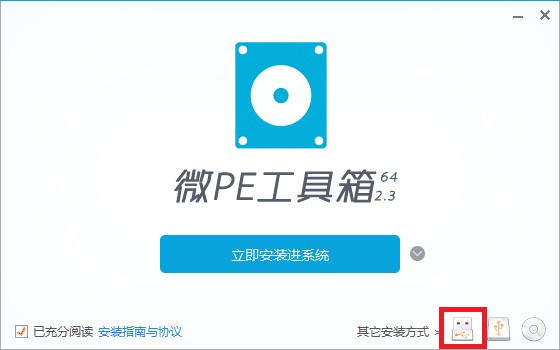
2. Windows Recovery #
Is your PC not working? Don’t worry! 🛠️ With Dabaicai or WeiPE, you can fix Windows, recover files, or reset your system in just a few steps. Simply create a bootable USB, boot into the recovery tool, and use the built-in fixes to get your PC running again. Whether it’s a boot error, lost data, or upgrade to a new SSD, this guide will help you restore Windows quickly and easily! 💻
Follow these step below #
2.1 Pre-Recovery Preparation #
2.1.1 Create Bootable USB #
- Choose either one method and create bootable USB.
- Prepare in advance to save time.
- Can be found in Magicray Support website or search for official website.
- In website, go to Drivers & Downloads tab > Driver > Bootable USB Drive Creator Tool for Windows.
Details (Click to expand)
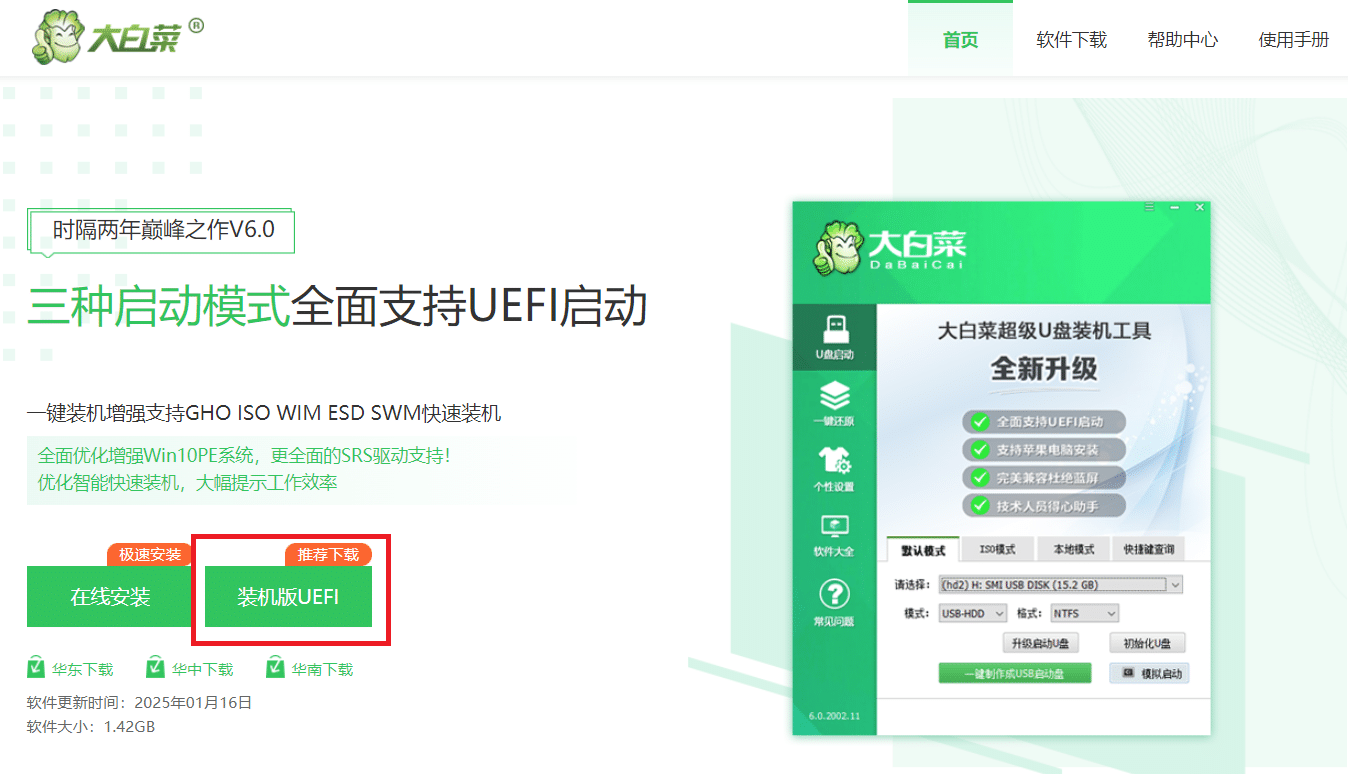
2.1.1.1 DaBaiCai Methods #
- Can download and install DaBaiCai software from DaBaiCai website.
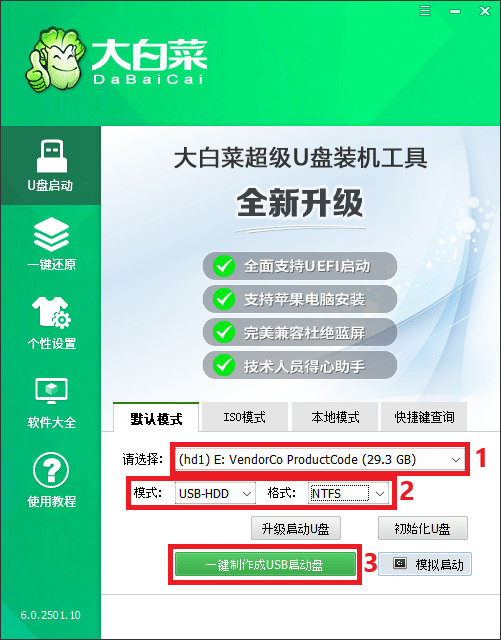
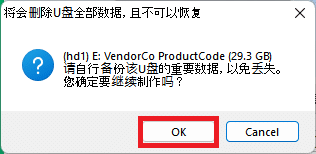
- Insert a pendrive, backup every important data of the pendrive. (Pendrive will be format after create bootable)
- After download, launch the software.

- Choose the pendrive that will be use to create bootable USB.
- The mode & type is by default.
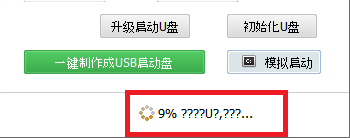
- Click to create bootable USB.
- Creating bootable.
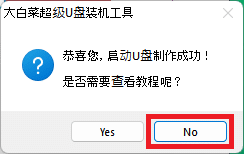
- Bootable USB is created, click no to skip watching tutorial.
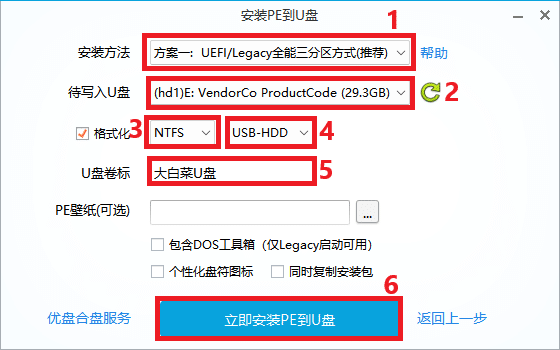
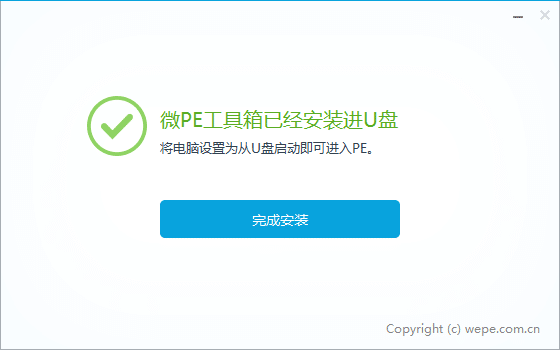
2.1.1.2 WeiPE Methods #
- Can download and install WeiPE software from WeiPE website.
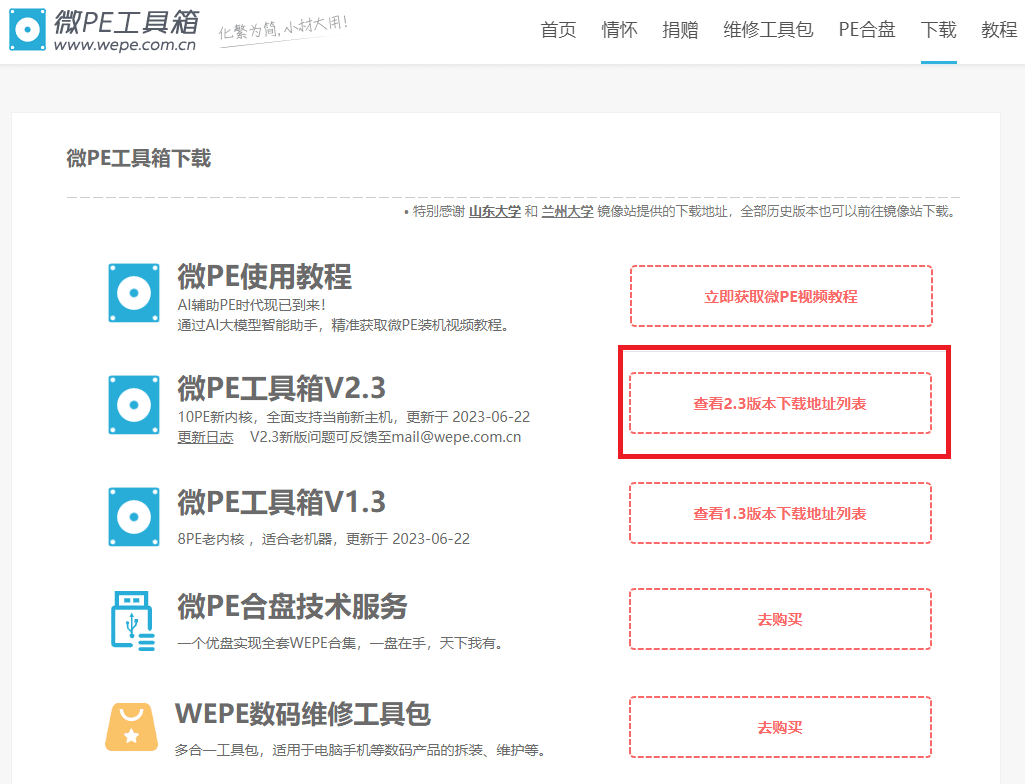
- Continue by clicking on these to download.


- Insert a pendrive, backup every important data of the pendrive. (Pendrive will be format after create bootable)
- After download, launch the software.

- Click to create bootable USB.
- By default
- Choose the USB pendrive that will be use to create bootable
- Choose NTFS
- By default
- Can change to desired name
- Click to create bootable
2.1.2 Check Machine Functionality #
- Before doing windows recovery, check if the machine can run in good condition.
- Ensure conveyor, camera & SPC can run properly before backup.
2.1.3 Backup Important Files #
- Backup AOIBin & every customer needed folder.

2.2 Recovery #
2.2.1 Reboot PC & Backup #
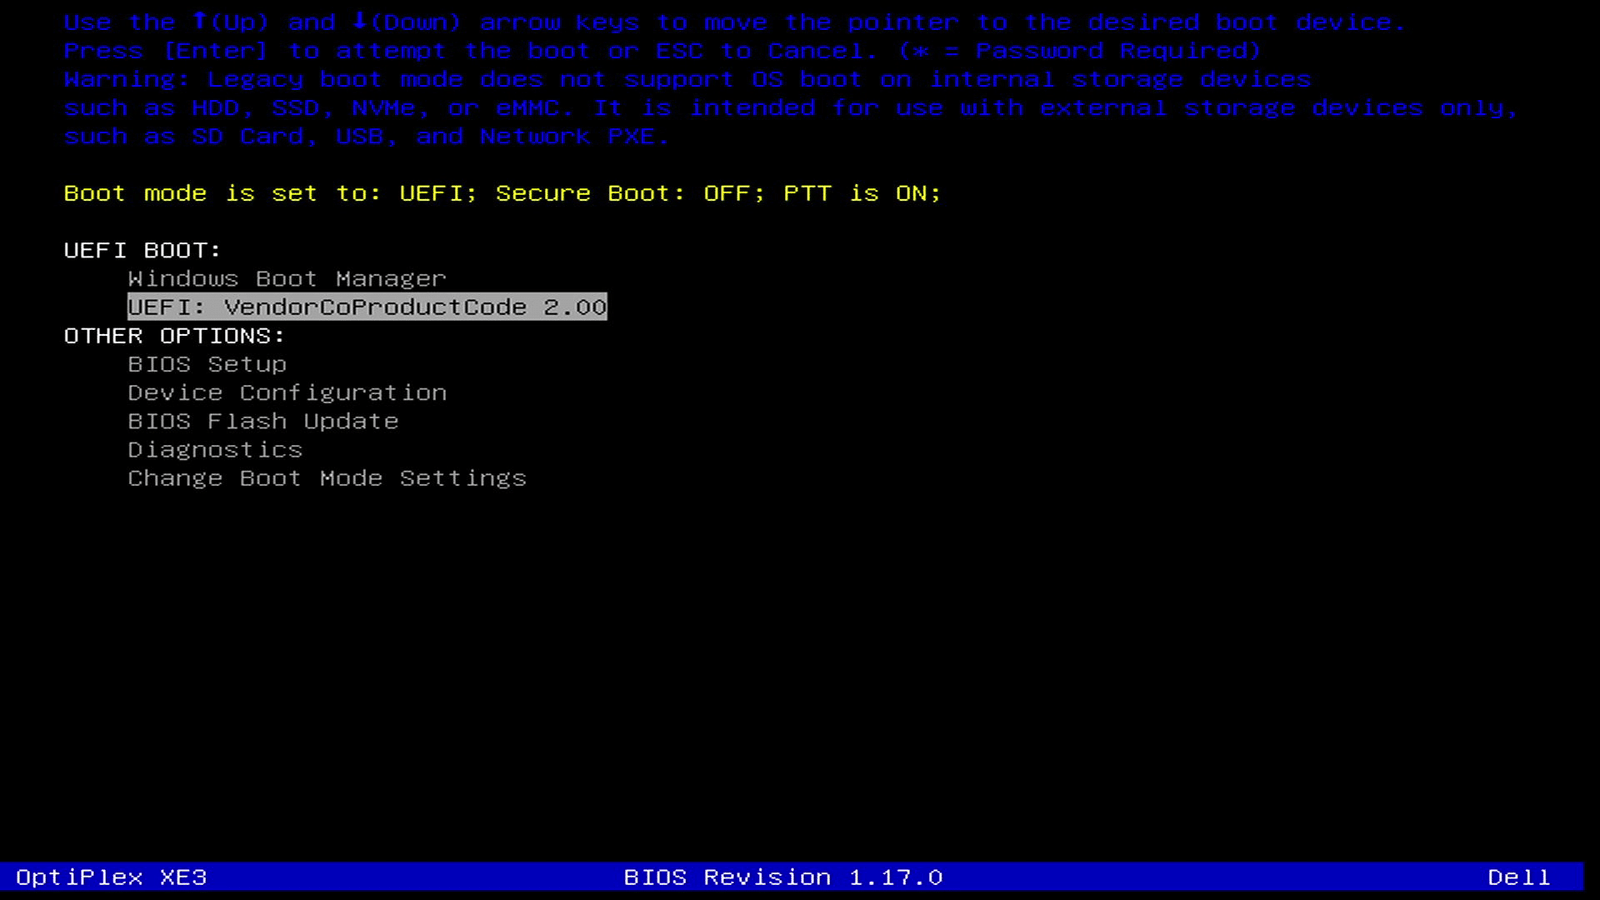
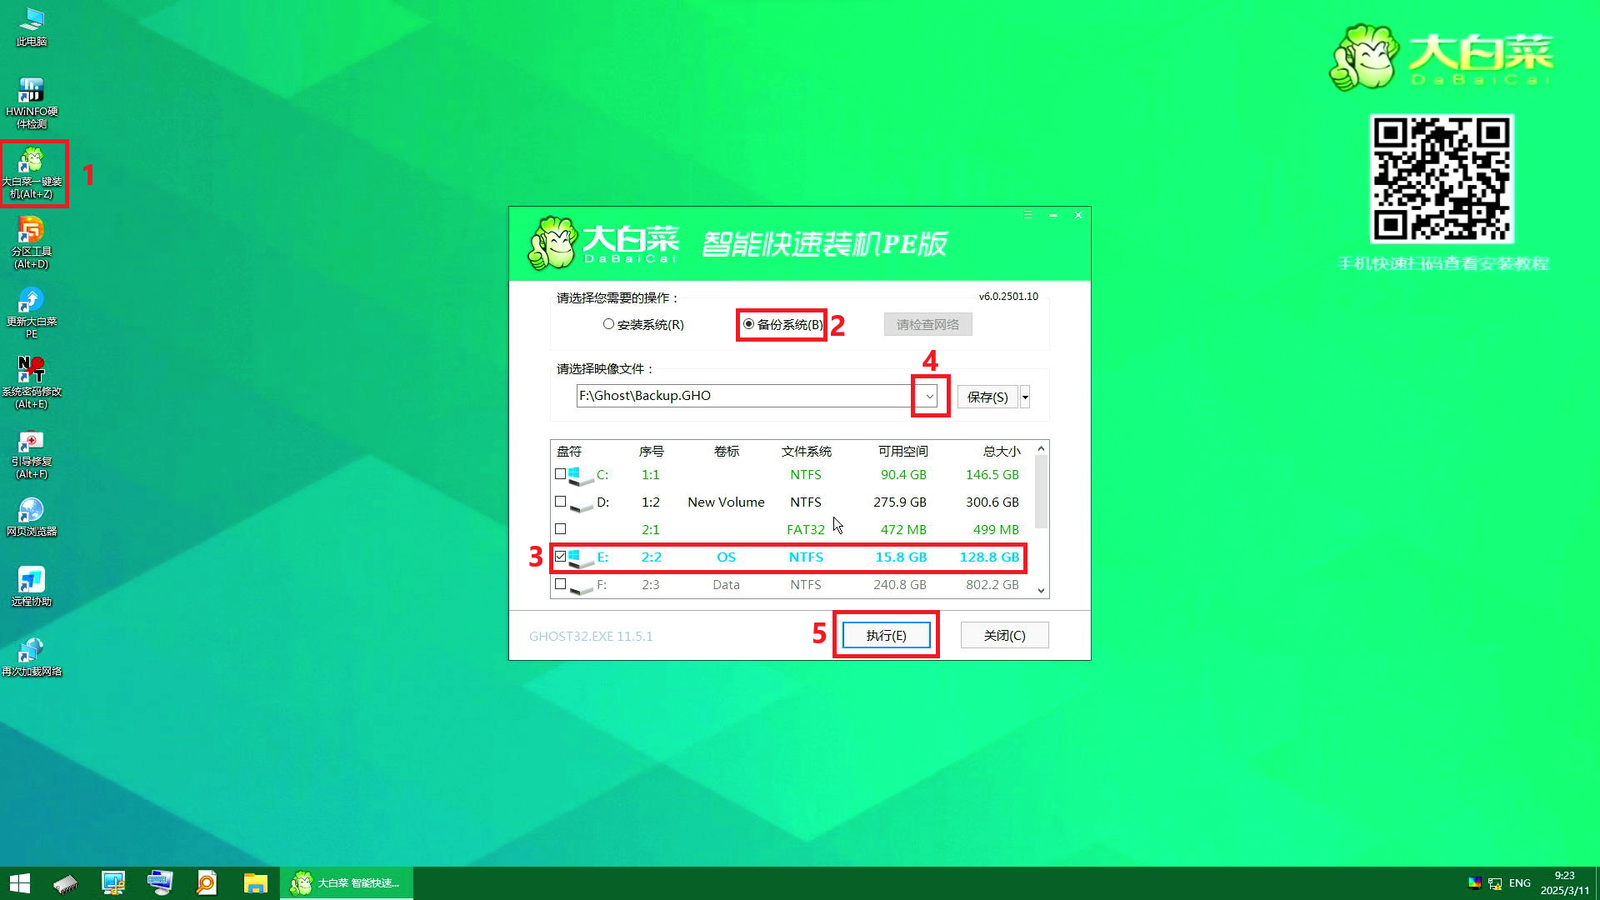
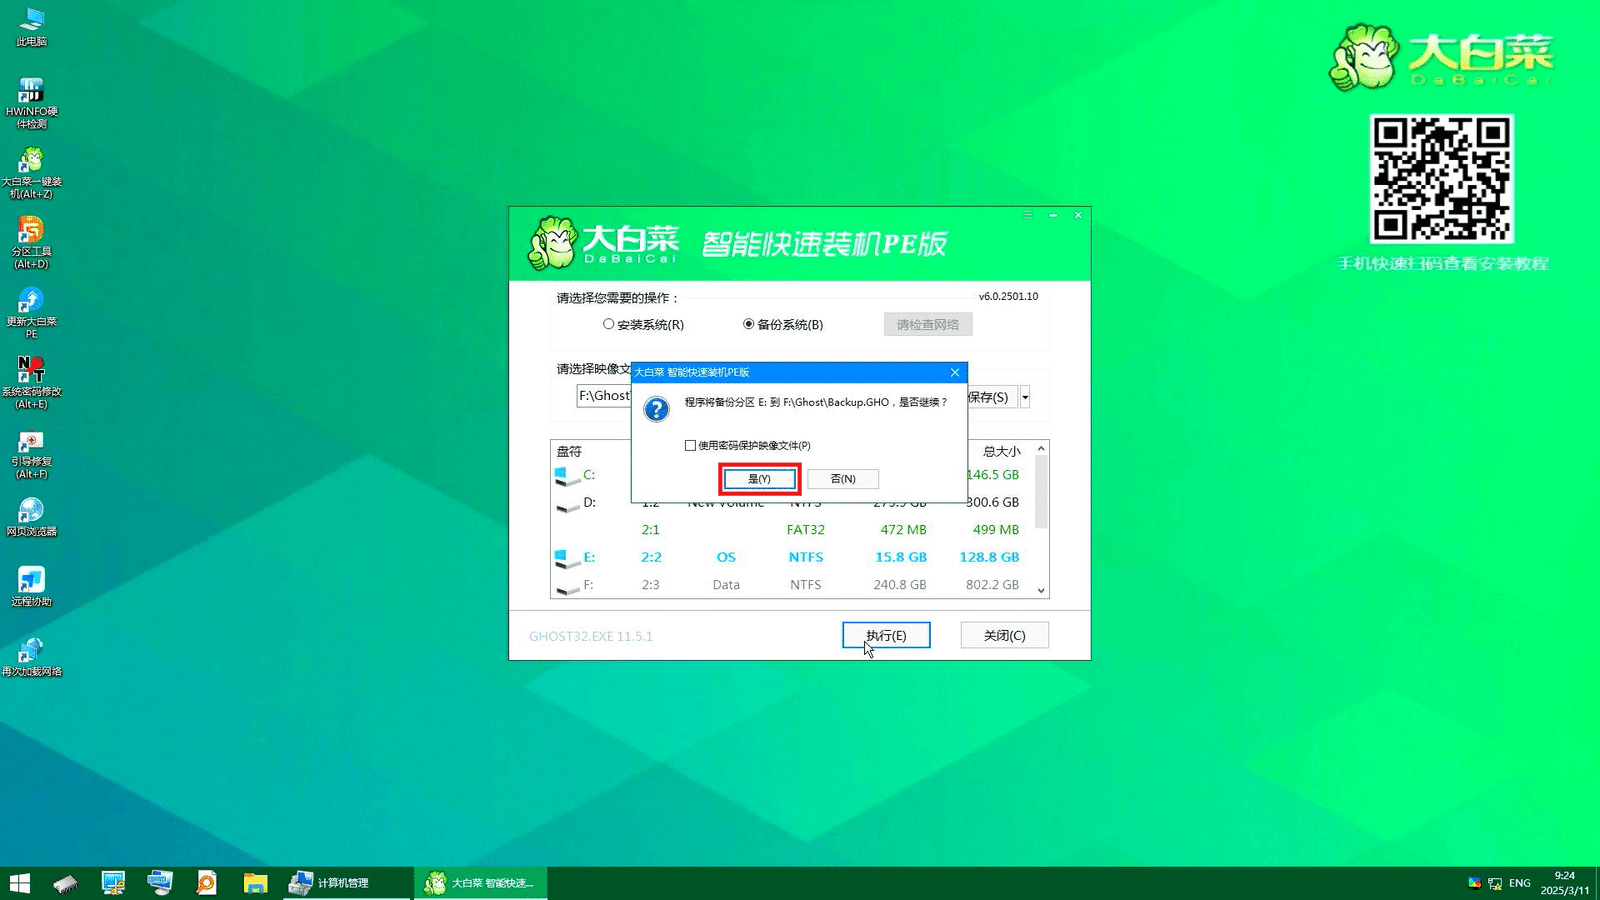
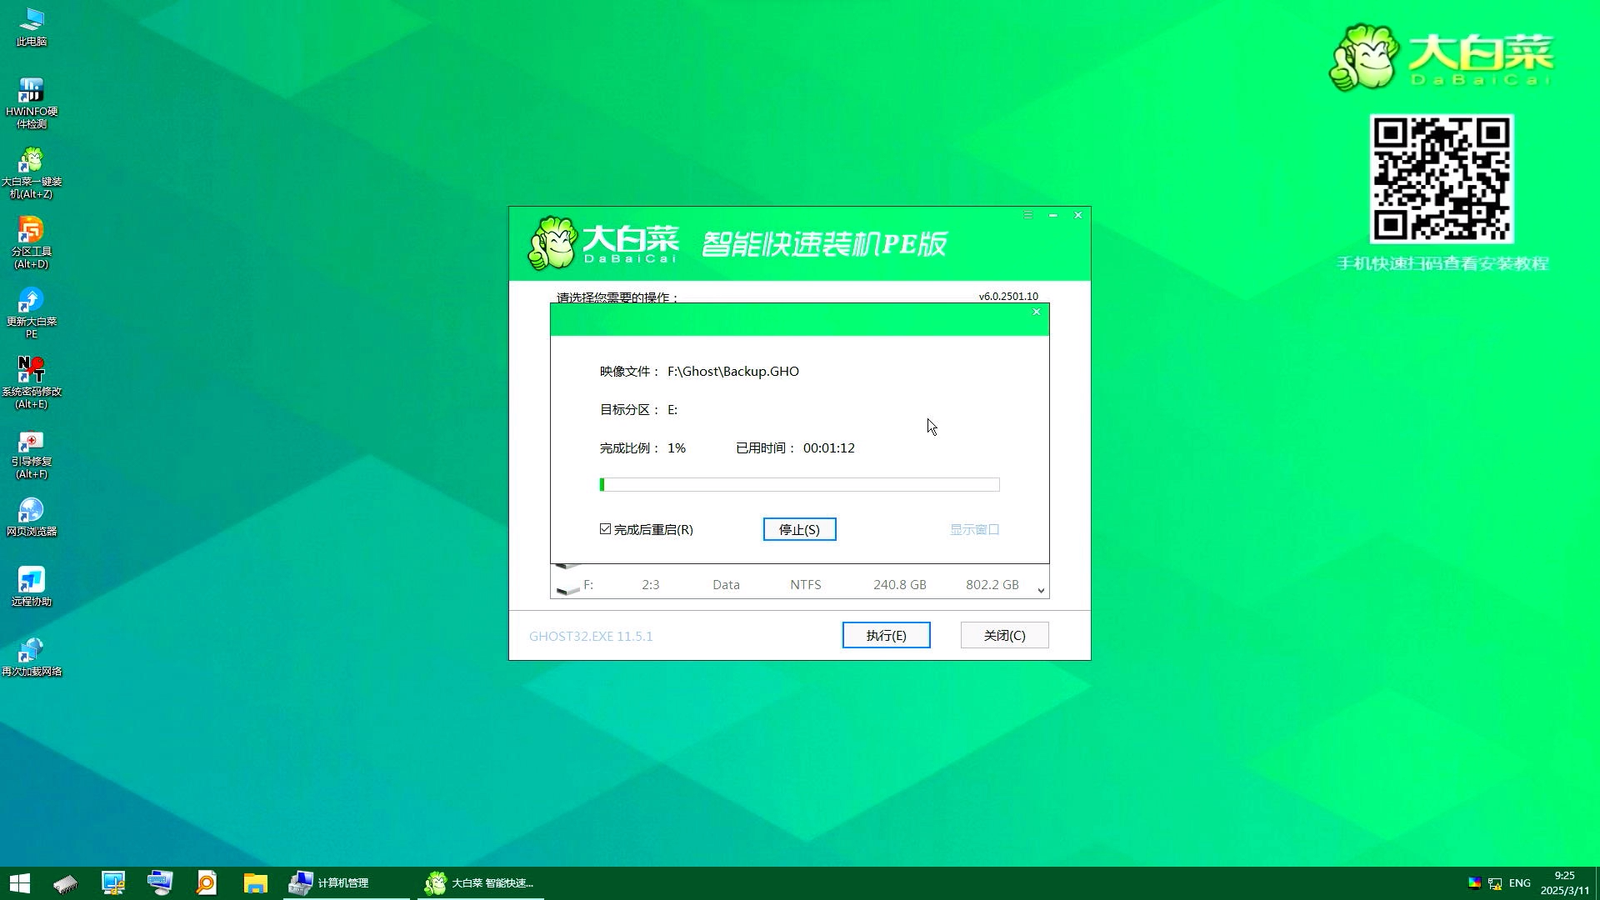
- Reboot PC & hold/tab F12 till it enter boot menu.
- Create a .GHO file
Details (Click to expand)

- Change boot sequence & boot from the bootable USB.
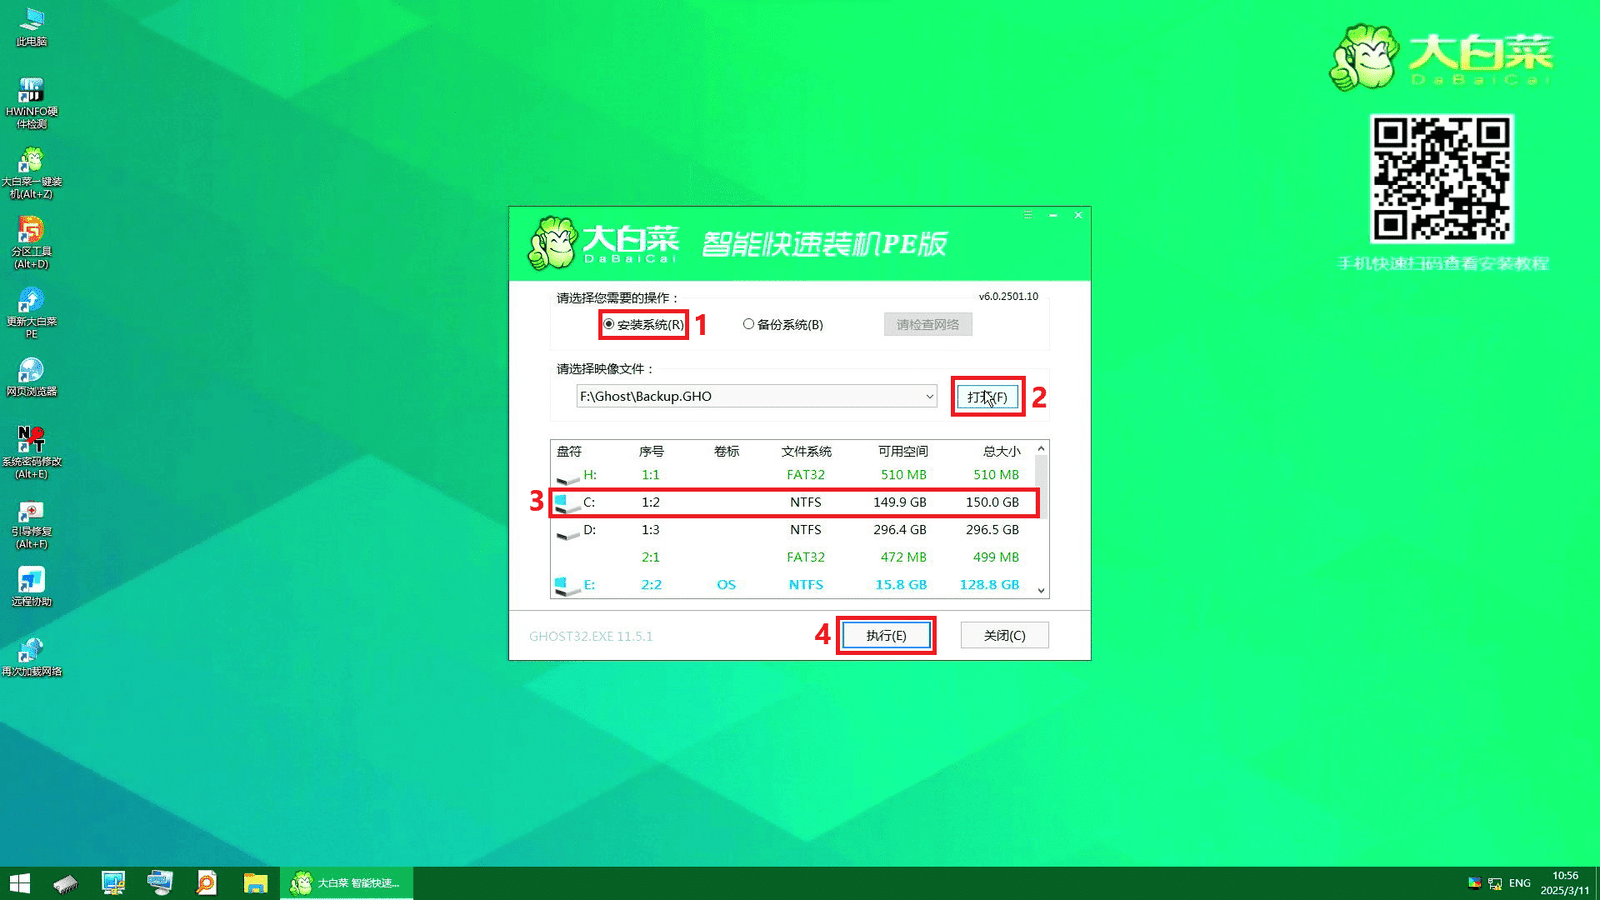
- In DaBaiCai open 一键装机
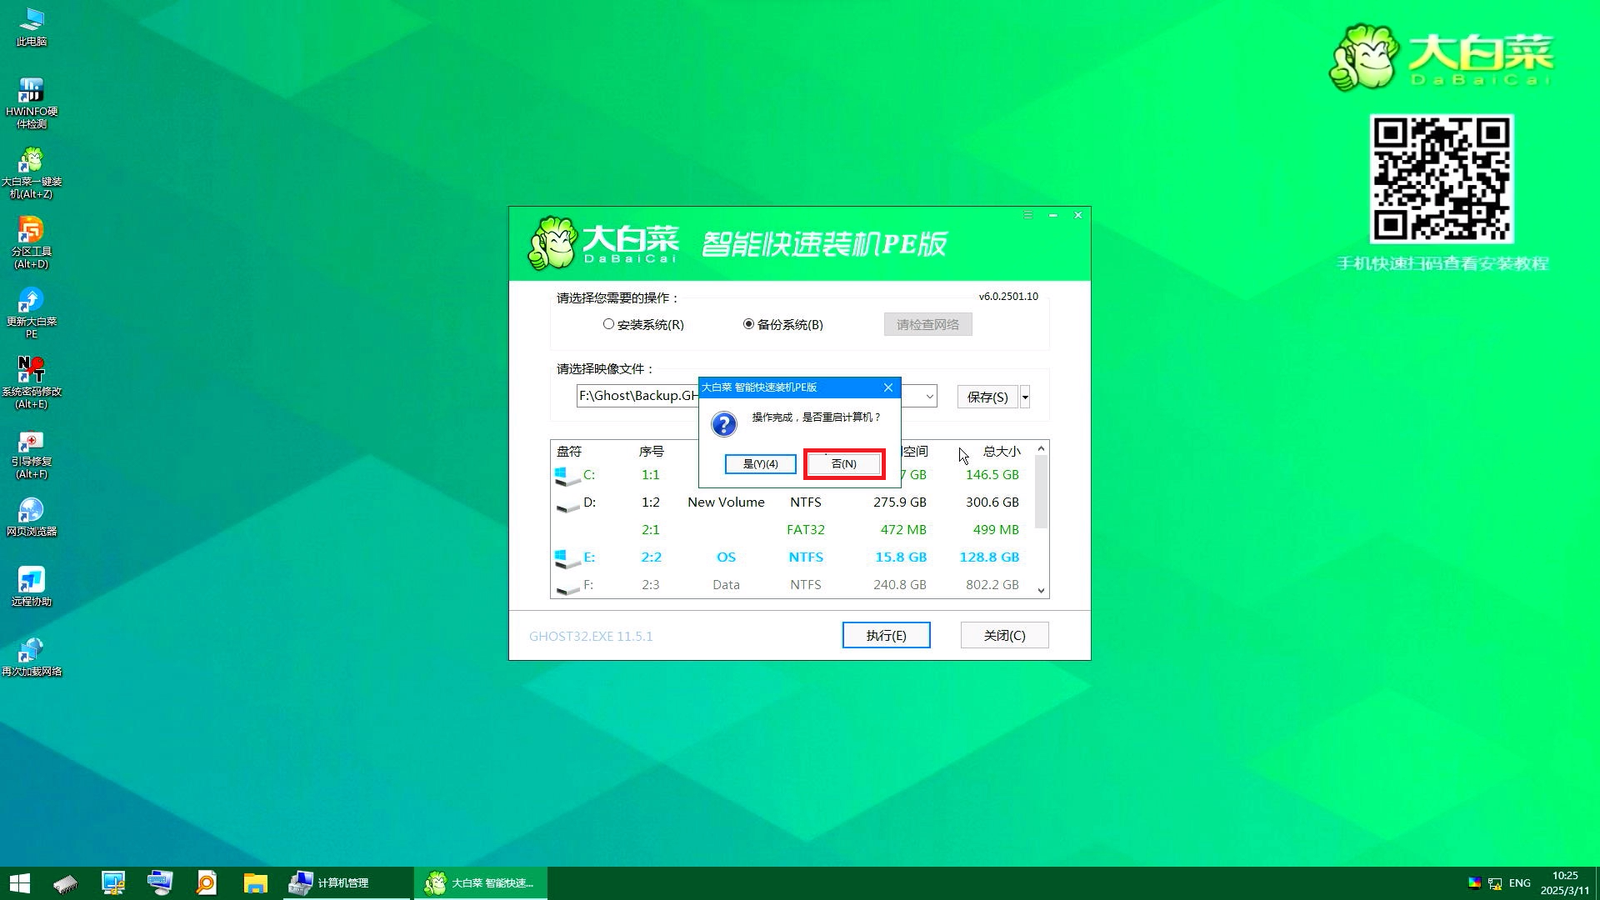
- 备份系统 (Backup)
- Choose OS disk to backup a ghost file.
- Select where to backup the ghost file. (D: drive or any specific drive)
- Execute
2.2.2 Disk management #
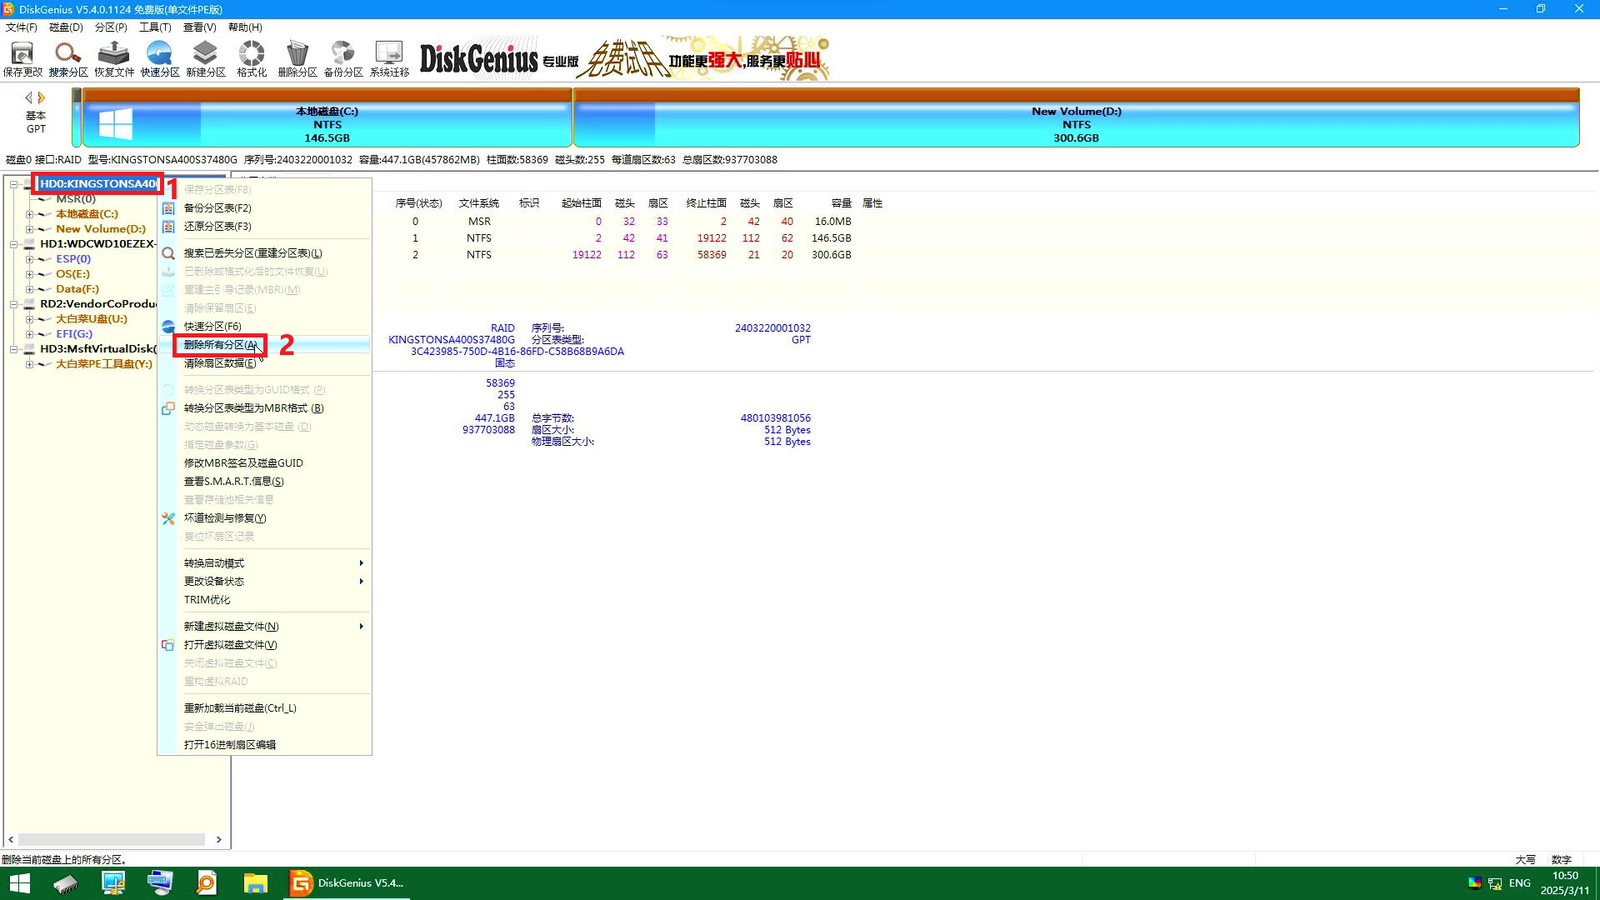
- Manage new disk that will be use, delete or format the disk if needed.
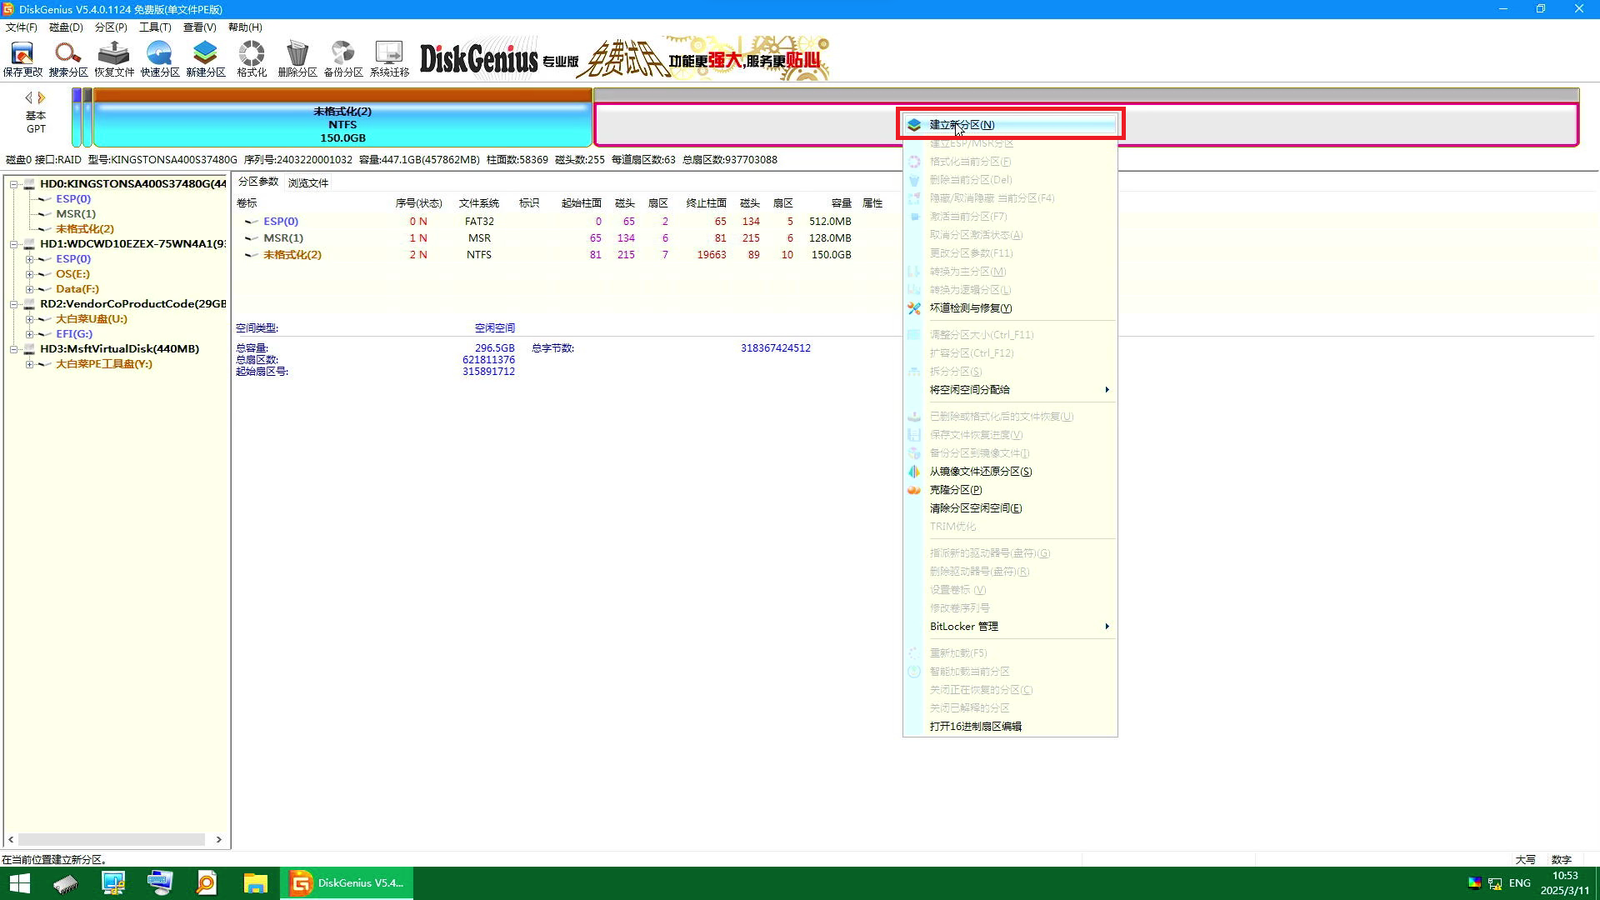
Details (Click to expand)
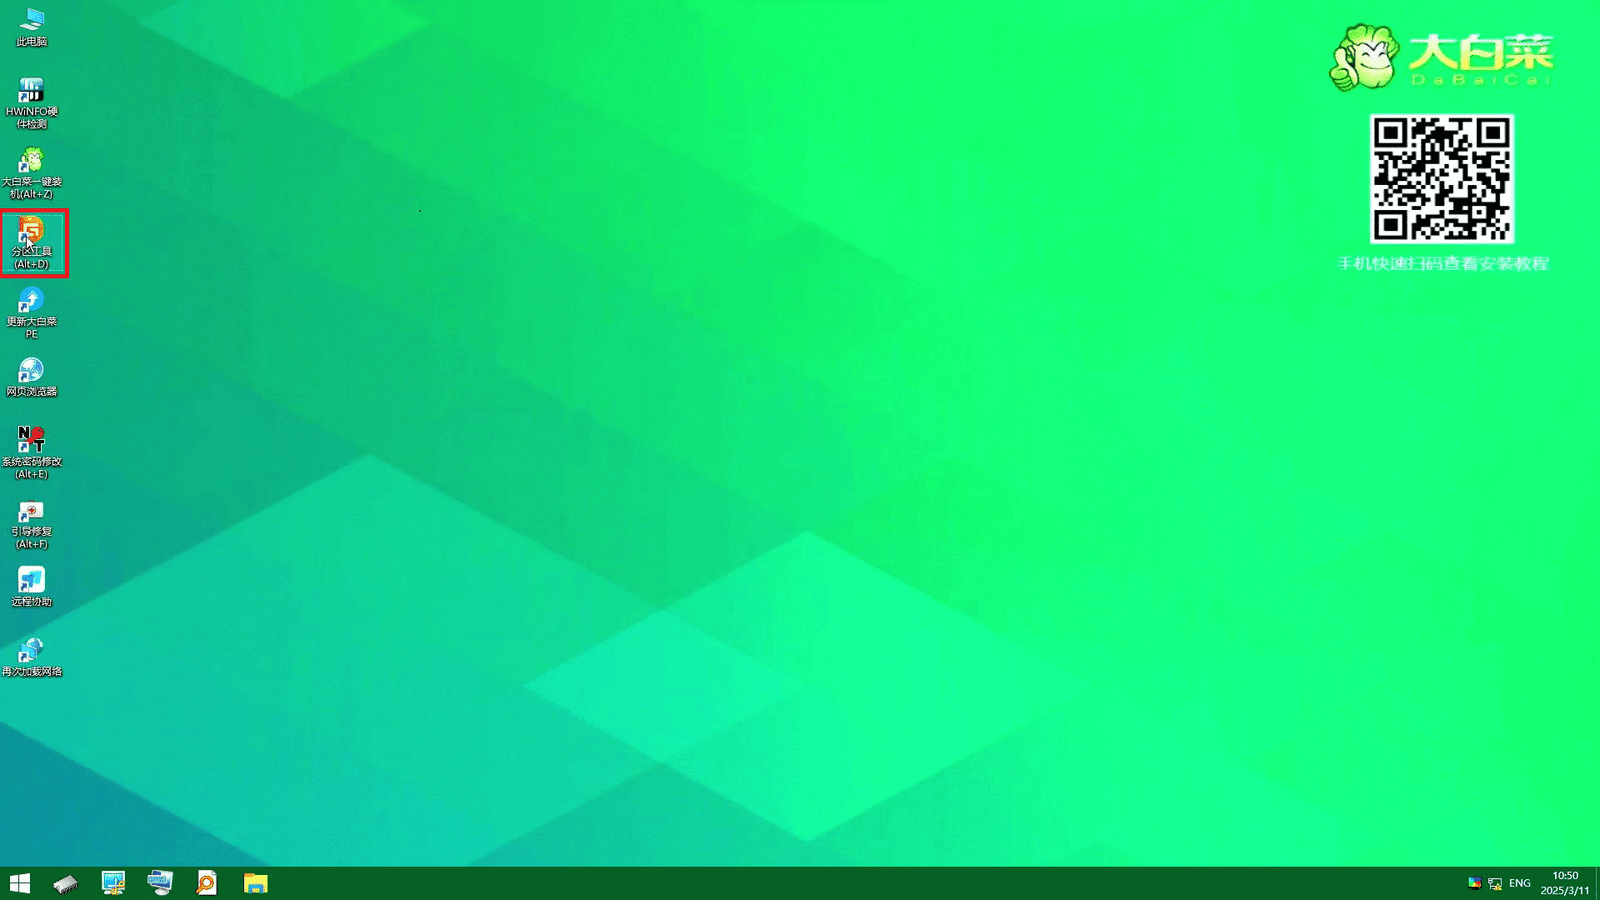
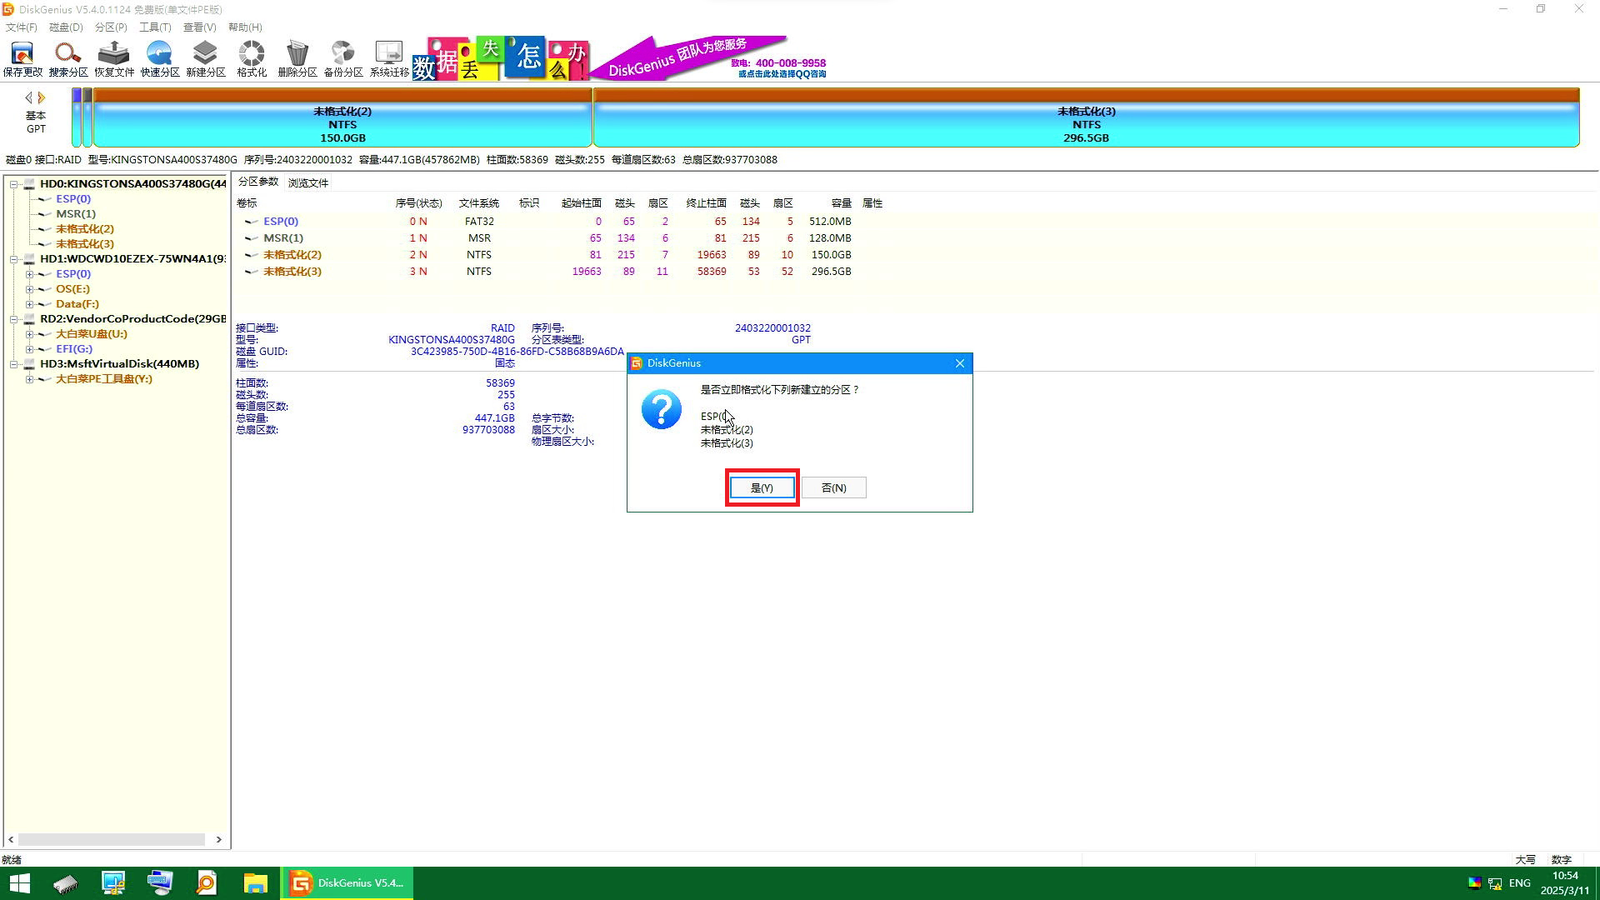
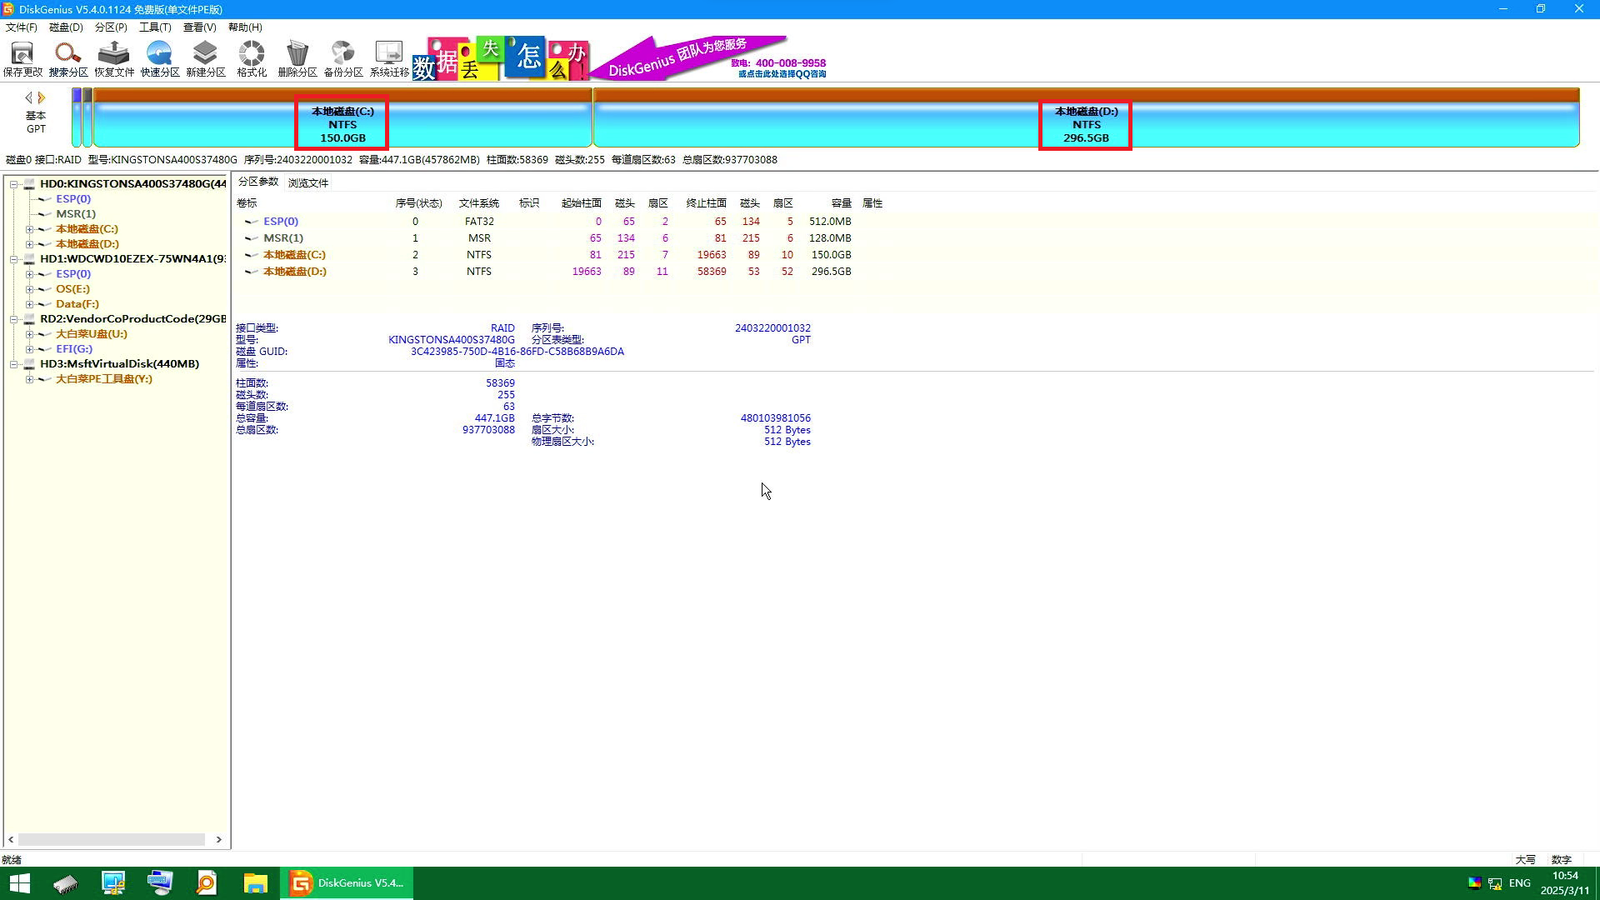
- Open 分区工具 (Disk Genius)
- Choose and right click on the new HDD/SSD & 删除所有 (clear/delete all)

- Right click on the unallocated space and create new partition.
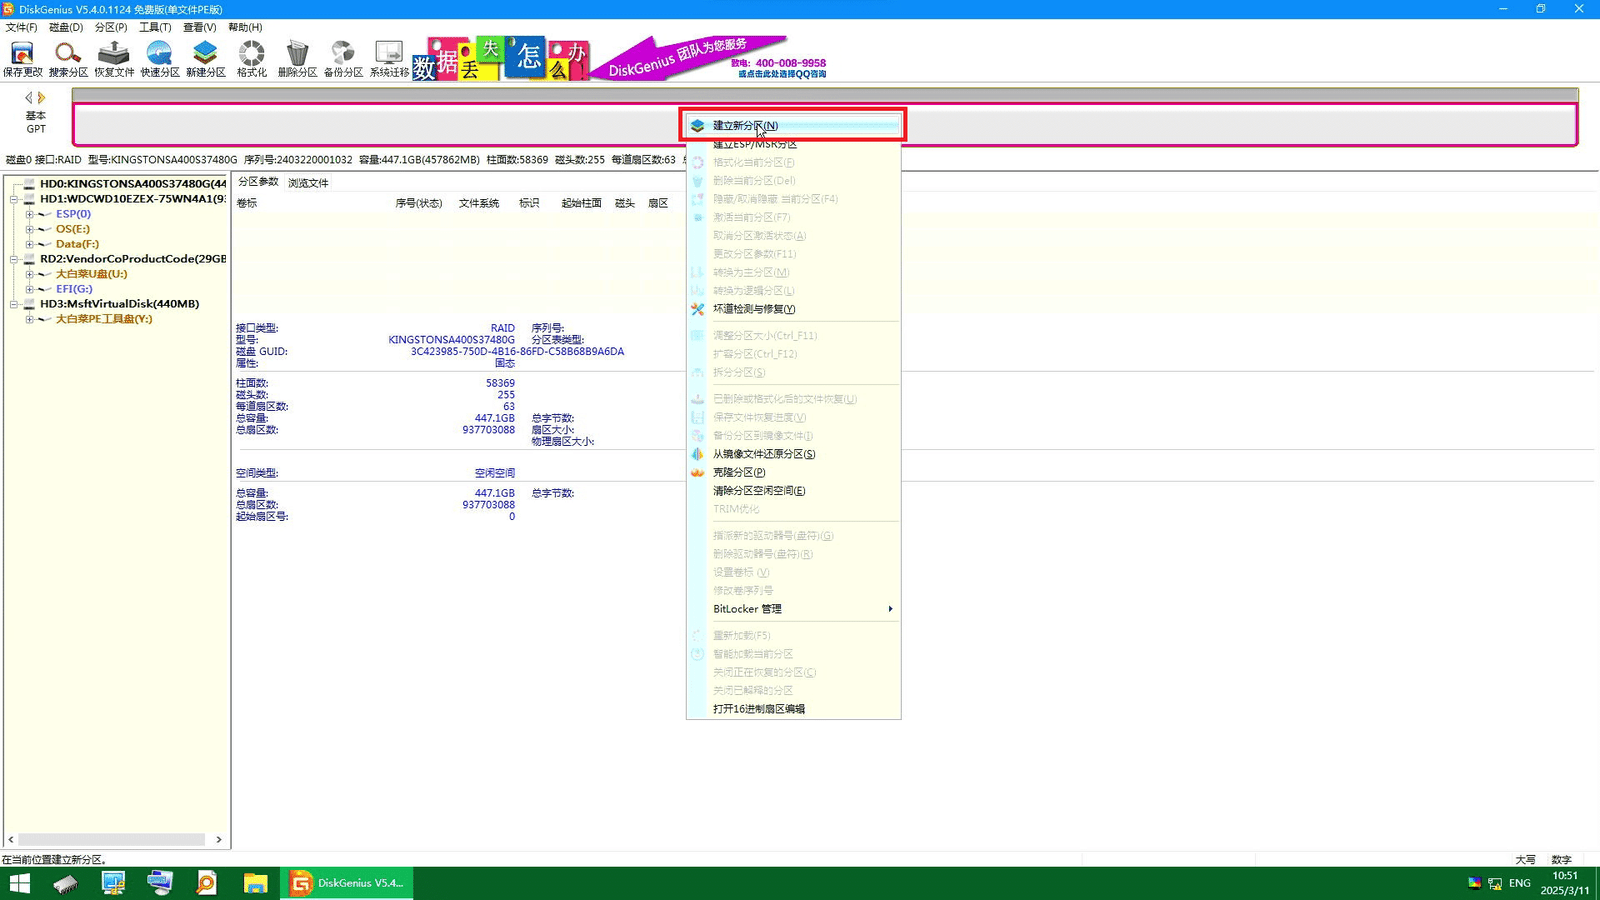
- Set follow as below

- Do the same thing for second unallocated space.
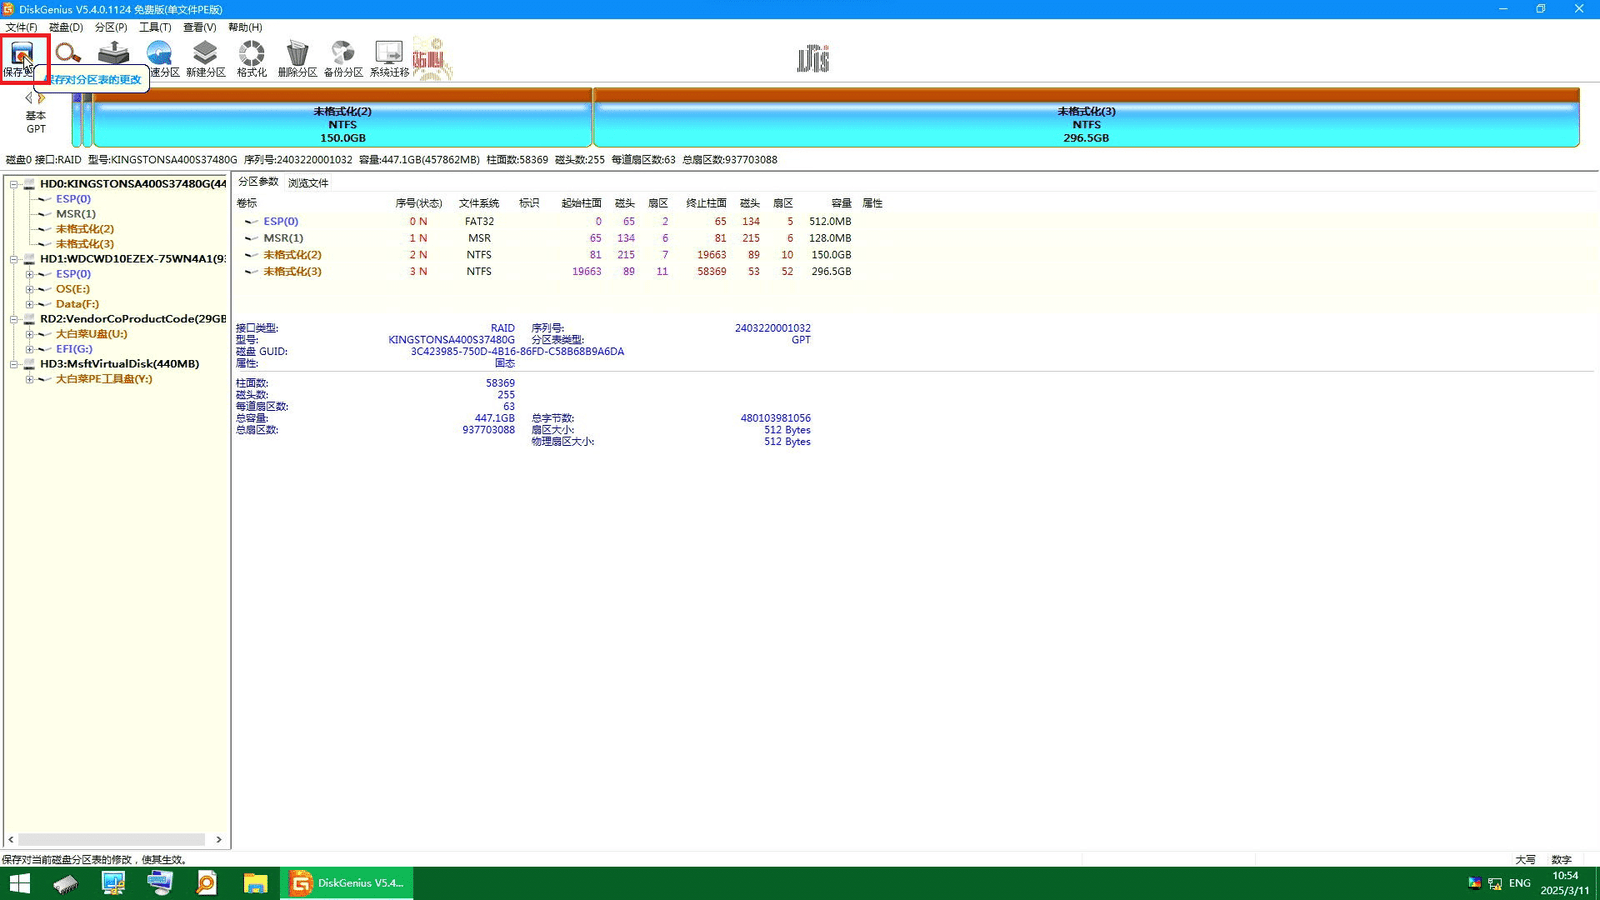
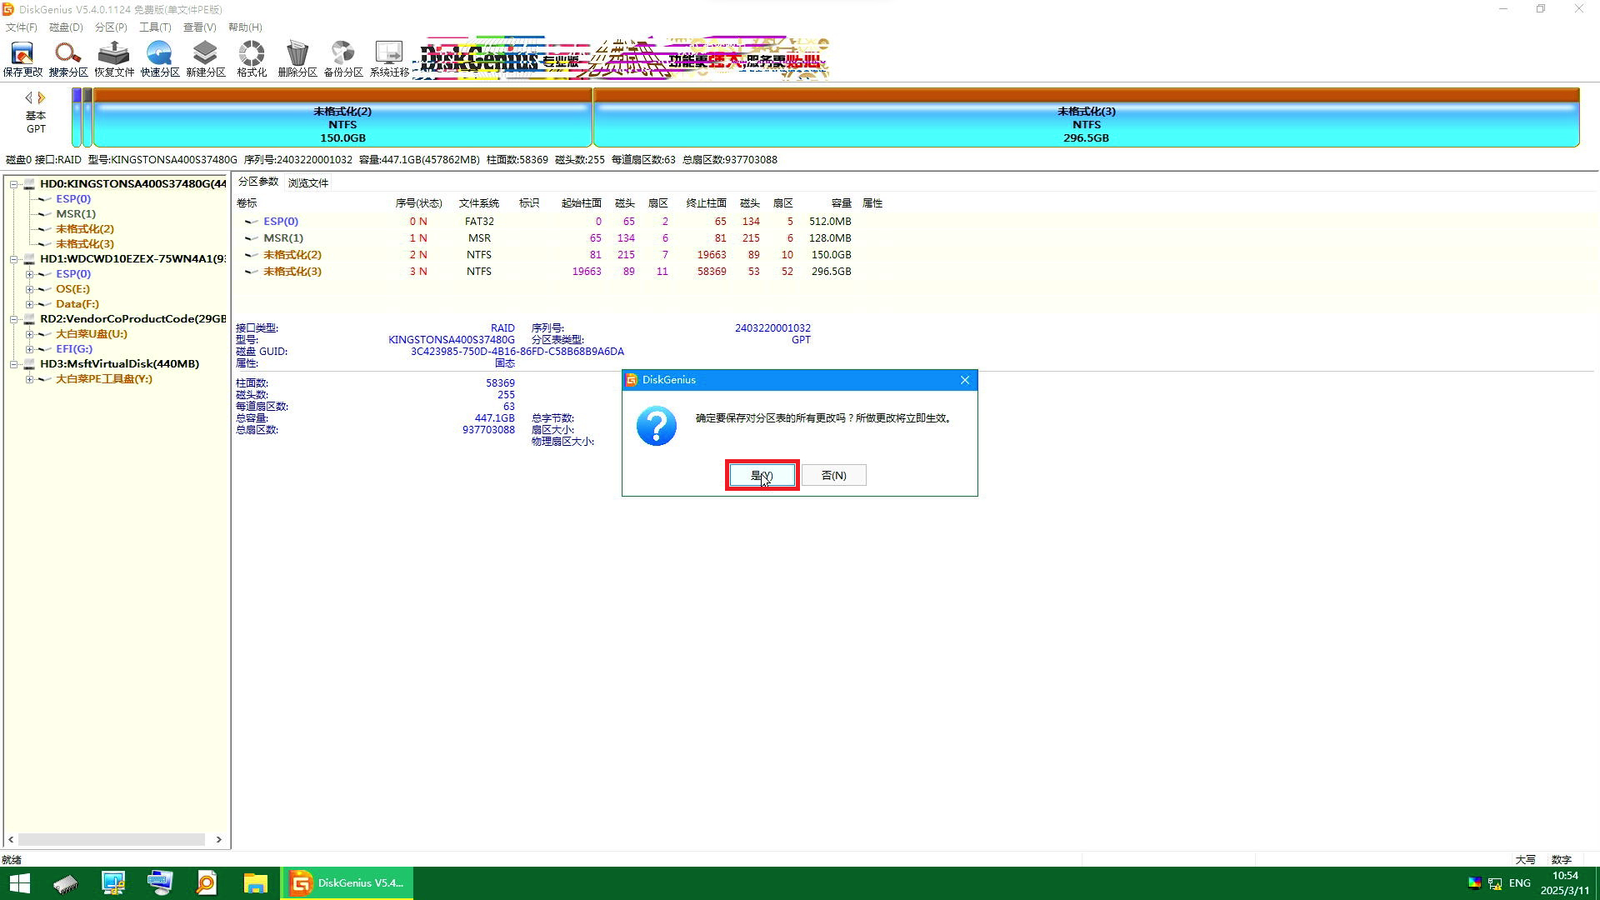
- Click on 保存更改 to save and execute it.
2.2.3 Recover Windows #
Details (Click to expand)
- Choose recover
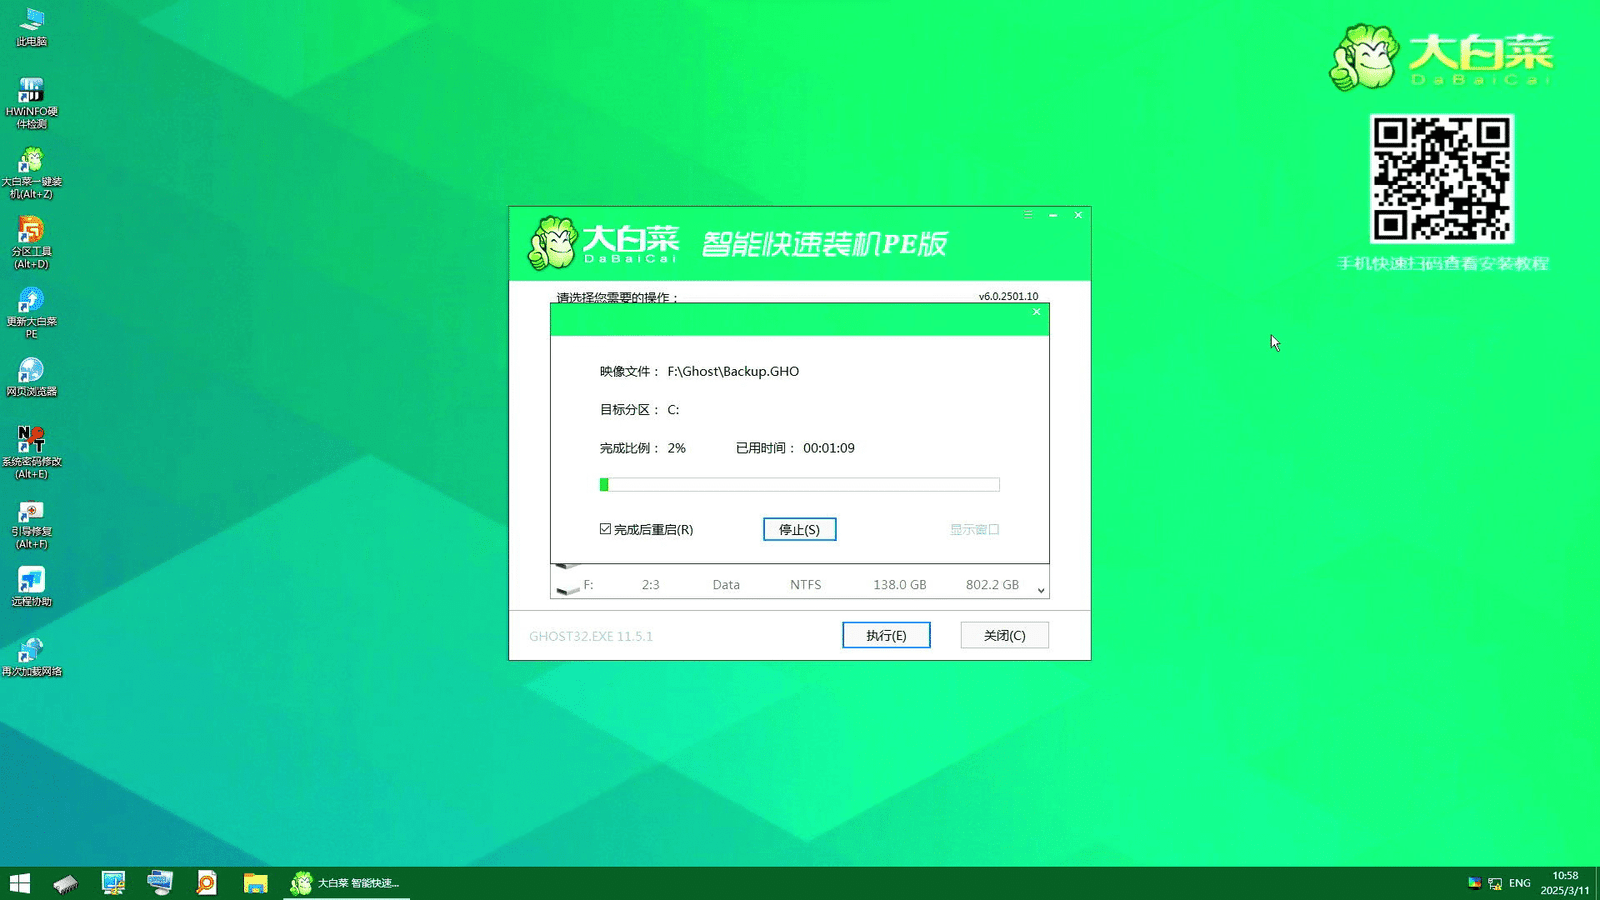
- Open and choose the backup ghost file
- Choose the disk partition that will be use as OS disk.
- Execute
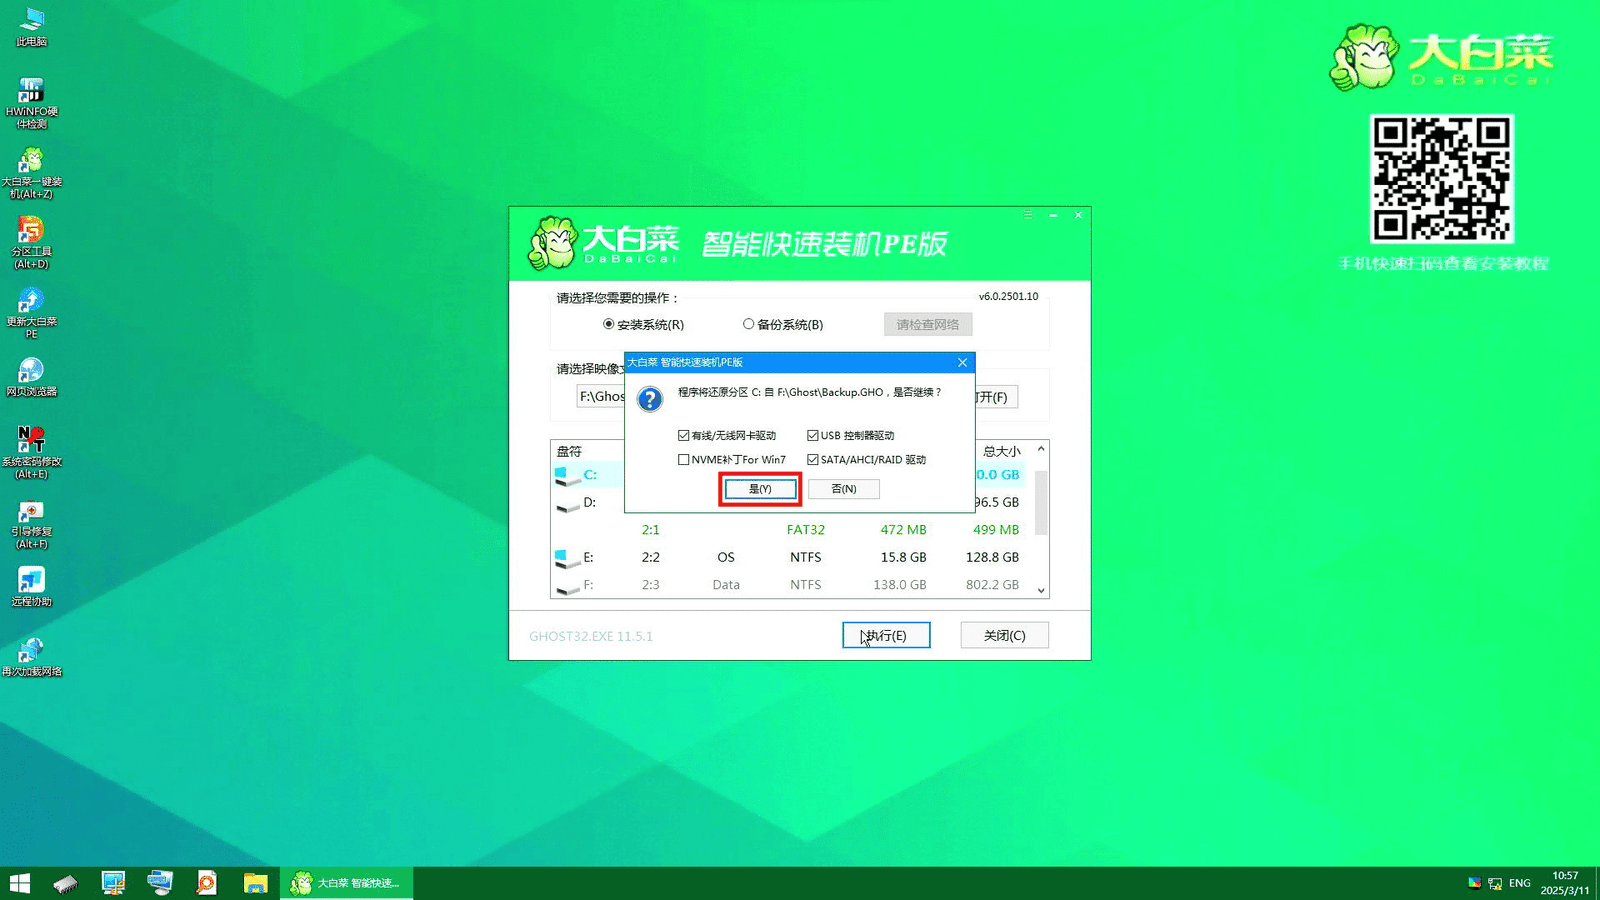
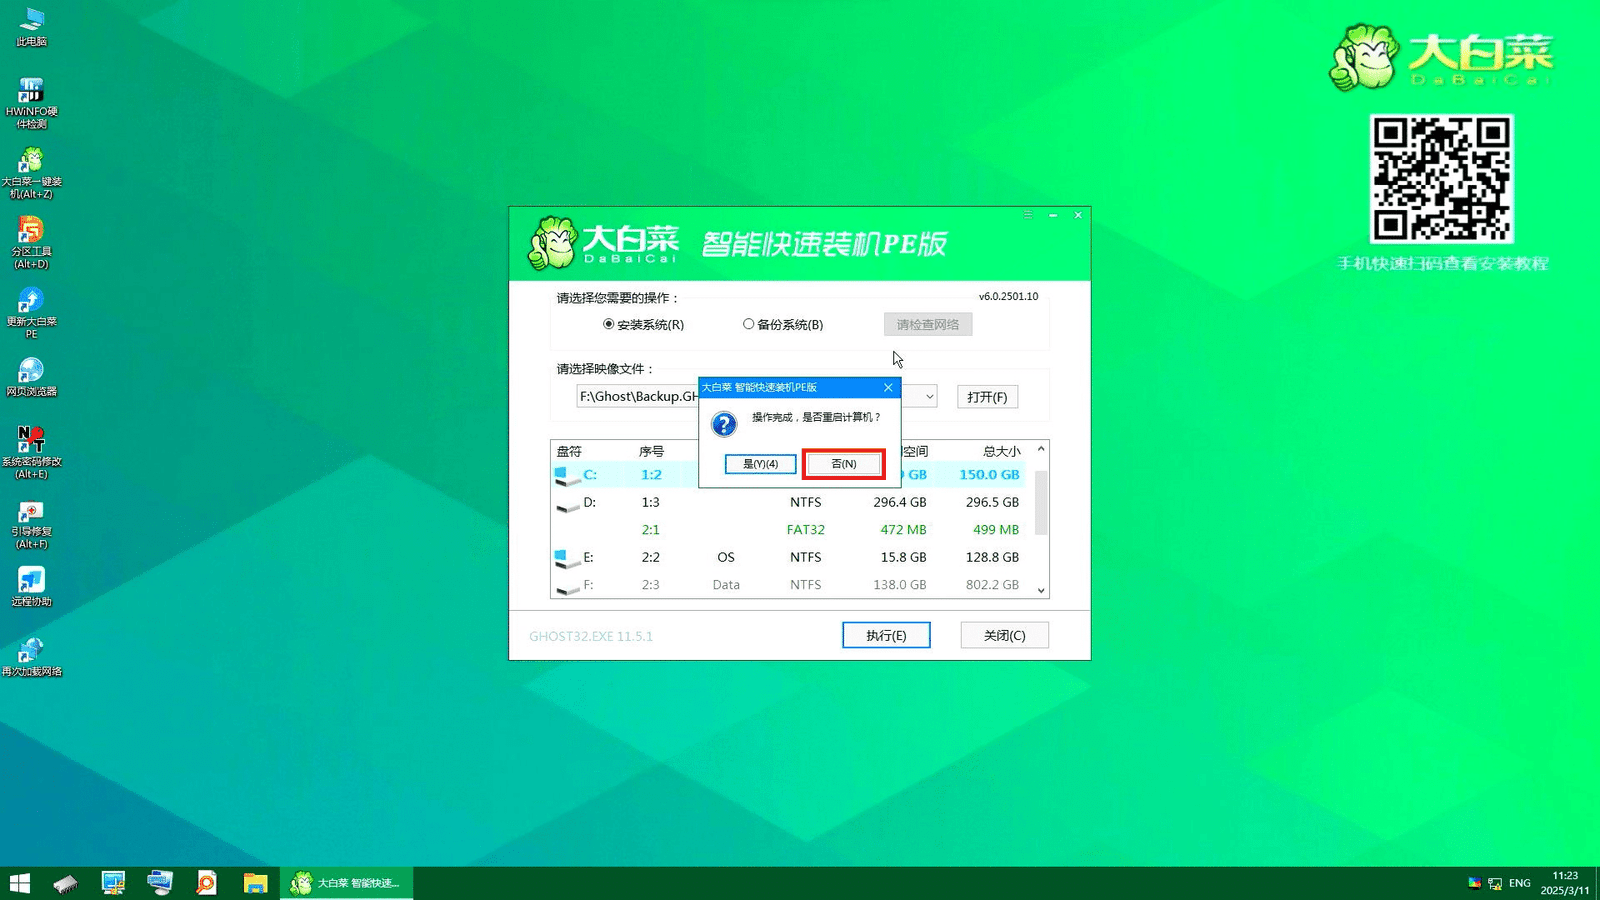
- After done recovery, need to do boot repair (引导修复).
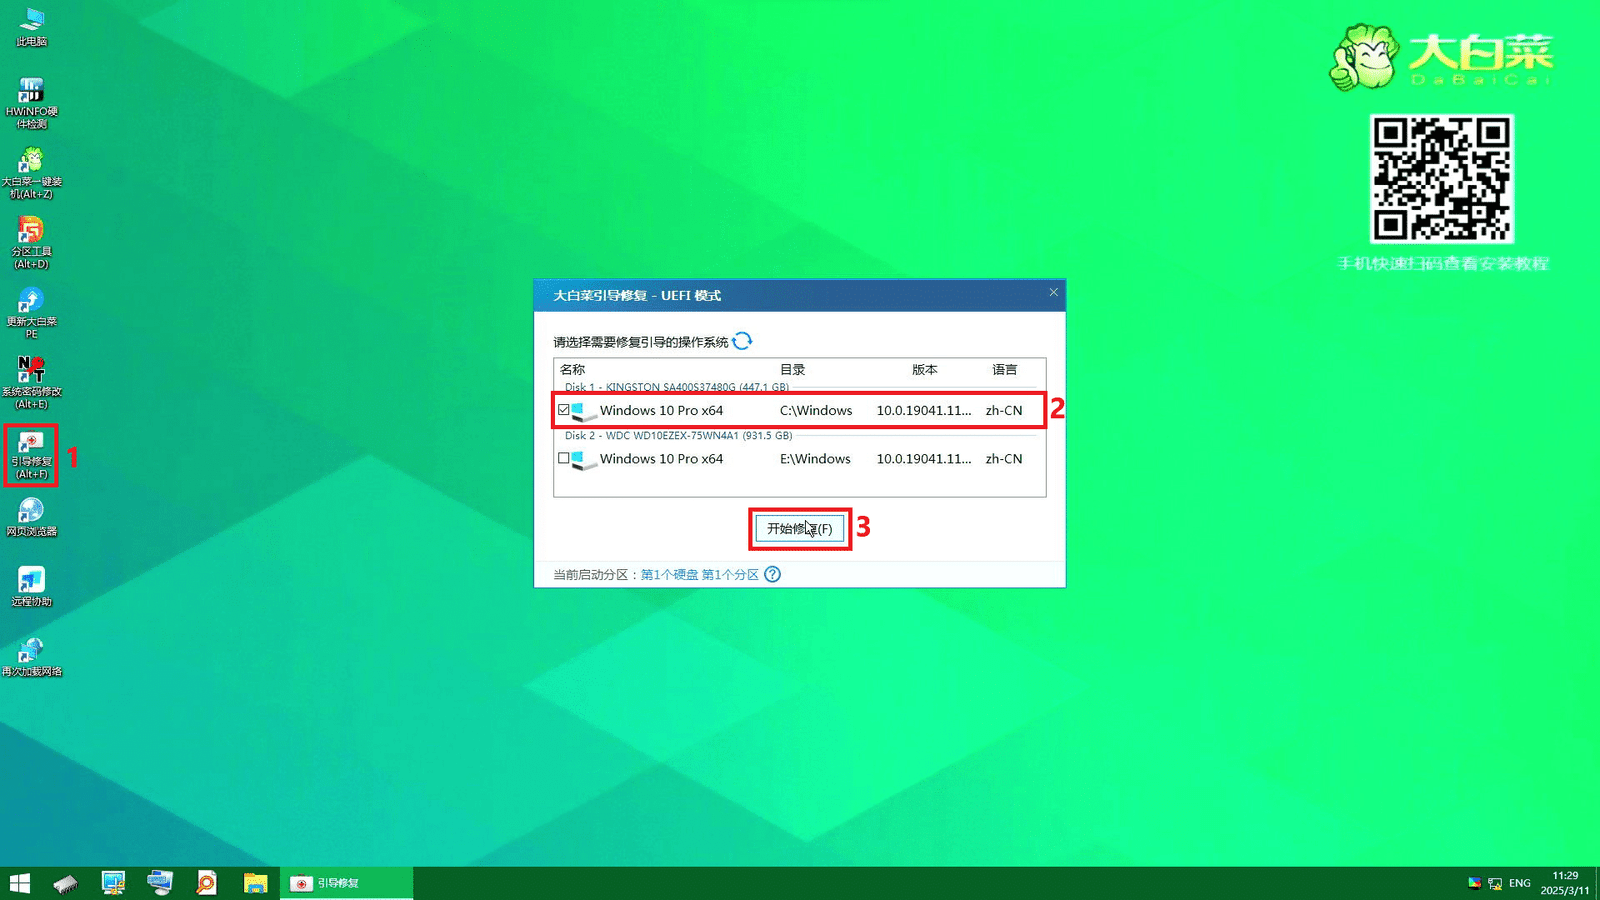
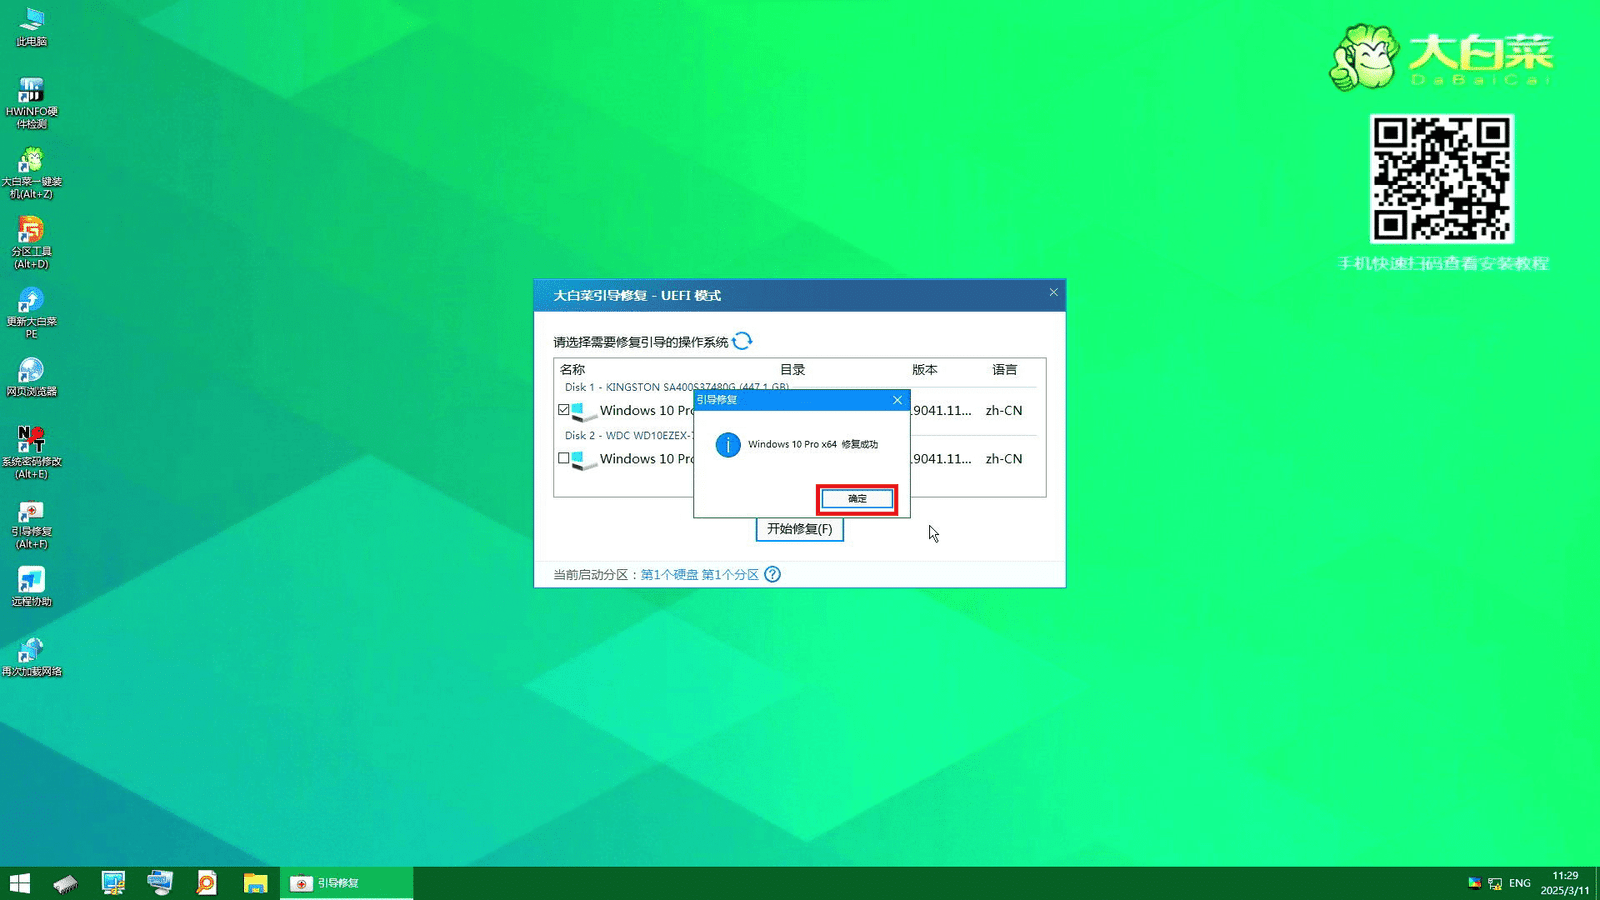
- After done boot repair, reboot PC and boot from the new disk.
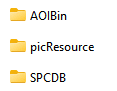
- In D: drive copy back the backup folders (AOIBin) and add folders of SPCDB & picResource then share and give access to everyone.
2.3 Post-Recovery #
2.3.1 Run AOI software and test #
- Check AOI software functionality
- PLC functionality (Motion)
- Camera functionality
- AOISPC functionality
Read the full checklist to get started!


