Offline Station Setup for Programming #
This guide provides you with clear, step-by-step instructions to ensure a smooth and efficient setup of your offline station. The offline station allows you to do real-time fine-tuning and offline programming without interrupting the machine’s operation.
1. 2D AOI (V5300) Software #
To start Offline programming or fine-tuning on a program, you will need to Install the 2D AOI software to your computer. There is two methods of Installing the software, the first is by copying the AOI Bin folders from the 2D AOI machine to your computer, and the second is by downloading the latest software patch from the MagicRay website.
Method 1: Copy AOI Bin from machine #
This method is efficient and easy, requiring only a simple copy-and-paste of the entire AOIBin folder from the machine to your computer.
Steps (Click to expand / Hide)
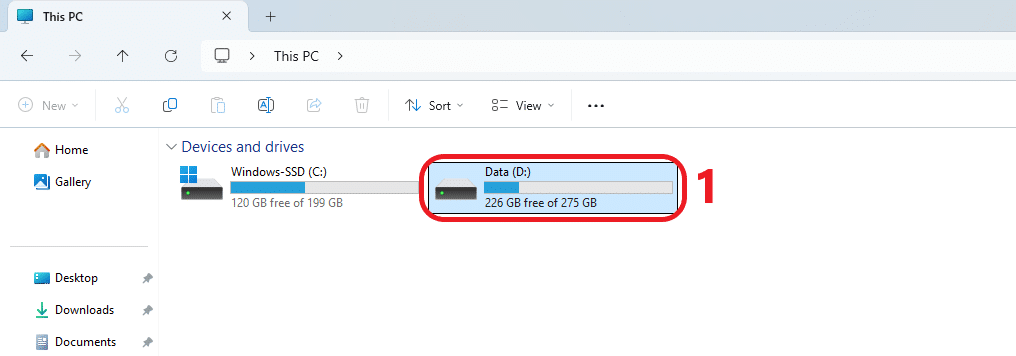
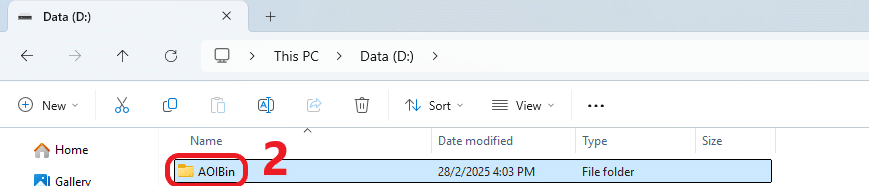
- First, from the AOI Machine, go to “This PC” > “D: Drive” > and copy “AOIBin folder” to your “USB Pendrive” and paste at your computer. (Make sure you compress the AOIBin folder before copy to your pendrive to avoid corruption.)
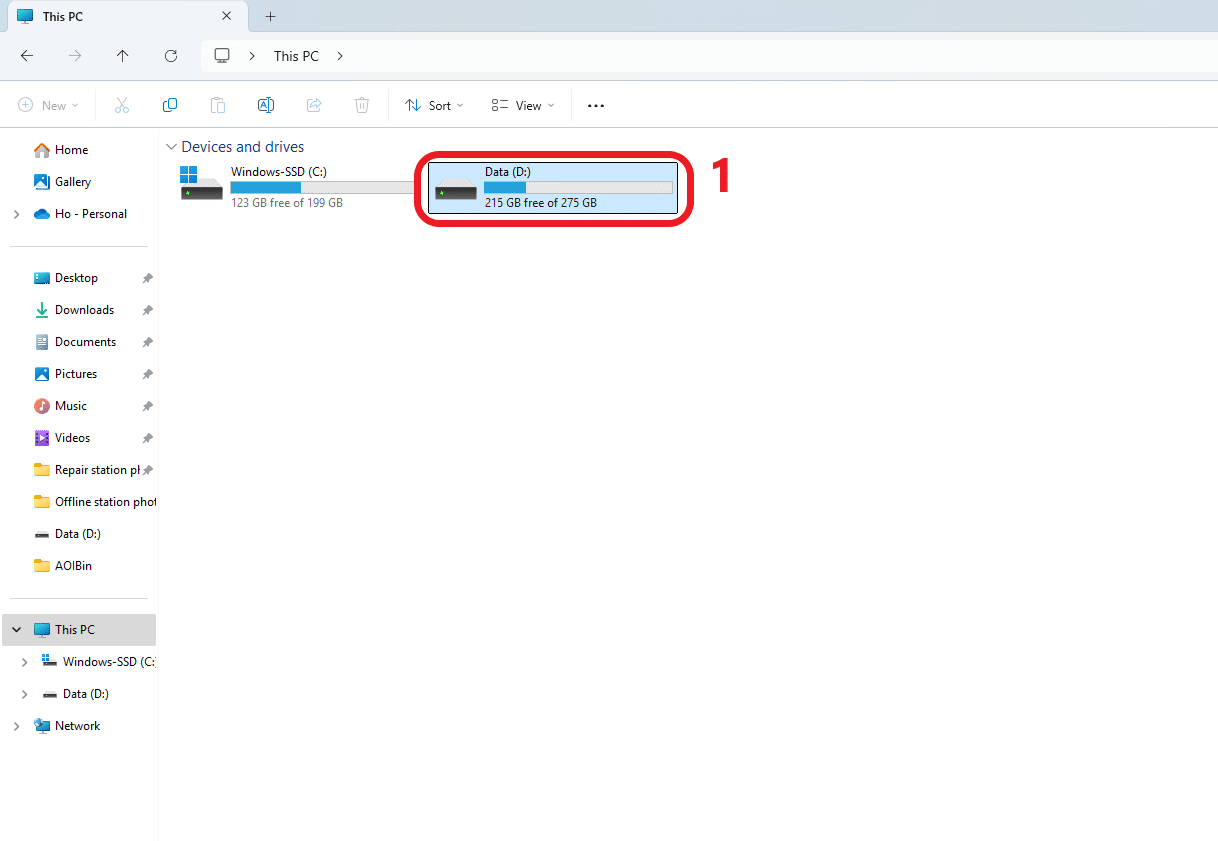
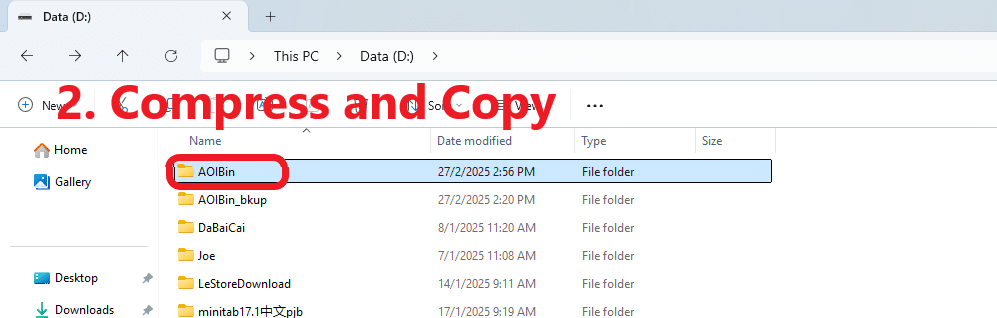
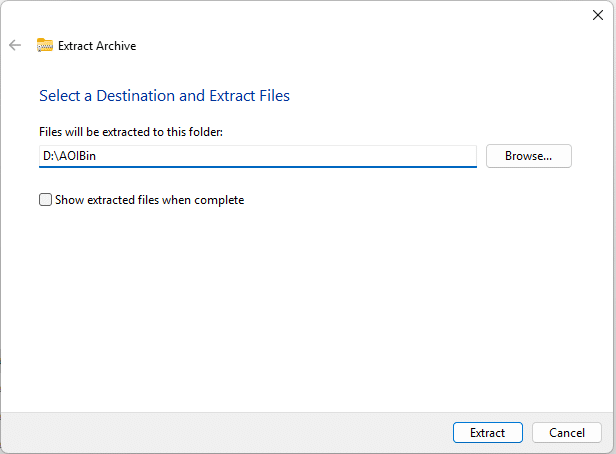
- After pasting the folder to your computer, “Extract” it to the “D: Drive”
End of Method 1, please proceed to step “2: Dongle Key”
Method 2: Download from website #
This method involves downloading and Installing the latest software patch from the MagicRay Official Website.
Steps (Click to expand / Hide)
- The first step is to visit the MagicRay Website, navigate to the “Drivers & download tab” > “Software Patch” > “2D AOI” > “V5300” and download the latest patch in your preferred language (EN “English” / CH “Chinese”).
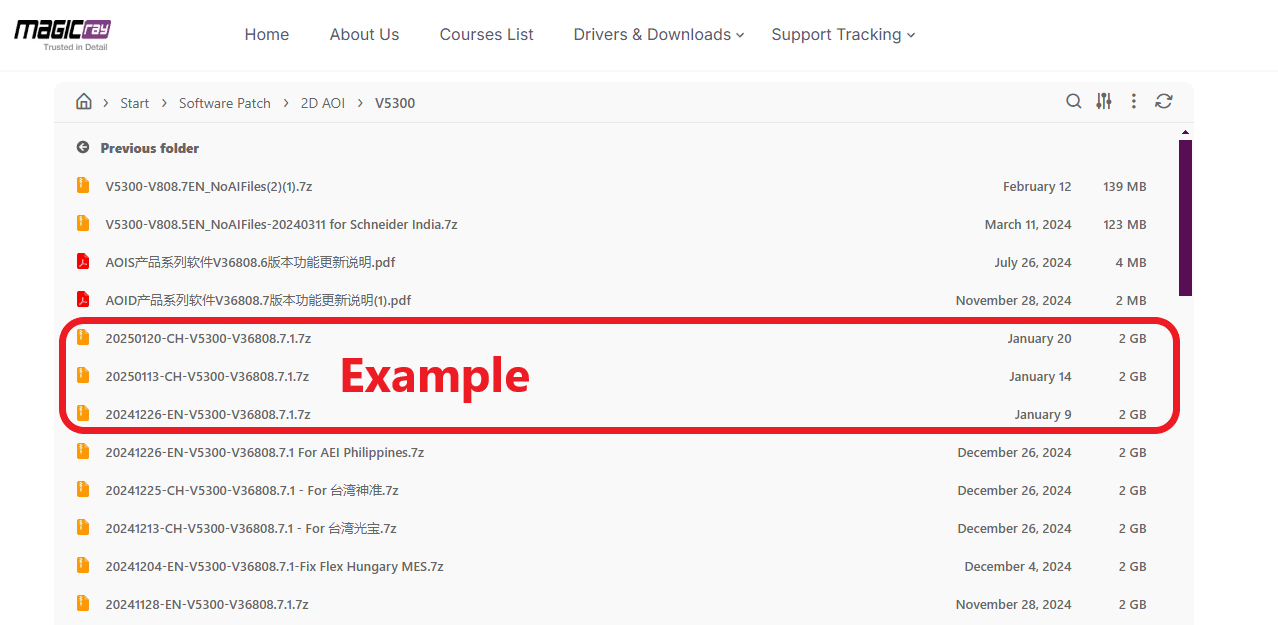
- After downloading the folder, extract it into “D: Drive” using “7zip” and rename the folder to “AOIBin”

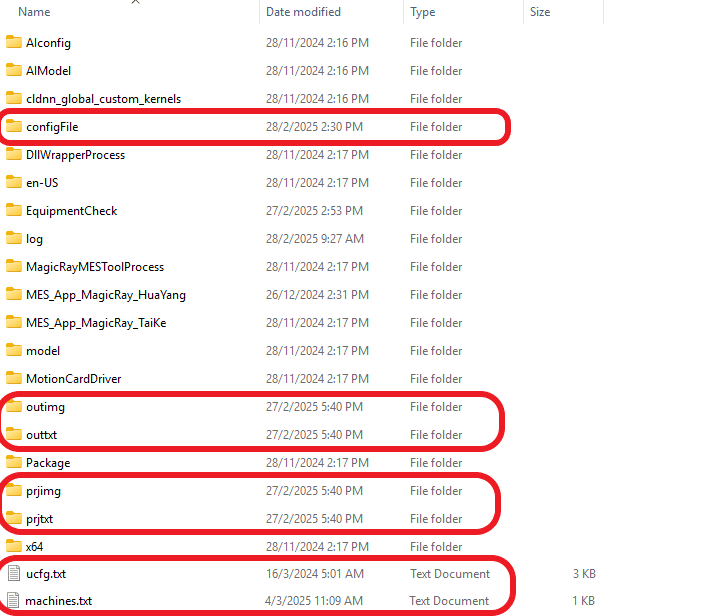
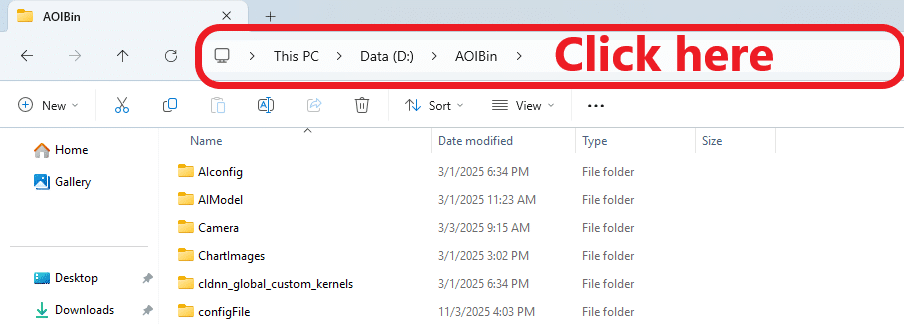
- Next, add the “necessary folders and files” (Shown in table below) into the “AOIBin” folder for the software to run.
| Folders/Files Name | Description | Where to get |
|---|---|---|
| configFile | Contains the settings you made in the software | Create a New Folder and rename it to “configFile” |
| prjtxt | Contains the program files when saving a program | Create a New Folder and rename it to “prjtxt” |
| prjimg | Contains the board Image when saving a program Image | Create a New Folder and rename it to “prjimg” |
| outtxt | Contains the result program after running an Inspection | Create a New Folder and rename it to “outtxt” |
| outimg | Contains the result program Image after running an Inspection | Create a New Folder and rename it to “outimg” |
| machines.txt | Contains the software version, machine name and Its IP address | Create a new TXT file and rename it to “machines” |
| Ucfg.txt | It contains the user login interface settings and formats | This file can only be obtained by magicray authorized employee OR Copy from existing AOIBin from Machine |
End of Method 2, please proceed to step “2: Dongle Key”
2. Dongle Key #
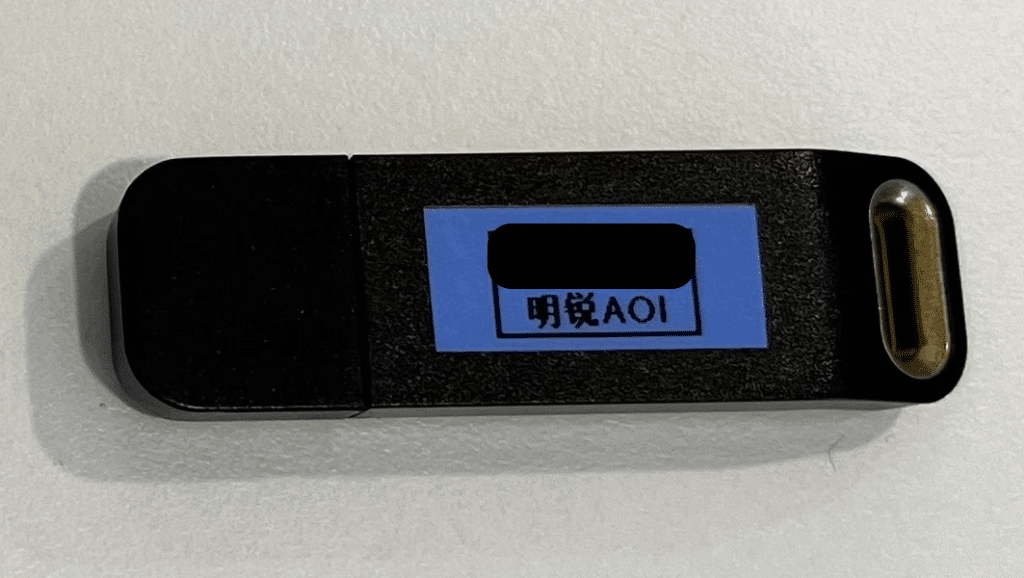
To access the AOI software, a dongle key flashdrive along with its corresponding license is required. To obtain the dongle key, please get in touch with a MagicRay representative, who will assist you in acquiring the necessary dongle key and ensure proper licensing for your software.
Here is an example of the Dongle key Flashdrive.
2.1 HASP (Hardware Against Software Piracy) Setup #
After obtaining the Dongle Key from a MagicRay representative, you will need to complete the HASP setup to activate your dongle key.
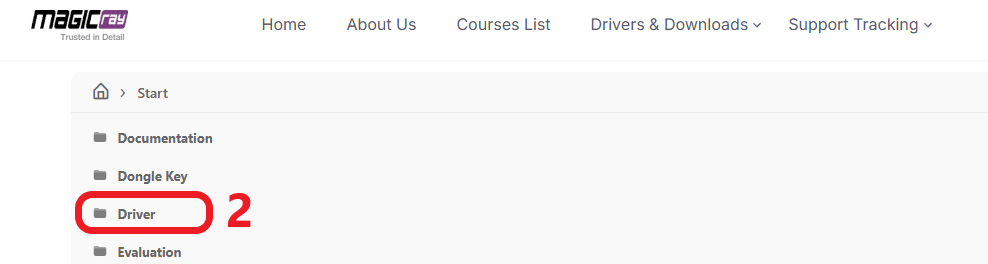
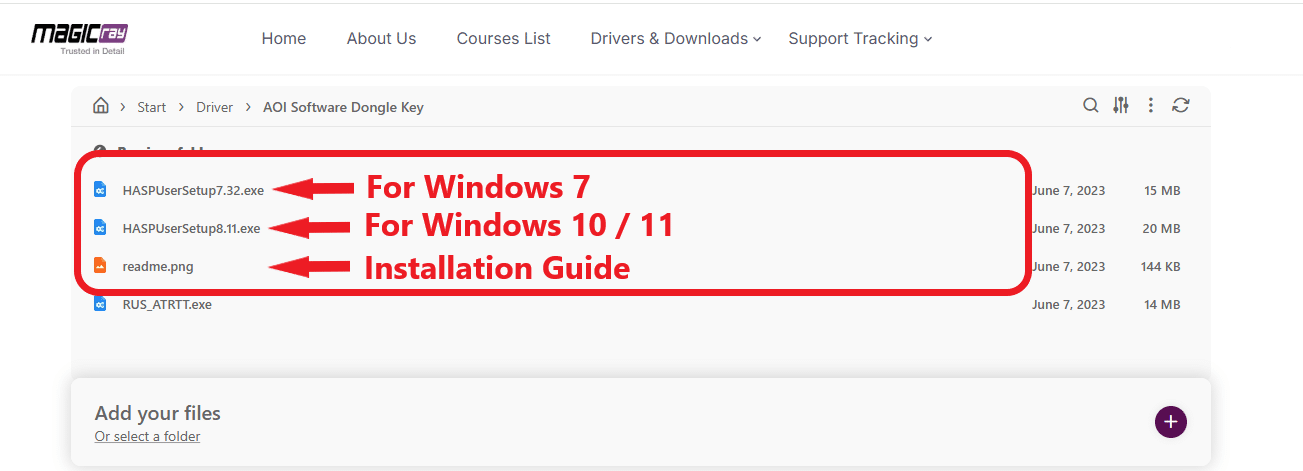
- First, visit our MagicRay Official Website and navigate to “Drivers & download tab” > “Driver” > “AOI Software Dongle Key“

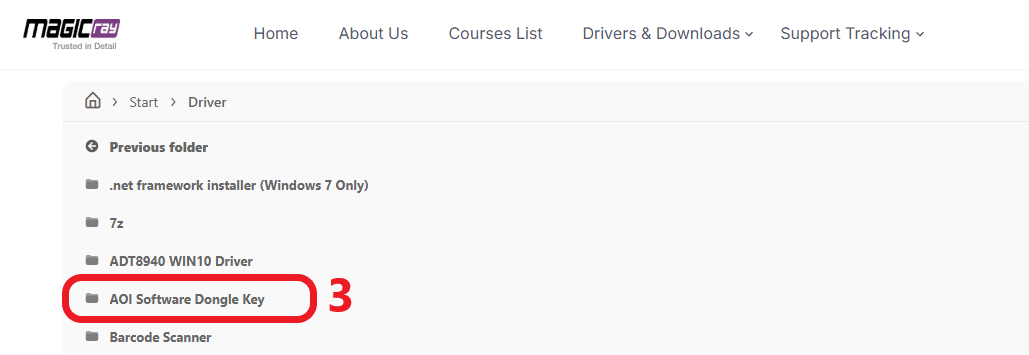
- Next, download the “setup.exe file” and follow the installation instructions provided in “readme.png”
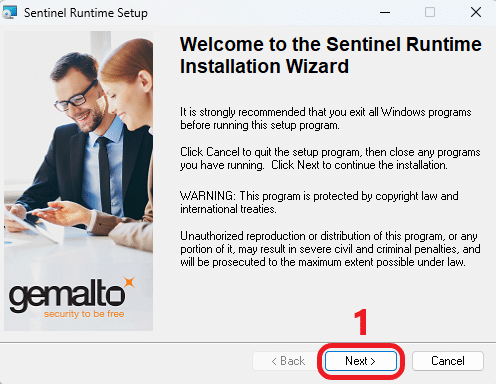
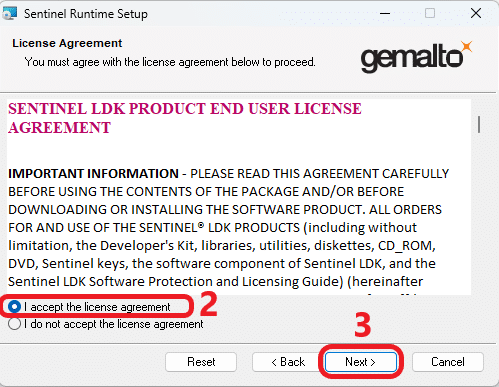
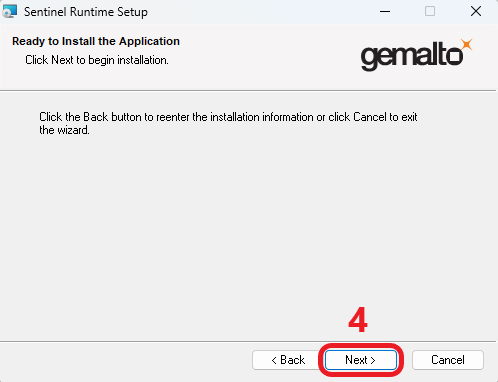
Installation Details (Click to expand / Hide)
3. AOI Offline configuration #
This step focuses on configuring the AOI Offline software to ensure seamless integration with your 2D AOI machine. After completing this setup, you will be able to perform real-time fine-tuning and programming.
3.1 Machine Name and IP Address #
To establish a connection between the machine and your AOI Offline, enter the machine name and IP address in the settings.
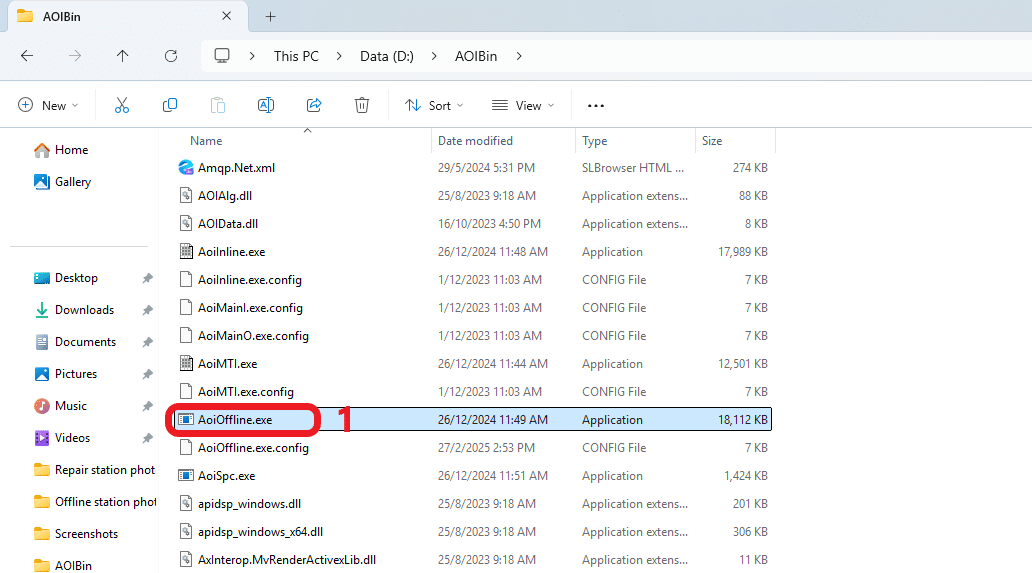
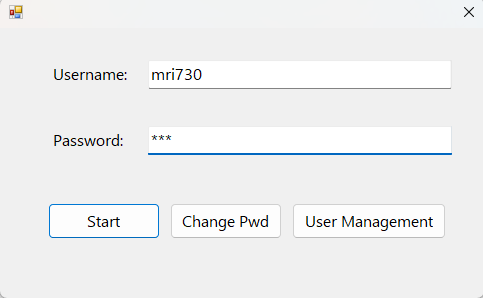
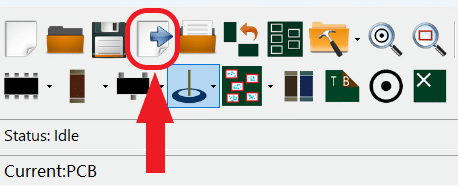
- Once the software and dongle key setup are complete, insert the dongle key and launch “AoiOffline.exe” and log in using an expert account. (Username : Mri730) / (Password : 730)

- In the software interface, go to “Offline Debugging Operation” > “Add”
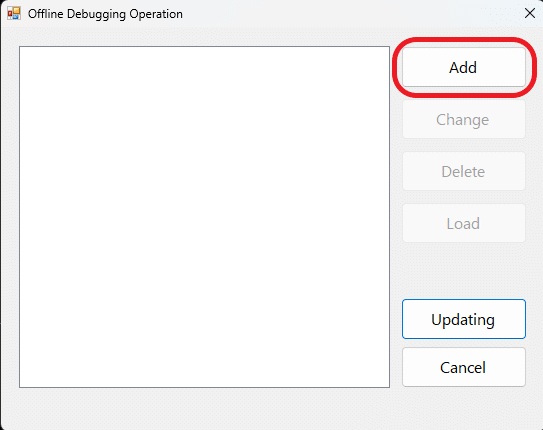
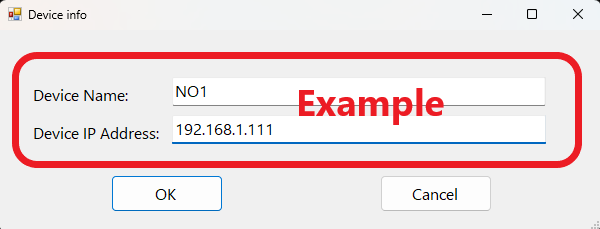
- Enter the “Name” (Can be found in settings) and “Local Host IP address” (127.0.0.1) of your machine, this will generate a file in AOIBin containing your machine’s information.
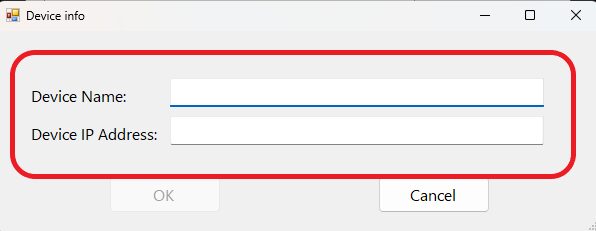
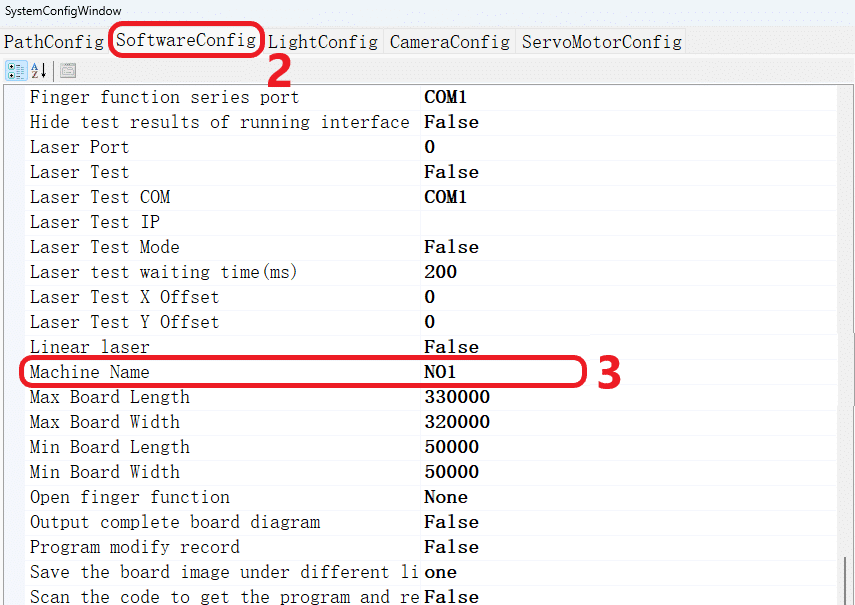
Location of Machine Name (Click to expand / Hide)
- Go to “Settings” > SoftwareConfig” > “Other Config” > “Machine Name” (If the space is empty, you can set the name of the machine according to your preference)

3.2 Path config settings #
This step involves configuring the AOIBin path to ensure the software can access and read data from the designated folder.
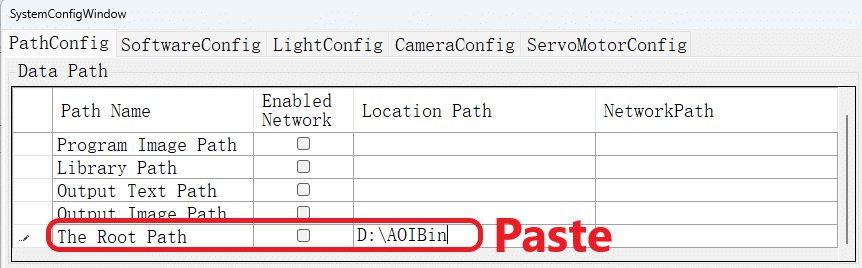
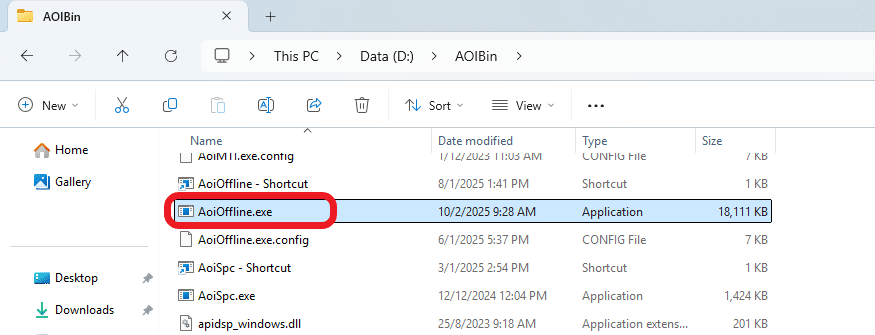
- First, go to “D: Drive” > “AOIBin” and click on the “Address Bar” copy its path in “File Explorer”

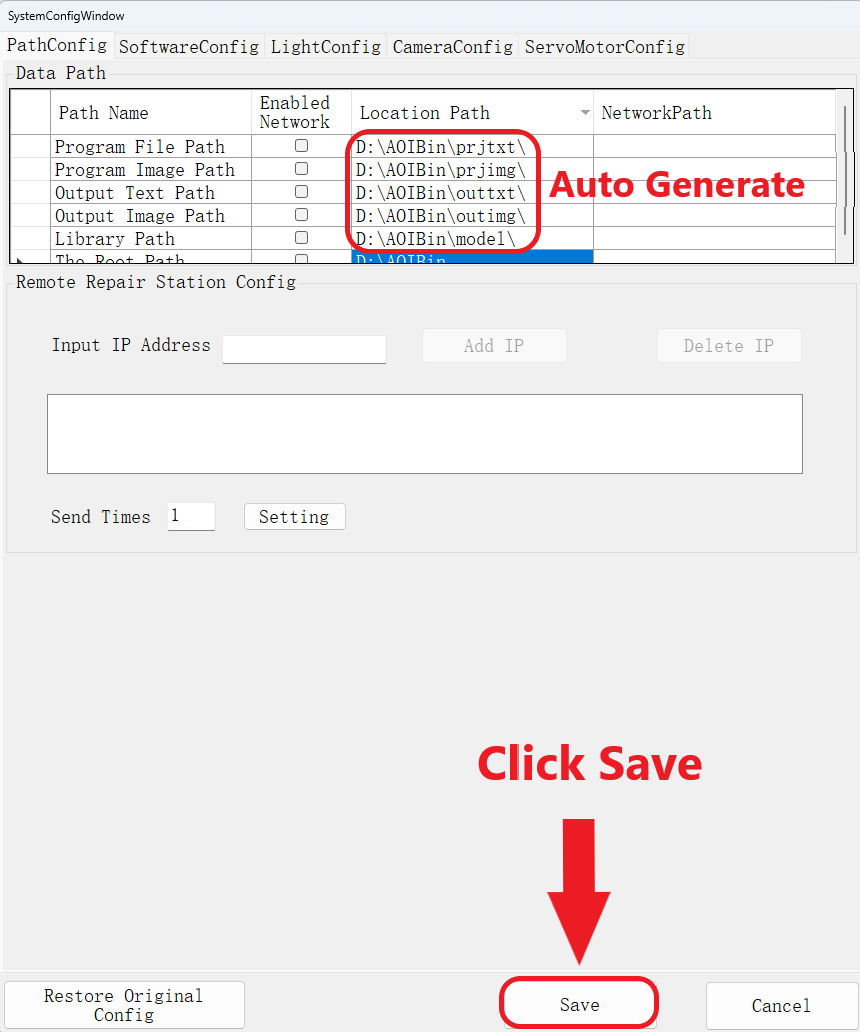
- Next, navigate to the “Settings”, paste the designated path into the “Location Path” under “The Root Path” and press enter. The system will automatically generate the remaining path. Finally, save and reload the software to apply the new settings.

CONGRATULATIONS!
You now meet the minimum requirements to run the AOI Offline software and can begin programming with it.
Real-Time Fine Tuning #
Real-time fine-tuning with AOI software allows for continuous adjustments and optimization of inspection parameters, ensuring higher accuracy, reduce false call rate, and adaptive performance without interrupting the inspection process.
Machine and Offline Station Communication. #
To implement real-time modifications to the running program, the machine must first establish a secure connection with your offline station, enabling seamless communication and data exchange. This process is similar to connecting a repair station computer to the machine, you can refer to the document which is ‘Repair Station Setup and Troubleshooting Guide‘
1. Offline Debugging Configuration #
After establishing the connection between the machine and the offline station computer, enter the machine name and its corresponding IP address into the Offline Debugging Operation feature.
- First, open up the AoiOffline software (Make sure both machine and offline station is using the same version of the AOI Software)

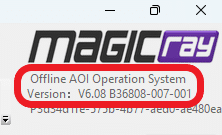
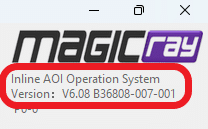
“Example of the same version of Offline AOI & Inline AOI“
- Next, navigate to Offline Debugging Operation, click “Add” and enter the machine “Name” and “IP Address” (Skip this step if it was already added during the offline station setup)


2. Load program from Inline to Offline #
After adding the machine profile in the offline software, you can now load the program from Inline to Offline to do fine tuning while the machine continues running production.
- First, make sure the machine is in running mode and have atleast one result confirmed in repair station.
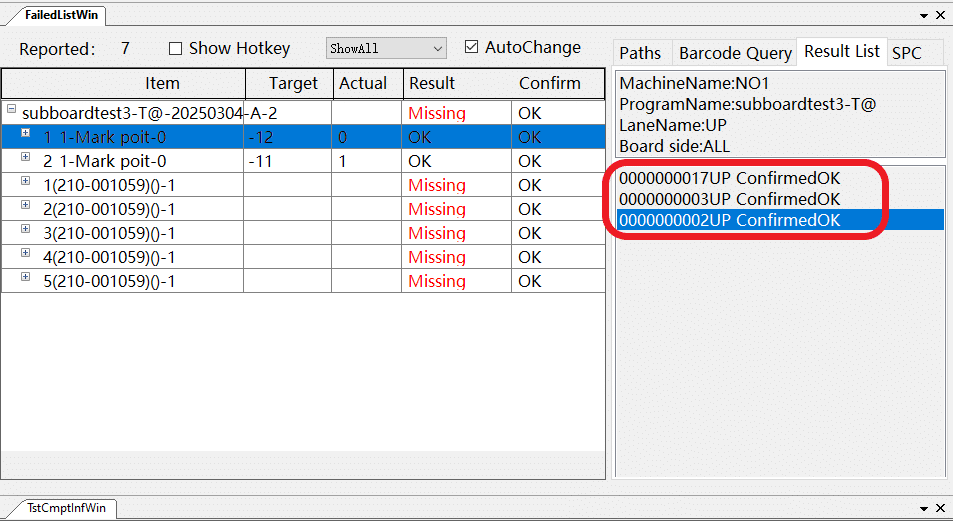
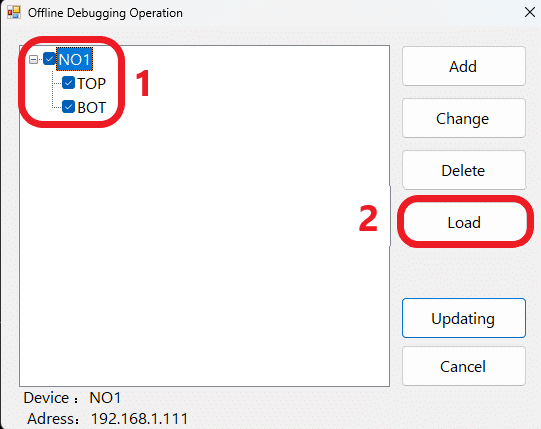
- In Offline AOI Software, select the machine in “Offline Debugging Operation” and click “Load“.
The program from Inline should appear in your Offline software and you can make necessary fine-tuning adjustments.
3. Update program to Machine (Inline) #
Once you have completed the fine-tuning in the Offline software, you can update the program on the machine, which will then apply the new settings to the next board.
- Select the machine you want to update the program to and click the “updating” button to update the program to that AOI Inline Machine

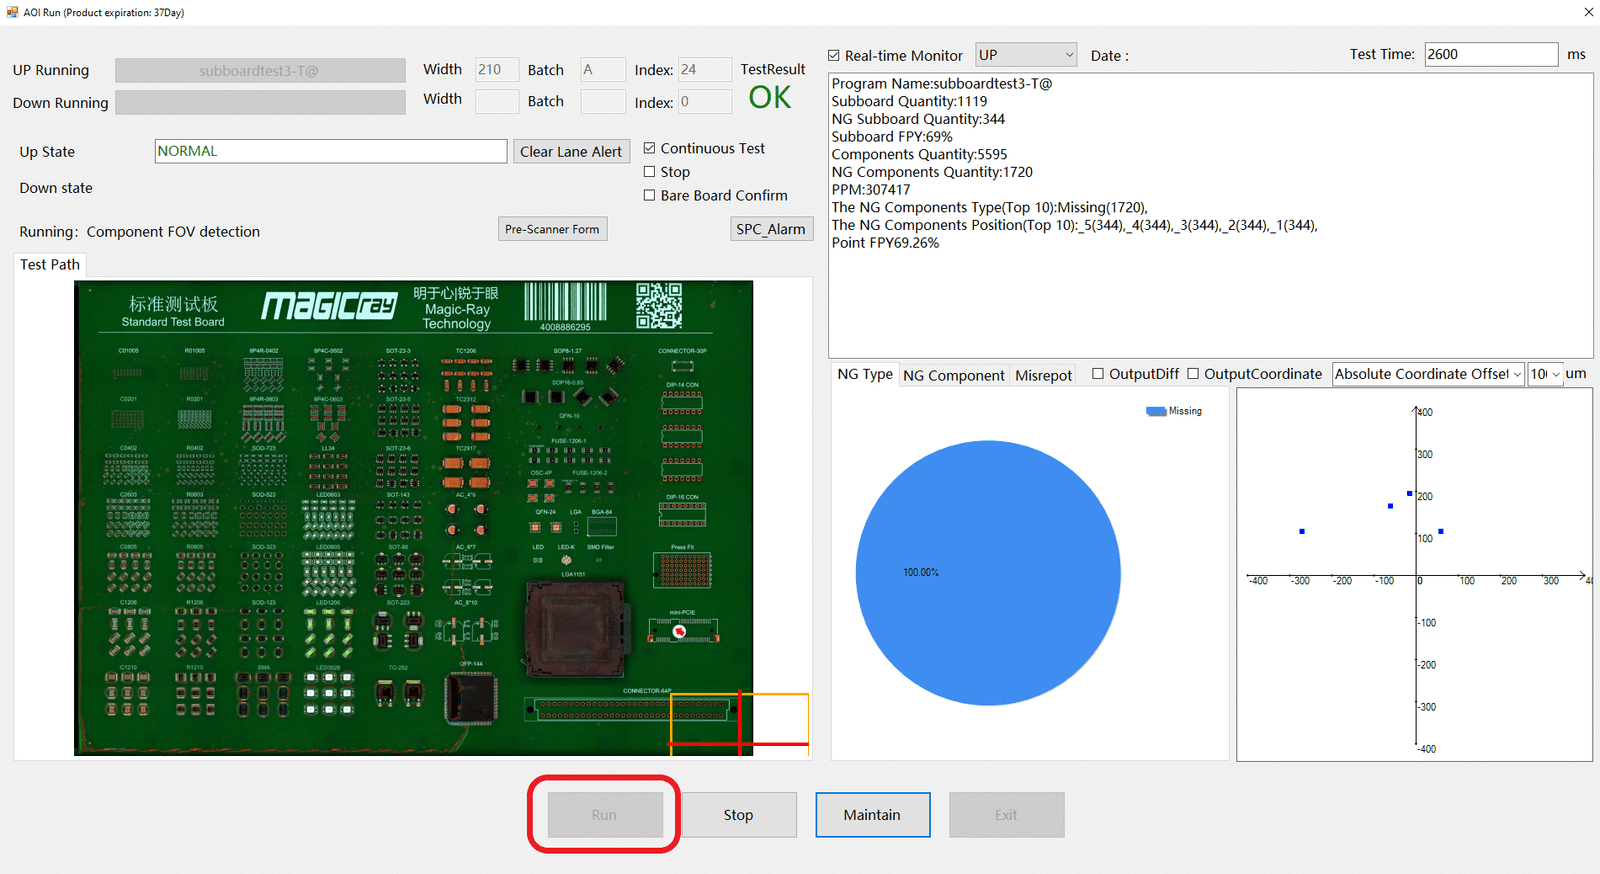
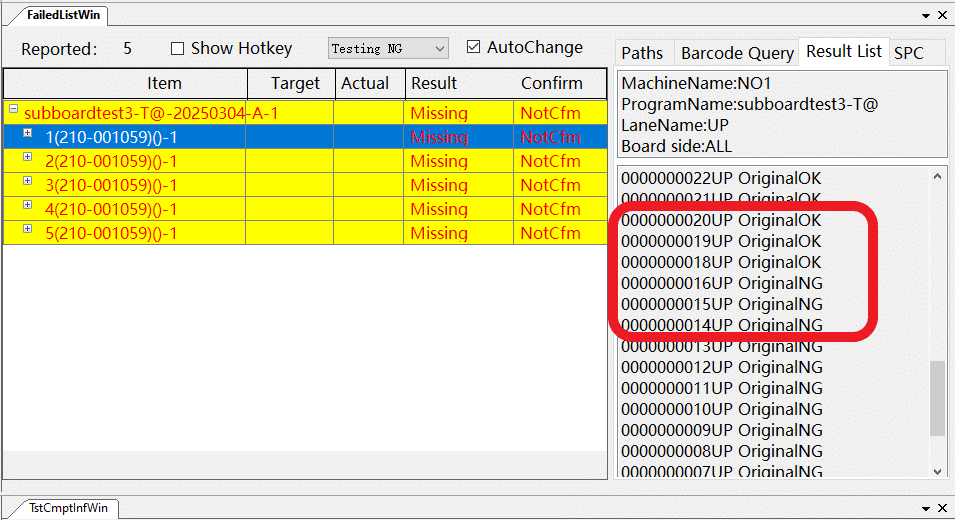
Here’s an example of the result changes after updating the program:
The Youtube link for the Tutorial of Offline Batch Debugging : https://www.youtube.com/watch?v=YqmZQMFNqD4


